Tuesday, December 22, 2020

Candy Cane Pagodas

 There's a touch (OK, more than a touch) of Chinoiserie in our holiday decor.

That's why when I saw Lydia Menzies post a 15 second reel on her IG about making little pagodas from mini candy canes I had to try it myself!!

This is not my idea - all Lydia's - but I tweaked it just a little. 

They are so cute. And quick and easy! 

I stayyyyyed up waaaaayy too late making these so I took a few step by step pictures in case you want to make some! 

You need mini candy canes. I decided I was going to skip the "frosting as glue" part of this and hot glue mine together. We aren't going to eat them so this makes them sturdier than frosting. And quick to put together. I used parchment paper to work on.

Cut the little candy canes out of the cello wrappers, and unlike real life building, start with the roof. I just used a dab of hot glue to create an upside down V with the curly part of the candy cane facing out. Don't worry about the hot glue blob - I'll show you how to fix that in a few steps.


Next up - the side walls. Glue two canes with the curve facing out as shown above.


Now you need 2 straight pieces to go across the roof line and the base. I found out that I could use a pair of kitchen scissors kind of like tile nippers to break the canes at the approximate length I needed. Put a dab of hot glue on each end and hold the sides in until the glue sets - just a few seconds really.


I wanted a door! I broke my cane so that the curved part formed a U and I glued that in as my door. So cute!

Next I added a short straight piece at the peak of the roof and in the center of the roof triangle. You could stop there if the glue doesn't bother you and depending on how you plan to use your candy cane pagodas.

OR...


I took some white glue and dripped it over the hot glue "joints" and on the ends of the upturned canes and over the doorway. Then I sprinkled some crushed peppermint cookie decorating sprinkles mixed with clear sugar crystals over the glue. This gave the pagodas a frosted, winter-y look and covered the hot glue blobs.


I left them to dry overnight. 
The hot glue makes them very sturdy but the white glue and sprinkles needed to dry completely.

The next morning I couldn't resist using them in the Holiday Mood board that was inspired by a contest on Instagram by @verryrobin_co!


These little pagodas will definitely be making an appearance on my Christmas dinner table! 

Saturday, December 19, 2020

Skirting the Issue!

 We've never had a Christmas Tree skirt before. We've never needed one because of where our tree spent the holidays. I've used galvanized buckets, a basket, a quilt, and a leopard fleece a couple of times to cover the base. But never an actual round legitimate tree skirt. 


But we rearranged our Family Room this Fall during the One Room Challenge. Our tree is in a more open spot and we can see the base of the tree.


 Aaaaaand we can't put our presents under the tree this year because.... Cooper!!


Do you see that paw juuuuust barely touching the present? And that look?? 

Mollie announced, after the tree was decorated, that we most definitely needed a tree skirt this year. Agreed. So off to the fabric store we went. We have a gem of a fabric store near us, Fabric and Fringe Warehouse, and I can almost always find what I'm looking for! 

We had only walked down 2 aisles when we saw THE fabric!! 


And they had huge rolls of  fringe trim in a clearance area for $3 for the entire roll - not per yard - the whole roll!! Wow. And one matched perfectly. We were in business!

Do you use a tree skirt? We love this one and now we wonder why we waited so long to be "tree skirt people!"


Friday, December 18, 2020

Christmas in the Kitchen

 The kitchen may be the "heart of the home" but it gets the "short end of the stick" when it comes to blogging (on my part anyway!) 

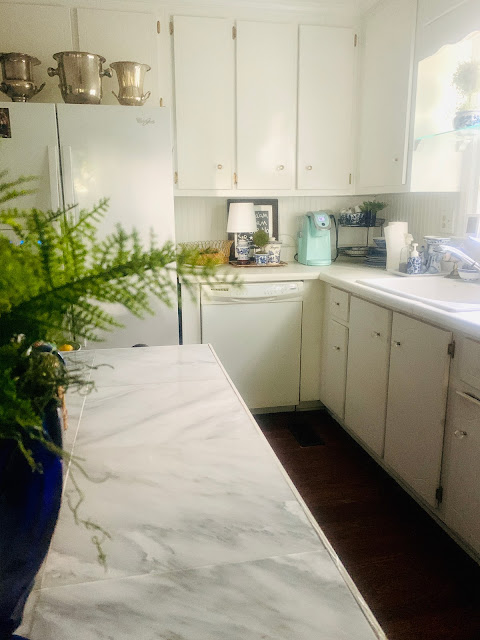
I haven't shared the kitchen very often - it just never seems to be clean enough and with all the "stuff" that accumulates put away. But it came close this week to being clean and uncluttered so I took a few pictures. This kitchen was actually one of my One Room Challenges that I just didn't quite finish for the longest time so I never posted a "reveal."

A little greenery, a few plaid bows and some twinkle lights go a long way in making the kitchen feel as cheerful as the rest of the house. 


Looking back the other direction to the eating area end of the kitchen. The kitchen is long and narrow and the eating area windows look into one side of the screened in porch.


This 100 drawer vintage hardware store cabinet is our spice rack. Each drawer is labeled and holds our large collection of cooking spices and herbs. It's on the wall opposite the cabinets above that are topped with blue and white pieces. The galvanized trash can holds Cooper's dog food. Big dogs require serious food storage solutions!


Hanging above the spice cabinet is a large, original watercolor of a Charleston scene 
that was inherited.

The blue and white Chinoiserie pieces and the silver champagne buckets are always in our kitchen. I just use seasonal plants, flowers or greenery to freshen the kitchen up each season. We cook every night (even pre-pandemic) and so I don't feel like I can add extra decor or accessories to the kitchen counters and table. 

There is one special touch that has been added just for Christmas.


 Mollie painted a Santa paint by number that we framed and propped at the end of the kitchen table. One of my favorite things to do each evening is to turn on the lamp above it and enjoy how it brightens up the kitchen at night.


"And to all a good night!"


Thursday, December 17, 2020

Risky Business!

 Sometimes you just have to take a risk, a leap of faith if you will, at Goodwill. 

Case in point- I found this champagne bucket at GW this week and it was completely black with tarnish. It was in good shape otherwise, without dings or scrapes. And it was $2.99. At that price I felt like I could be a "risk taker!" And it has been "slim picking" at GW for quite a while and I don't go often right now so it was exciting to find a little $3 treasure.

(The before...)

You never know... but a little silver polish and less than 20 minutes and I had a beautiful champagne bucket in perfect condition.


I have a small collection of champagne buckets (all thrifted for under $10) that I keep on top of my refrigerator. I love to use them when we entertain and they always make an appearance at our 'Get Merry with Mimosas" Ladies Brunch each December.

Here's a quick morning light pic from IG - you can see my little collection on the fridge.

We didn't have our ladies brunch this year and there isn't any entertaining in our near future so I put my pretty, new-to-me find to good use.

A little magnolia and cedar from the yard.


I'm a displaced Low Country gal so I added in some oyster shells.
I washed them well and then hot glued a bamboo skewer on the back. 


I had a short strand of tiny little battery operated lights so I added those in for a little extra sparkle!


So, $2.99 well spent!


Wednesday, December 16, 2020

Do You Do Waterlogue?

I'm not the most technically savvy gal out there but I do love the Waterlogue app! 


 (A favorite image from 2018!)

If you've never "played around with it" you are missing out on some fun. Just download it from the "app store" on your phone and start creating beautiful pictures.

Some photos from your phone library work better than others but figuring that out is part of the fun.

I often forget about it until Christmas rolls around. That's my favorite time to use the app.

And let's face it - there's time to enjoy it this year! It's a great distraction.

Just for fun I'm going to post a few of my favorite "waterlogue" pics along with the original photos I used.


This set up for afternoon treats was part of a fundraiser :)


All about my favorite new wreath and velvet ribbon here and here.


You can see a lot more of our Library decorated for Christmas on Instagram.


Isn't this fun? It's interesting to see which images 'turn out' better!


OK, I seriously need to get back to work and do a little cleaning around the house as well!! 
I'm sure you'll see more Waterlogue pics on my IG before the season is over!! 


Give it a try!