Friday, September 30, 2011

Eight is Great and a Little Urchin

I am going through my many tubs - more than 8 - that are filled with all the teaching aids and examples for when I hit the road " to teach teachers teaching" as College Girl says :)   That is why I have some seemingly randomly themed posts this week. It is a result of prepping for a little training event and a little organizing going on at the same time.
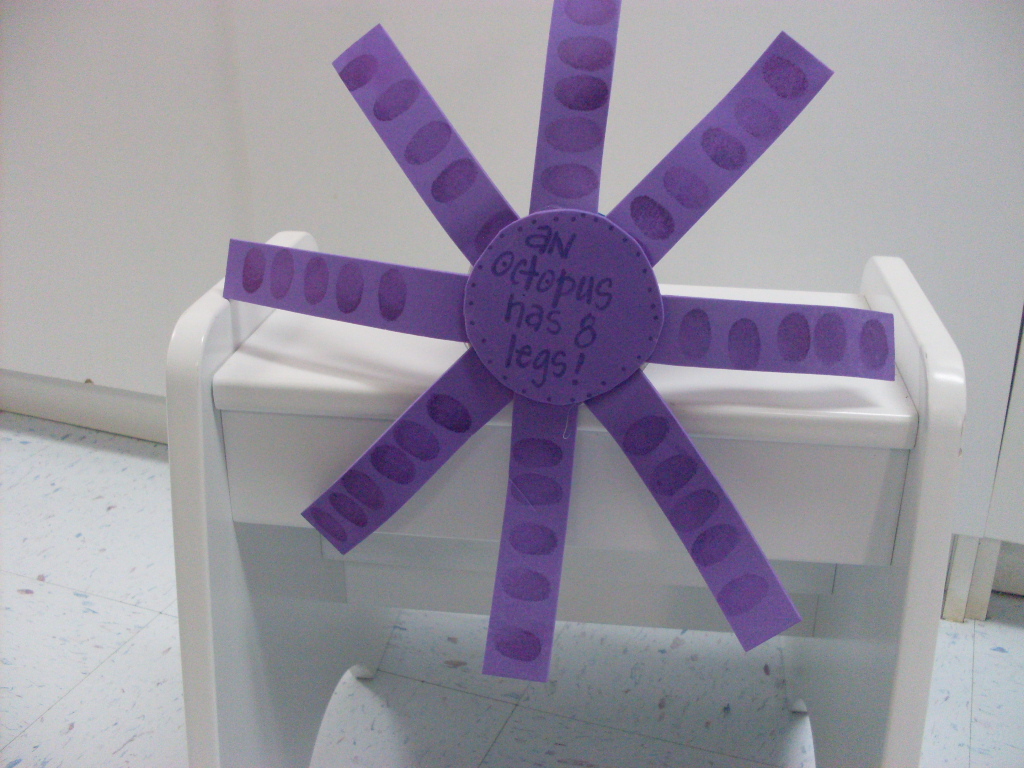
I did a post on Octopus ( O is for Octopus) a while back and mentioned that a paper plate budget version could be done very easily. I ran across my paper plate 8 legged sea creature sample! We just use odds and ends of colored paper plates and strips of fun foam to make our octopus. Bottle tops for eyes and a little torn fabric for the hanger. The legs could be numbered or if you used strips of paper you could print a fact about octopus on each tentacle.
  My advice- do not use those peel and stick notebook hole reinforcers to represent the "suction cups" on the tentacle. What a nightmare - too hard to peel for little fingers. Live and learn :)

 Here is another fun 8 legged guy! He's made from a paper cup and four long strips of fun foam. They are just glued on the bottom criss crossing! I cut a circle to glue over the bottom of the strips and wrote an octopus "fact" on it. Could be done with paper just as easily. I just like how substantial the foam tentacles are.
The "suction cups" on this one are made with fingerprints using an ink pad!!
Anything with little fingerprints on it is a parent pleaser!!
And one more octopus project. I really do like these guys. This project has been around forever but sometimes we forget about the oldies but goodies and this one uses cutting skills and costs nothing!
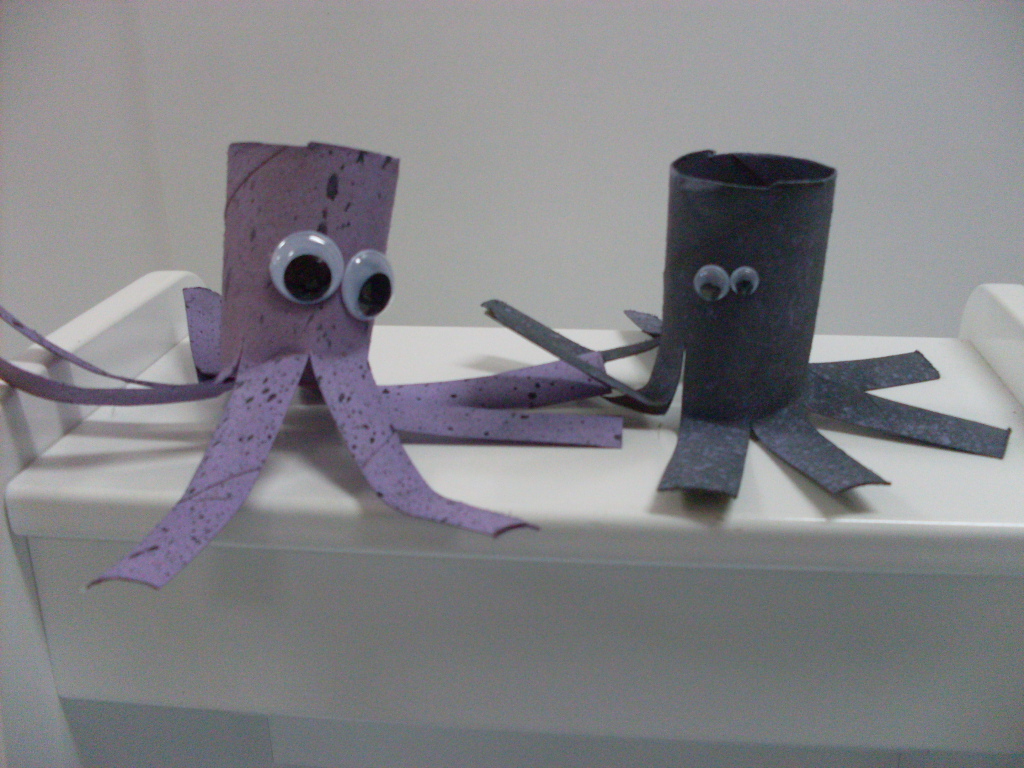
It's the old paper toilet tube octopus!! For little guys you can draw dotted lines but it's a great lesson in cutting and on 1/2's, 1/4's and 1/8's!! You just keep cutting in half until your octopus has 8 legs!! Paint him and add a couple of big wiggle eyes!
I'm enjoying digging through these boxes - especially the one with all the "ocean-y" stuff! I'm not ready to let go of Summer and beach weather!
... And here are my "sea urchins" for the water table :) Just use waterproof glue on the wiggle eyes!!
Are sea urchins cute or what??

Thursday, September 29, 2011

There She Blows or Cold Season or Jonah and the Whale???

I'm pulling a few things out for a quick little staff enrichment for some teachers I know. It's just quick  tidbits from some previous training sessions I have done. The goal is to get them excited, in a creative teaching mood and thinking outside the box- in this case, the Kleenex box!!
 
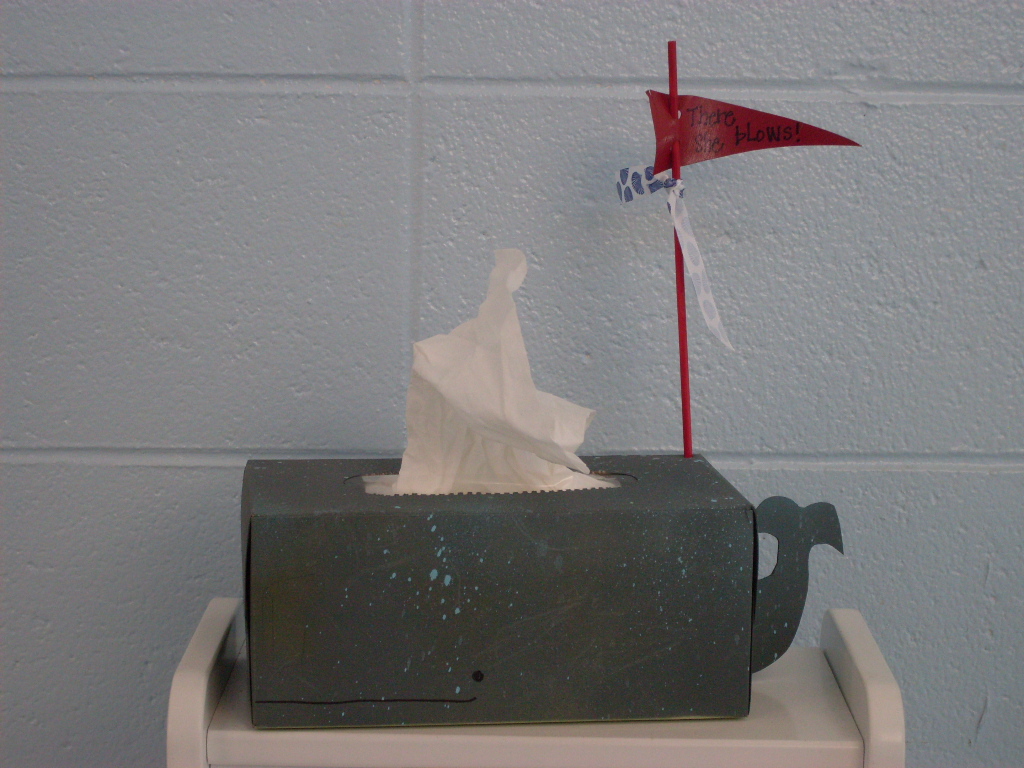
I'm mixing it up quite a bit- The whale is because they are doing "Jonah" in Chapel!! I saw a tissue box holder on the internet some time ago that was shaped like a whale but I thought, "why not the actual Kleenex box?" Maybe something fun would encourage more sniffles control?? I spraypainted my tissue box with gray primer, then spattered it with blue paint. I used the little cardboard oval that you tear out of the middle to open the Kleenex box as the tail. I just cut out a shape and hot glued it on. I drew a mouth and a dot for an eye and that was it... except I couldn't resist making a little nautical looking pennant that said- you guessed it- There she blows!!
After the Kleenex are gone you could use little paper doll "Jonah's" to play with the whale box. Just remove the banner so no one pokes the stick in their eye!! Each child could make a whale - filled the Kleenex are only a dollar but you could collect empty tissue boxes, create the whales and just put a single tissue in the box to represent the "blow."That's what our guide in Alaska called it- seriously- and it is moving something like 30 miles an hour!!!
For a Science project older students could write whale facts on strips of paper and place them in the box. The strips could be shaped like big drops of water and placed to look like the water spout or just tucked inside ( almost like the "report in a bag" format.)
There she blows!!

Wednesday, September 28, 2011

Night Owl...

...or the post title could be "Sleep Deprived"! I started making these last night and I couldn't stop. It was so much fun! College girl, who is a Chi O and loves the Sorority symbol like crazy, and I had seen a big burlap owl door decoration over the Summer. It was cute but it was almost $50.00 and that was a bit much for those of us paying for college. So after seeing a few on Pinterest ( love it and a whole post of it's own!!!) I decided to give one a try! I had some burlap on hand and plenty of paint so I just started painting on the burlap. I drew out the shape with chalk and off I went. The burlap really soaks up the paint! I made one for the Sorority House and a turquoise and yellow one to match College Girl's room. After the paint dried I outlined a little with paint pens. Then I stitched around the outside edge leaving about a 1/2 inch of burlap showing. I left a little opening at the bottom and lightly stuffed the owls with recycled plastic bags from Publix! Stitch up the opening, trim around the stitched edge, add a wire hanger and it is ready to hang around and be cute!! I sent College Girl a pic via phone and I already have orders from her sisters!!

I had some odd shaped scraps and since we know I am fixated on Candy Corn this time of year... something for my front door and one to donate to a silent auction at our church craft show next week.
My constant companion decided to check out the candy corn right as I snapped this picture!

They are fun, cute and easy but start before nine o'clock at night because you won't want to stop until it's hanging on the front door!!
 I'm definitely making some Christmas themed ones for gifts!!


** Linking up http://www.sweetlittlegals.com/ for a Turquoise lovin Party!!!. The Turquoise and yellow owl got an invite !Thanks, Sara

Photobucket

Tuesday, September 27, 2011

Do You Remember?

Here is another component from the Camping/Woods theme that the ABC wood slice blocks are from. This is a simple matching game that cost pennies to make.
It could be duplicated for any theme.
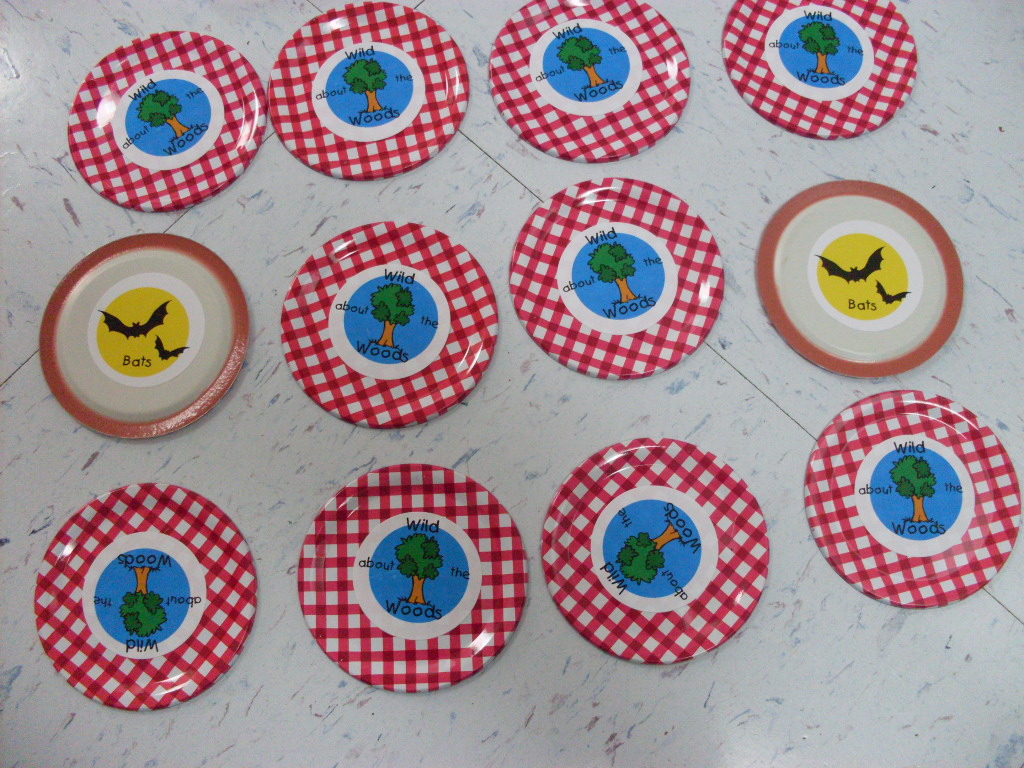
I printed out the name and graphics on cardstock. I repurposed an old plastic zippered bag that I had gotten a tablecloth or sheet in.  A zip loc baggie would work  or any free container that you can label and see into! Just clear tape the name on the front.
Then I simply printed small round labels with animals that you would find in the woods on a camping trip. ( I printed a whole sheet of each because I share them with teachers at the training events I speak at but you only need two of each animal!) I printed a whole sheet of the backing label  that has the name of the game on it. This helps you to quickly sort the games if you make multiples. I put the stickers on to canning jar lids because I liked the red and white checked design for this game but you can use paper circles that you laminate or bottle caps as well.
Then you lay them out with the animal pairs face down and start trying to match them up from memory. This can be used alone or as a game. You can create as many pairs as you think is age appropriate. Younger children will only need a few pairs to search out while older children can use more. This is a fun way to create games for every unit!
Do you remember the game "Husker Du"? It was from a Scandinavian Country and I used to play it with a little boy whom I babysat for every Sunday night. It was a matching game just like this and we loved playing it! This is my homemade version of Husker Du!

Friday, September 23, 2011

I know I shouldn't but...

...I love Candy Corn. I must buy a bag of candy corn mixed with those
little pumpkins every Fall.
I love them with a cup of Earl Grey tea when it gets chilly.
And I love candy corn projects.
 I have several that I do with the children but this is always a favorite. It's so easy, you can vary the size and any age can do it. You simply have the children paint three clay pots orange, yellow and white respectively. Then stack them up ( you can do a lesson on thirds, big to little or in my case, at church, I do a Trinity lesson with candy corn. I'm telling you I will do anything to justify eating this stuff !) Add a little glue between the pots and we coat ours with a little sparkle glaze for extra fun. I call this the Halloween Food Pyramid and we try to talk about healthy eating this time of year, too!! A very versatile project and a yummy snack, too!

** you can use any size pots you wish but this one is made with very small pots- the whole thing is about 4 inches tall ( minus the flag!)

Thursday, September 22, 2011

In the Jungle, the Mighty Jungle...

( now everyone is humming "the lion sleeps tonight")!!
But actually in the jungle, the mighty jungle, we are going bowling tonight !
What else would you do for recreation in the jungle?? Coconut Bowling, of course!!
 I have seen recycled 2 liter bottles filled with colored water, etc. for bowling games but in the jungle it would definitely be palm trees and coconuts!! I just glued some fun foam palm fronds and a trunk to the empty green 2 liter bottle. I added a brown bottle cap to look like a coconut and then I filled it with just enough sand to keep it sitting up and create a little bit of a challenge to the bowler( be sure to screw the bottle lid back on tightly!!)
 And since we are in the jungle all we have to use for a ball is... you guessed it , a coconut!!
After the bowling fun is over you can use the coconut for more learning fun and involving all the senses. Drill a hole and drain out the coconut milk. Then crack it open and pull out the flaky, white "meat". Everyone can taste the fresh coconut and maybe try grating it!! That will make you appreciate a bag of coconut from the grocery!!
I also make coconut play dough to go with the jungle theme. I use the Kool-Aid Clay from a previous post and leave out the Kool Aid and add a little bit of Coconut flavoring from the grocery store. It's inexpensive. The dough is a creamy color without the Kool Aid in it so it looks like coconut and smells like it, too.
The Jungle is fun!

Wednesday, September 21, 2011

CCBB!!

Seriously, how many times can you write Chicka Chicka Boom Boom??!
Here's my Chicka Tree- it's magnetic!!! So you can give the children a letter or two and as you read the story they can stick the letter on to the Chicka Tree at the appropriate time!!
That means great listening skills are needed!!
It's simply made from 3 of the large family size cans. I got the church kitchen to save them for me- you could ask in the school cafeteria as well. I used a little peice of masking tape to hold the stack together and then I wrapped them in woodgrain Contact Paper. You want the top can to have the opening at the top for two reasons... one is so that your silk fern can go in the top to make the palm fronds and...

You can store the magnetic letters in the top!! Yeah! You always know where they are!
I am hoping to find something a little cuter for the palm fronds or at least spray mine lime green or something more fun than the fake fern as is. It does take a beating, lifting it out and so on, so don't invest in an expensive silk fern. But even the way it is, it's a cute Chicka Tree!
 The Chicka Tree is a great way to start the year if you are teaching the alphabet or letter of the week and it works great with a Jungle themed unit, too.