Friday, May 28, 2021

Summer begins...

There is a well known quote by Charles Spurgeon: "Begin as you mean to go on, and go on as you began, and let the Lord be all in all to you." It is usually reserved for New Years greetings and for "big beginnings" but it popped into my mind when I was thinking about the start of Summer this year. 


School is out here and, to me, that signals the beginning of Summer. Some consider it to be Memorial Day weekend and some wait for the "official" Summer Solstice. However you calendar Summer is on everyone's mind. I am always a Summer girl - I love the heat, the beach, working in the garden. All things Summer. This year, and I think the reason that quote has been bopping around in my head, is that I've felt the usual excitement and retrospective as well. 

I want to begin this Summer as I mean to go on. I want to remember to celebrate the ordinary and to not forget the parts of last Summer that were important. It was an out of the ordinary Summer but there were good things about being home and not being "busy."


The pace of last Summer was more Summer-y than I can remember in years. It reminded me of the Summers I spent with my Charleston grandmother and endless days at the beach with cousins. Time had no meaning. I am not romanticizing the Summer of 2020 at all. It was hard, devastating for some, but there were small joys to be found and we gave them importance. I don't want to lose that by going back to busyness in our excitement to get back to "normal."  I also still feel, as many of you do, unsettled, unsure, concerned about so many things in our world but I'm going to go on as I began last year - I will keep the faith.


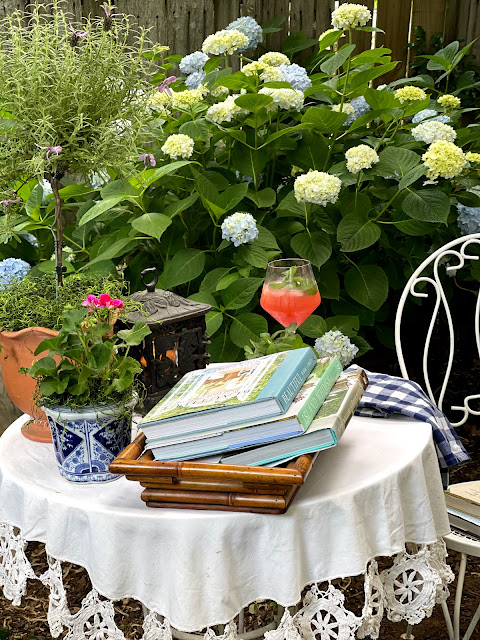
This is my public reminder to myself to start the summer with time well spent and to continue it through the Summer. To appreciate looking through design books surrounded by backyard blooms. To pour my grapefruit juice in a pretty glass and add a sprig of mint from the herb garden. To burn a candle. To use my great-great grandmothers tatted (and tattered) tablecloth to make the table look pretty even if it is just me (and James Farmer, Bunny Williams, Celerie Kemble and Mark Sikes! And lets not forget Mrs. Whaley!)


I mean to go on as I have begun - looking forward to the Summer and planning to find small joys and celebrate the ordinary.


What are your Summer plans?

SOURCES:

Plastic Wine Glass - World Market (highly recommend)

Beautiful by Mark D. Sikes

Celerie Kemble's new book, Island Whimsy

A House by the Sea by Bunny Williams

A Place to Call Home by James Farmer

Mrs Whaley and Her Charleston Garden which I reread every year. At least once.

Gingham cloth napkin/dishtowel - similar item

Dog statue - Wal Mart garden center this season

Vintage or thrifted items: tatted tablecloth, bamboo tray, scalloped terra cotta pot, blue and white flower pot and small pitcher, pagoda lantern

Variegated zonal geranium - Home Depot

Lavender topiary - Wal Mart

Sweet Mint -f rom my garden but I saw it at Lowe's this season

The iron garden table and chair were purchased over 20 years ago.

Thursday, May 27, 2021

One Room Challenge Week 4 - The Hall of Mirrors

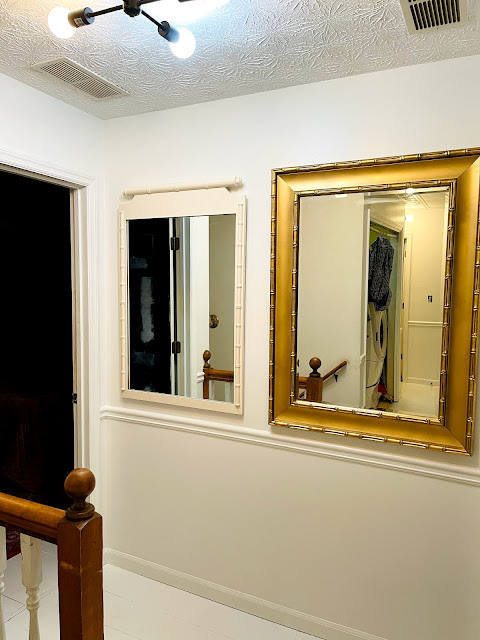
I hung another mirror.

(still reflecting a messy work zone!)

 I finished painting everything white (except the doors- more on that below!) I feel like I need applause! It doesn't seem like that much to paint but, whew!, it took a while to do it all, top to bottom!

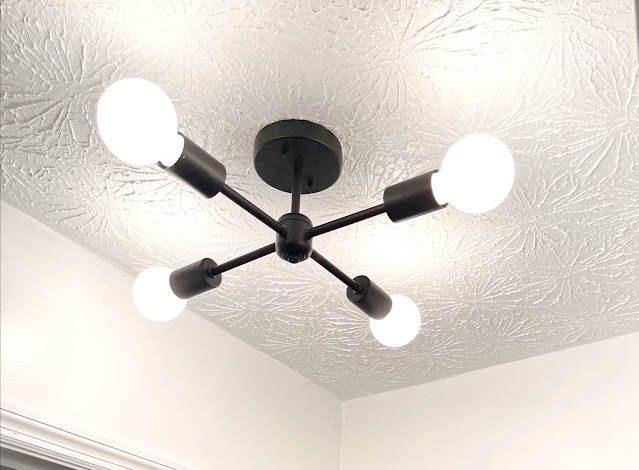
I wanted to change thing up a little when it came to my light fixtures. (The builder "boob" lights were still up there. I know.) I decided I wanted to go a little modern, bold, punchy and not expensive at all. This is an upstairs hallway. I want it to look nice but I was not willing to spend a lot for lighting. Then, I decided on black to make a statement in the sea of white. 

I searched Amazon, Lowe's and HD for affordable options. I ordered one style from Amazon and it had to go back. A poster child example of "you get what you pay for!"  But I hung in there and ordered another one that popped up when I started searching again. I had some space restrictions on size because of where the second light was located in relation to the drop down attic door.


This is the one I decided on and it looks good in the space. It is not the most quality light out there but it works for my vision and what I wanted to spend. And I'm definitely glad I went with a black fixture. It has some oomph in that all white space.

There isn't any natural light in the hallway so all of my pictures will be lights on. Sorry :(

I also ordered a Loloi Rug to place at the top of the stairs to hopefully catch some of the dirt and dust tracked upstairs to the white floors. I like Loloi because they are affiliated with GoodWeave and are socially responsible in their company policies. I may find I need to go with a runner down the hall later on but for now I'm going with this. I like the muted colorway with my curtain fabric.

(It was on sale for about $30! Great price for size and their quality)

Next up is deciding on curtain rods and mounting hardware. I have some rings, a couple of rod choices  and some assorted wall mounts that I purchased for pennies at a REstore a few years ago. It was a box full of designer window treatment paraphernalia and I have used it in multiple ORC's by now! I'm going to see if I can pull together what I need from what I have on hand! Then I will sew my curtain for the laundry "closet" opening. 


What's left to do:

1. Finish painting. Replace switch plate covers, etc. Any touch ups. 

2. Doors- I painted all of the upstairs doors black several years ago and now they are going back to white. This  is the story of my life: I tend to go from one extreme to the next when painting. Black to white and back to black. Then white again. It's never covering one soft color with another!! I should learn. Also, it doesn't help matters that there are 6 doors in this hallway!! OY!

3. Purchase correct light bulbs. One bulb in the box of 8 blew immediately. I bought a 2 bulb replacement pack and ended up with a "bluer" bulb. Rats.

4. Decide on curtain rod combo and hang. 

5. Sew curtain for laundry "closet" opening. 

6. Hang remaining mirrors.

7. Cut carpet at door openings and install carpet strips (until additional rooms are floored.)

8. Here's the biggie - figure out how to photograph an awkwardly shaped space that is full of mirrors.


Be sure to check out everyone else's progress here.

I have some "favorites" I'm following and I'm excited to see the updates each week.  What about you? Are you doing the ORC or just cheering everyone else on this round?? This is ORC #11 for me so I may just be cheering from the sidelines next time. I guess you can tell by the fact this is ORC 11 for me that I find Linda's challenge to be agreat motivator!

Thursday, May 20, 2021

One Room Challenge Week 3 - The Hall of Mirrors

Put a Pagoda On It or #putapagodaonit

Do you remember a few years back when the whole "put a bird on it" thing was an ongoing joke in the home decor/DIY/Pinterest world thanks to Portlandia?

Well, I think my underlying ORC theme might just be "Put a Pagoda On It" :)

Case in point:

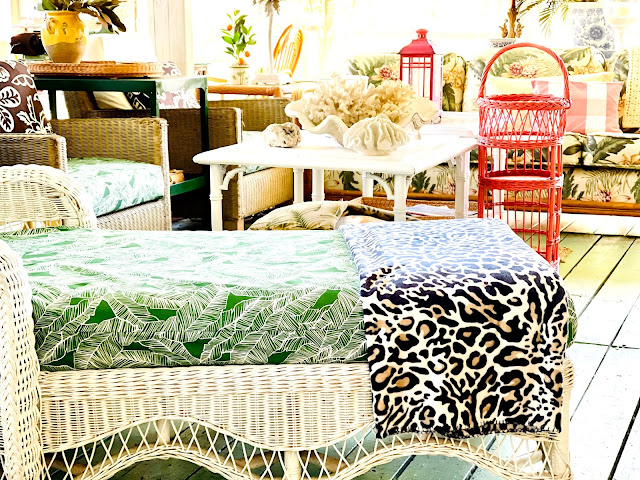
The pillows on my vintage wicker couch from the Fall 2020 ORC -

#putapagodaonit

The pillows from my Spring 2017 Guest Bedroom ORC - 

The desire to #putapagodaonit was so strong that 
when I couldn't find pink pagoda fabric I painted my own!

And the pillows from the Spring 2016 ORC (our Library) - 


              The entryway has had a few changes since it was an ORC  but still...  #putapagodaonit

Anyway, last week I shared that I found the fabric for the curtain that hides our laundry area. I could definitely refresh that area and make it better looking but the bottom line is that I'm never going to want it open to the hall. I want to be able to hide it from sight - even when it's just us. 

Plus I love the addition of the softness of a textile in this space. There is a lot of white, which I love, but it's still "hard" in appearance and the mirrors, which I love for the light they will bring to a windowless space, are "hard" as well.

This hallway is going to be very neutral so some texture is necessary. 

Anyway, I love this fabric and since my textile mantra seems to be "put a Pagoda on it" this one fits the bill.


It looks much darker in these pictures but it's actually a very soft greige - it isn't beige and it isn't gray. The background is off-white instead of bright white so that will be a warm note against the bright white walls.

#putapagodaonit

I still have to make curtain rod and curtain hardware decisions but that's for another day. Finding the fabric was the fun and exciting part.

Be sure to check out the progress on all the other ORC projects here.


Friday, May 14, 2021

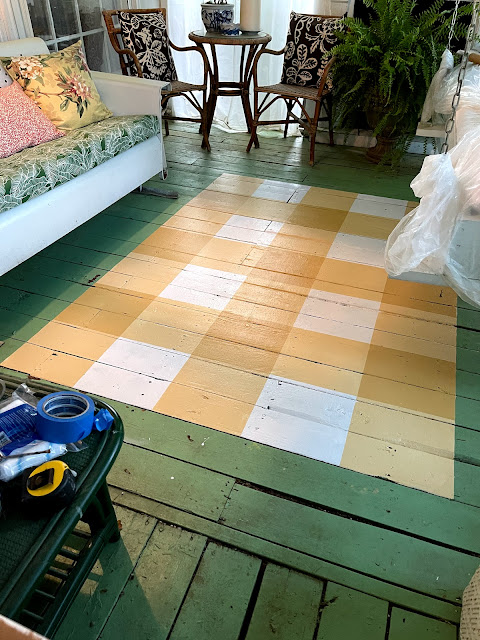
The Painted Rug from #thethriftedporch

 I'm sure there are a lot of tutorials out there on the web for painting floors so I'm going to quickly share how I went about mine and what I used just in case you are thinking about giving it a try.


I used the same materials and process to paint my Powder Room floor last Summer. 

Your floor needs to be clean and if it has a glossy surface I recommend lightly sanding.  I mopped my porch floor to get off the pollen and dirt tracked in.

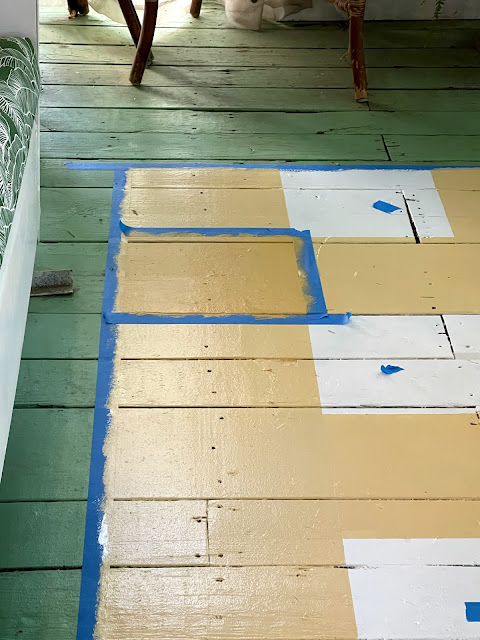
The first step is to tape off your rug shape or if it's the entire room just tape off your baseboards. Then you prime. I use oil based primer and I did two coats- possibly overkill but my Powder Room floor has shown no signs of wear and it's been 10 months of heavy traffic. 


I let my primer dry overnight, painted the entire "rug" area white, let that dry and then I taped off the stripes lengthwise. I always put a tape dot in my "no paint" spaces while I'm in progress. It keeps me from making a mistake. You may not need it!


This is definitely a project where you want to measure twice before painting!! But if you make a mistake you can just paint over it and go again!!


I use Sherwin Williams Exterior Super paint on my floors. I've had great luck with it. #notsponsored
Because I was doing the checked pattern I mixed the Anjou Pear at about 1/3 AP to 2/3 white to get my lighter tone. Depending on your color choice you might have to adjust this ratio to make it work. 


Two coats of my lightened stripe color lengthwise. I let that dry overnight before taping off the horizontal stripes and giving them two coats of the same lightened AP.


After they all dried I taped off a "test" square where the stripes overlapped. I painted two coats of the full strength Anjou Pear to be sure the contrast was correct. I didn't want to do all the squares and then be unhappy when the tape came off!!


I liked it! It looked like gingham or buffalo check.
So I taped off the rest of the squares and painted them full strength AP.

Now for a confession. The furniture placement in this section is not perfectly balanced and the smaller rug I had in here before was off center so I knew the "rug" placement was a bit tricky. I debated forever about where I started it in relationship to the opening to the rest of the deck and the glider, etc. I should have gone with my first instinct because I ended up adding another 'row' of checks to that front edge after pulling all the tape up!!

Before the added row:


More measuring and taping to add the extra row of checks.

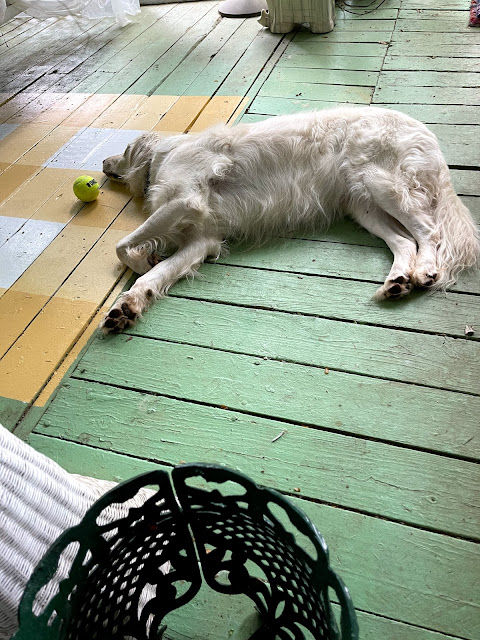
All of this taping and painting completely wore Cooper out!


 I think the proportion of the finished rug is better with the added row. I made the first outline 5 x 7 feet which is a traditional rug size. But that's the beauty of painting my own rug - I made it the size that "looks" right! 


It's a great, inexpensive way to brighten up a space! And it's just paint - if you want to change it then simply paint over it!


Thursday, May 13, 2021

One Room Challenge Week 2 - The Hall of Mirrors

 As with most of my previous ORC's this one involves a base of white paint. 


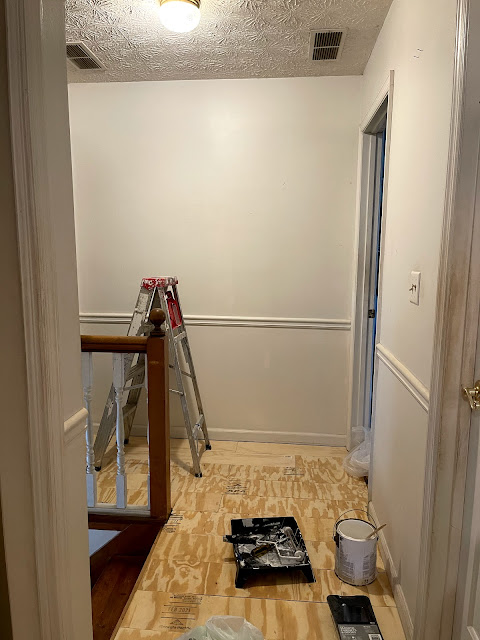
Before anything else can happen the entire space needed a coat of white paint - ceiling, walls, trim, floors. Everything gets white paint. It has been dingy  for so long I just wanted the space to be bright and white. The hallway doesn't have any natural light and it is also the connector space to 4 bedrooms, a bathroom and the laundry closet. All of this white makes it a very neutral territory. 

So this week I started painting all the things white.

(Still have to change out this riser board and fix this gap.)

And also because I have zero chill when I start a project I went ahead and hung this huge gold bamboo mirror that weighs a ton!

I've been dying for the first mirror to go up!


All it has to reflect is a messy work zone but it looks fabulous and I'm excited to have the first mirror up in the "Hall of Mirrors"!!


And in true thrift style fashion it wasn't always this gorgeous gold! 

It was a dark reddish tone and the finished was scratched. No worries. I knew my favorite gold spray paint would work its magic.


It was a quick an easy fix despite the fact that Cooper thinks all dropcloths are put down for his enjoyment!

I'm spending this week finishing painting walls and floors so the fun parts can begin.
And I found the fabric for the laundry area curtain!  
Stay tuned.


Be sure to check out what everyone else is working on this week. There are literally hundreds of amazing projects happening!

Wednesday, May 12, 2021

#thethriftedporch

 I had the fabulous opportunity to join 4 friends from Instagram for a fun, thrifting based, porch refresh this Spring. It was all about creativity over cash and you know I love that. 

And you know I love my porch so it was a win-win for me. 


Be sure to check out everyone else's fabulous porch refreshes:

@cjswank_newyork    @paigekontrafouris       @speakingofdiy        @cgumin

The "reveals" were on Instagram but I wanted to share a few more details about my porch and it's thrifted history.
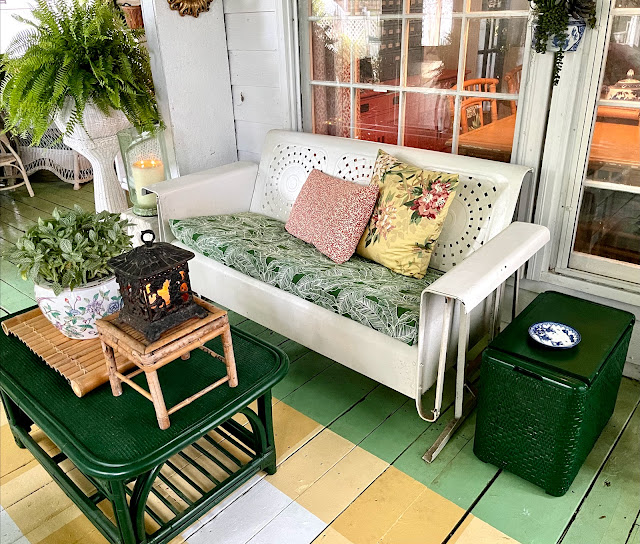
Our screened in porch is big but it didn't start that way. It began as a small, about 10 x 10, "builder deck" and we actually thrifted the rest! Not quite all of it but most of it. My husband called one day from a construction site and said they were moving the office trailer and it had two big decks on front at the doors. It was the exact materials our existing deck was made of and did I want him to bring them home and add on to the deck? Umm, yes! And the rest, as they say, is history. We just kept doing that and eventually the southern mosquitoes motivated us to screen it in as well. We have put a lot of hard work, sweat and a few tired muscles into creating this porch!
It has evolved through the years and didn't happen overnight. We added on with salvaged materials from building sites for years and almost everything on the porch - furniture, planters, accessories - has been thrifted over time as well. 
And when something wore out we went thrifting again to replace it!

Since we have thrifted a majority of the furnishings, there was no worrying about the huge amount of wear and tear that our porch has taken over the last 20+ years. We have hosted literally hundreds of people on our porch - 200 people in our porch and yard for Mollie's HS graduation, a band and a large group as a fundraiser for a school we were building in Haiti, entire HS track and XC teams and of course family and friends in much smaller numbers. Last year it was just us but it was a blessing to our family every day. And it is, by far, Cooper's favorite place to be. 


Here is a post to show you what our porch looked like last Summer after I finished repainting our floor. (It's a project for sure!)

 I made some changes early this Spring and then a few more for our #thethriftedporch refresh.

Again, our porch is large, but I urge you to thrift some comfy seating and create an outdoor space to enjoy. We use our porch so much and I'm thrilled when people say our porch has inspired them to create an outdoor space to enjoy. There's nothing like fresh air to make the day better.
So here is what #thethriftedporch looks like this Summer.


We had a limit of $200.00 for this refresh. I'm going to count the fabric I ordered right before this came about because it has been the biggest expense this year and has done a lot to pull the separate pieces of furniture together. 

(The new green outdoor fabric from Shopfabric.com. The big vintage couch in the background!)

Since I'm working with what I have and it's accumulated over time, there needed to be an element to make it all more cohesive. I ordered $80.00 worth of outdoor fabric in a deep green to recover quite a few cushions on the porch and to coordinate with our huuuuge vintage bamboo couch. The big couch is covered in a high quality laminated fabric and is in excellent condition. It's maybe not what I would choose but this couch is so tough and wet dog proof that I can't complain. (Let's face it if I won the lottery it would all be covered in white Sunbrella fabric!!)
 We actually saw this couch on an episode of Magnum P.I. - the original one! That's vintage!!


This green fabric also ties in with all of our painted wicker and bamboo. I use the darkest gloss green spray paint I can find to mimic my beloved Charleston Green.  


Other than moving some accessories around and covering the cushions the only major thing I did for this refresh was to paint a buffalo or gingham check rug between the glider and the swinging bed on the opposite side of the porch. 


I used the ochre paint from last Summer's One Room Challenge where I gave the Powder Room a refresh. It is Sherwin Williams Anjou Pear. It took a couple of hours and the blue painter's tape and paint I had on hand. 


 If you want to paint a floor - inside or out - I'll be posting my how to's on the blog tomorrow.
The porch was actually one of my One Room Challenges a few years ago. You can see how it has changed since then here.


I wintered over our big ferns in our "greenhouse/coldframe" experiment so I didn't even need to buy ferns this Spring!


And P.S. this isn't the first time this porch had a painted rug! 
Look at cute, little Mollie on our porch in 1996!


Also note the dark green wicker chaise, green porch floor, fountain on the porch and  a handpainted gingham rug! When I like something , I like it!!
This was before we screened in the porch and there are vintage milk glass compotes on the porch rail that I used as votive holders :)  This vintage thing is not a new gig for me!!

I made a few changes to our bar cart area too. First, I had to clean off a thick layer of pollen. 
Then I hung a large seascape that I found at Goodwill for $1.99 behind the cart.


It's always fun to gather up cocktail napkins, cute stir sticks, little pitchers of herbs, bowls of nuts or munchies and set up the bar cart. It doesn't have to be fancy or expensive. Most of these items were thrifted, including the camel lamp, the cute pineapple swizzle sticks came from the Dollar Store and the herbs came from the yard. Don't have a bar cart? I didn't either for years! You can still gather up all the pretty and creative drinks accessories and put them on a tray or a designated counter space. It just makes things seem a little more festive.


Whew! That was a long post!
Thank you for sticking with us all the way to the end!