Showing posts with label green craft. Show all posts

Monday, March 27, 2017

Back To My Roots...

This is not about genealogy.

It's about fabric. 
And paint.
Pigment. Dye. Whatever the choice may be.

I have a Bachelor of Visual Arts in Surface Design.
What I do in my daily job has zero to do with design.

(This is a peek at my "knock-off" project)

So, given the fact that my parents spent a fortune on my design degree 
(Thanks Mom and Dad!)
 and I'm not using it to earn a living I decided to go back to my roots.
And hand paint some fabric to use on a project.

I call this my #secretproject on IG.
I'll be able to share more soon but for now we will talk about jazzing up plain sheets or yardage for about $1.27. Yep, $1.27.


I used my jazzed up sheets as curtains and you'll find out why soon. 
I also used this process to perk up some pillowcases.

First, here is an idea of my inspiration textiles.

WINKS - desire to inspire - desiretoinspire.net:
via
 I am loving the hand painted/hand blocked  fabrics 
that are everywhere in decor these days.


Hand Printed Fabric Design | Dasara by Pintura Studio:


 Block print curtains. See More. Deep in the tree:
via

Here's what I did.
This is definitely a "do as I say not as I do" tutorial. ;)

I started late at night because that's how I roll 
and it makes taking "good blogger" photos harder. But this is what we have!


I draped my kitchen table in plastic dropcloths because it was really cold the 3 days I had to work on this so the big table on the porch was not an option.


I gathered up supplies.


My recycled palette - Chic Fil A Catering Nugget Tray, foam roller, and Sherwin Williams Acrylic Latex in the perfect blue.
I know all about textile medium and extender but I have lots and lots and lots of clothes with latex house paint on them and it doesn't wash out. So I feel good about skipping the textile medium on this project. And if they faded slightly it would only add to the handblocked look.
And it's 11:30 at night, so there's that. 
I compromise with myself very easily late at night.


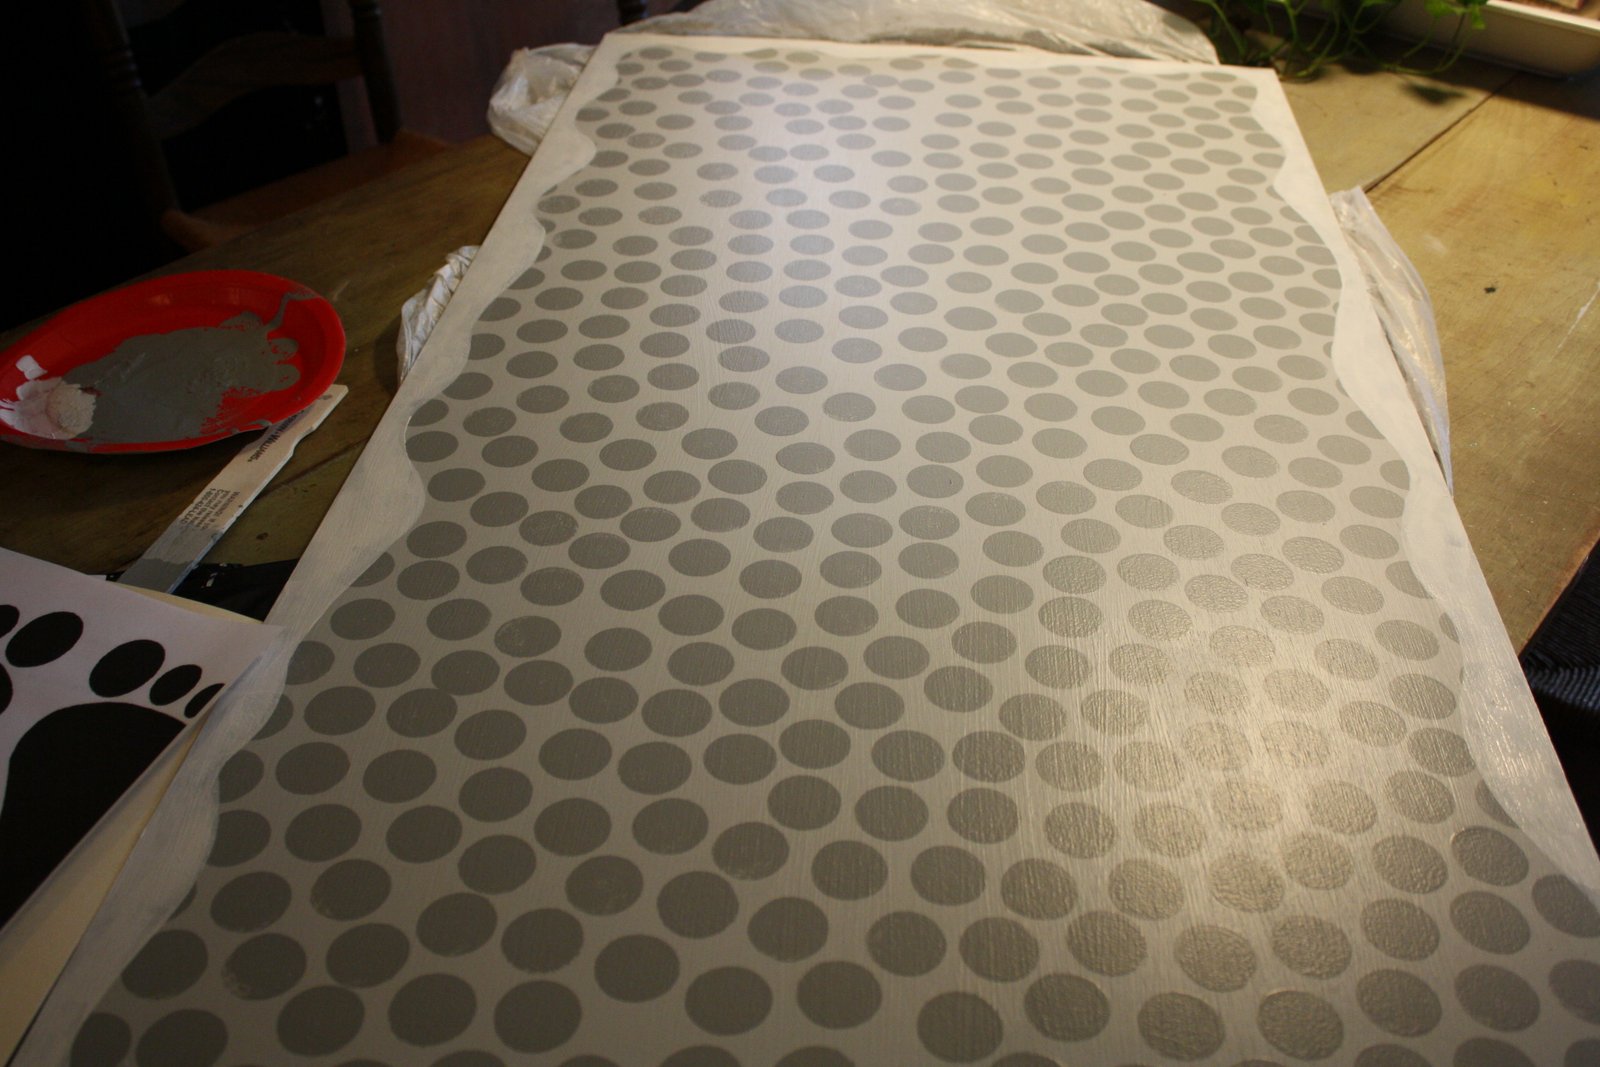
There's the $1.27 stamp. 
Roll a thin coat of paint on the stamp and start stamping.

Again, the sheets or yardage should have been pressed (or at least tumbled- yikes) but it did not matter for the "look" I was after so I lazily skipped that step.


I just eyed the repeat pattern and did not worry about the stamp image being "perfect" every time. I wanted a hand made, worn type of look. I wanted that Anthro vibe for these.


I just kept stamping, blow drying, shifting the sheet and stamping some more
 until all the sheets were finished.


And the next morning everything looked pretty good in the daylight!
Off they went to the #secretproject, ironed and crisp looking!
(There will be a full reveal!! Soon.)


 And then I pulled out my favorite Sherwin Williams green paint - Talipot Palm - and decided to go green on a couple of sheets and pillowcases
 for the #secretproject with another $1.27 foam stamp.


I love the green, too!
Grab a foam stamp and some leftover paint and give something solid a new look!
It's fun!

UPDATE: The latest issue of Country Living had this great feature on block printing!!
Check it out!


*I am not affiliated or compensated ( too bad!) by Country Living magazine. 
I just wanted to share.

UPDATE: Be sure to check out my most recent hand blockprinting project here.

Thursday, May 19, 2016

Hydrangea Love!


(taking a little break from all the ORC chatter!)
I love my hydrangea bushes.
A lot. Probably more than I should.


 I had to dig them up and put them in pots a few years ago because
 I really love my two big Goldens as well and they are not easy on gardens.

The hydrangeas outgrew those pots and this year my handy husband
 used pallet wood and a plastic bin to create some great big planters.


An aerial view: We decided to build around the plastic bin to help the wooden framework hold up better and to allow for legs on the bottom so that we could level the planters on sloping ground.
We looked at a lot of ideas on Pinterest and then just went for it.
 I'm sure there are some good DIY's to follow if you want to make some. 
We didn't take step-by-step pics because there is a ton of info out there already!


They are very simple and rustic. 
We knew they would be covered by the plants and 
we really didn't need anything too formal or fancy. 
I just needed a very economical way to get really big planters. 
The pallets were free and the tubs were less than $5.00 at Wal Mart.
 Seriously, nothing swanky going on here.


And look at how the bushes have taken off!! 
They are covered in blooms about to burst into color!!
I'm obsessed!!


The hydrangea behind the pond is in a huuuuge pot and is loaded with buds this year, too.


I add something to the dirt to convince my blooms to be blue but I have lavender and pink blooms this year anyway! I think it must be all the extra soil added to those huuuuge planter boxes. I'm just happy to have so many blooms - whatever the color!


And this hydrangea bush is Limelight and makes all the other bushes green with envy!

#summerinthesouth

Thursday, August 15, 2013

Feeling A Teensy Bit.....

... Famous!!
 
A few weeks ago I was contacted by the blogger who writes and manages All Free Kids Crafts. She wanted to know if she could feature some of my recycle crafts.
Of course, I said "Of Course!" 
Today I was scrolling through FB and there was a picture of my bottle cap rainbow project on her post!!
 
Amazing Cap Rainbow
 
She has a bazillion followers so it was exciting to see my project on her page!
 
And a few weeks ago I was contacted by the owner of the  Kipling House , which is the cutest little art studio/crafting cottage ever.
 
The Kipling House - Marietta, GA
 
See. Yellow front door love.
 They invited me to teach some classes for adults and we are starting off with an owl painting project and I ended up on their FB page yesterday, too.
 
This is pretty exciting for someone who usually just hangs out in paint spattered clothes!!
Check out both sites... they are fun!
 
So, "famous" being relative ... I was feeling a teensy bit famous
 in my little world today!
 
PS. I have been verrrry busy pulling together a few things for College Girl's new place so it can be finished before classes start in a few weeks.
 I've put some pics on mollie's mom FB page and Instagram.
I love Instagram. I check it more than FB. More pictures. Less opinions. Ha!


Thursday, February 28, 2013

My Scrap Bin and a Board....


turned in to this:
A 6 foot long ABC picture.

I can't even figure out how to photograph the whole thing!

It's longer than my work table in the studio!

I've been seeing all the cute ABC signs and walls on Pinterest and I love anything with the ABC's, typography, fonts, etc. I didn't have any reason to make one until.... I decided to make one to donate to a Silent Auction at Georgia Preschool Association's Training Event  this weekend at the Cobb Galleria! Yeah - an excuse to go for it.
( wow - time to clean in the studio! and yes - phone still smashed.
 It's upgrade month! I just need to make time to go!!!)

I figured out that if I wanted the squares to be about 3 inches, which is about as small as I felt I could go and it could still be big enough to do letters and images and not be too small to see, that I would need a board 6 feet long.
That's 24 squares 3 inches wide which works by combining XYZ.

Seemed reasonable and didn't even seem that crazy until I got the whole thing done
and it is one big ABC board!!!

Of course, the "O" is an owl!!
 
So, here are my ABC's


.... won't you say them, please, with me?
 And hopefully it goes home with someone (who likes loooonnnnng art)
and is a good fundraiser for GPA!!!

I kind of want to make another one. True story.

Update : it sold and is going home with a very happy school director!!

Linking Up:
mop it up mondaysThe 36th AVENUE- A creative DIY blog. Sharing tons of recipes, gift ideas, crafts, home décor and home improvement easy to follow tutorials. Come visit to make the ordinary EXTRAORDINARY on a budget! www.the36thavenue Follow on Pinterest pinterest.com/...#recipes #crafts #decor

Thursday, February 14, 2013

Life Is Like ...

... a pinball machine!
I know I'm supposed to say " a box of chocolates"
since it is Valentine's Day ( Happy Valentine's Day, BTW)

 But I'm all over the place so pinball machine is more on target.

I said in an earlier post that I had forgotten to take any more pictures of this sign I did take a few more after all. But still a fail because none of the finished product with its beaded wire hanger and ribbons galore. Oh well. It has already gone to cheer up a little friend who had surgery yesterday. We met at Starbucks on Saturday to "catch up." Since when do 10 year olds instigate Starbucks dates??


Anyway, I substituted a glittery heart for the "O" :)


I used a mix of pink and red glitter. It's awesome.


I'm working on a big painting right now. Kitchen table big. Lots of dots. Lots.


I showed you the other day how Chloe helps me blog. Well, Biscuit is the art dog.


Wherever I am painting his furry self is right there!
Still dealing with the cone! He destroyed the $40.00 cone so he is in the plastic kind now.
A big dog in a cone is a dangerous thing. He bumps in to everything and has tried to chew it off ... hence the bulldog clips on it.

... and pinging right along like a pinball... this wall mounted light was ostracized from College Girl's room when we purged and painted stripes. It was laying in the guest bedroom waiting for a new home or a trip to the attic or something... the shade was disgusting so I tossed it and then today cleaning up the guest bedroom I had a thought....


It would work great to replace a tall table lamp that was on my work table in the studio with the wall lamp! So I hung it right next to the wonderful chippy shelf, that we rescued a zillion years ago from a demo on a construction site, which holds my ribbon tubs.


Note to self. Roll ribbon. Soon.
... and I tossed the shade and I want to hang it now. I made the lamp shade on the other table lamp from a small fair trade  basket woven from recycled plastic bags. I wanted an unique shade that didn't block light so I turned it upside down and put a crystal clear bulb in the lamp. I love it and it has little specks of every color in it. Matches my Sharpies on the shelf behind it.


I might need to talk to someone about the Sharpie obsession. Really.


I love it and I wanted something unique acroos the room on the new wall lamp and I wanted to do it now. So I looked around and this wire mesh hanging veggie basket thing was in plain sight.
Waiting to be a lampshade.


I took pliers and pulled the 3 baskets and chains apart and grabbed the middle one.

I painted the brass wire lamp shade part white with spray paint.


I let it dry. Almost.
 

And then I put it all together. I love it. The feel of a shade but nothing to block the light.
It's funky. Free. And it's all finished in 5 minutes! 
 
I think I need a clear bulb here too but I still love it.