Showing posts with label DIY. Show all posts

Thursday, September 22, 2022

Chinoiserie Tree for Fall

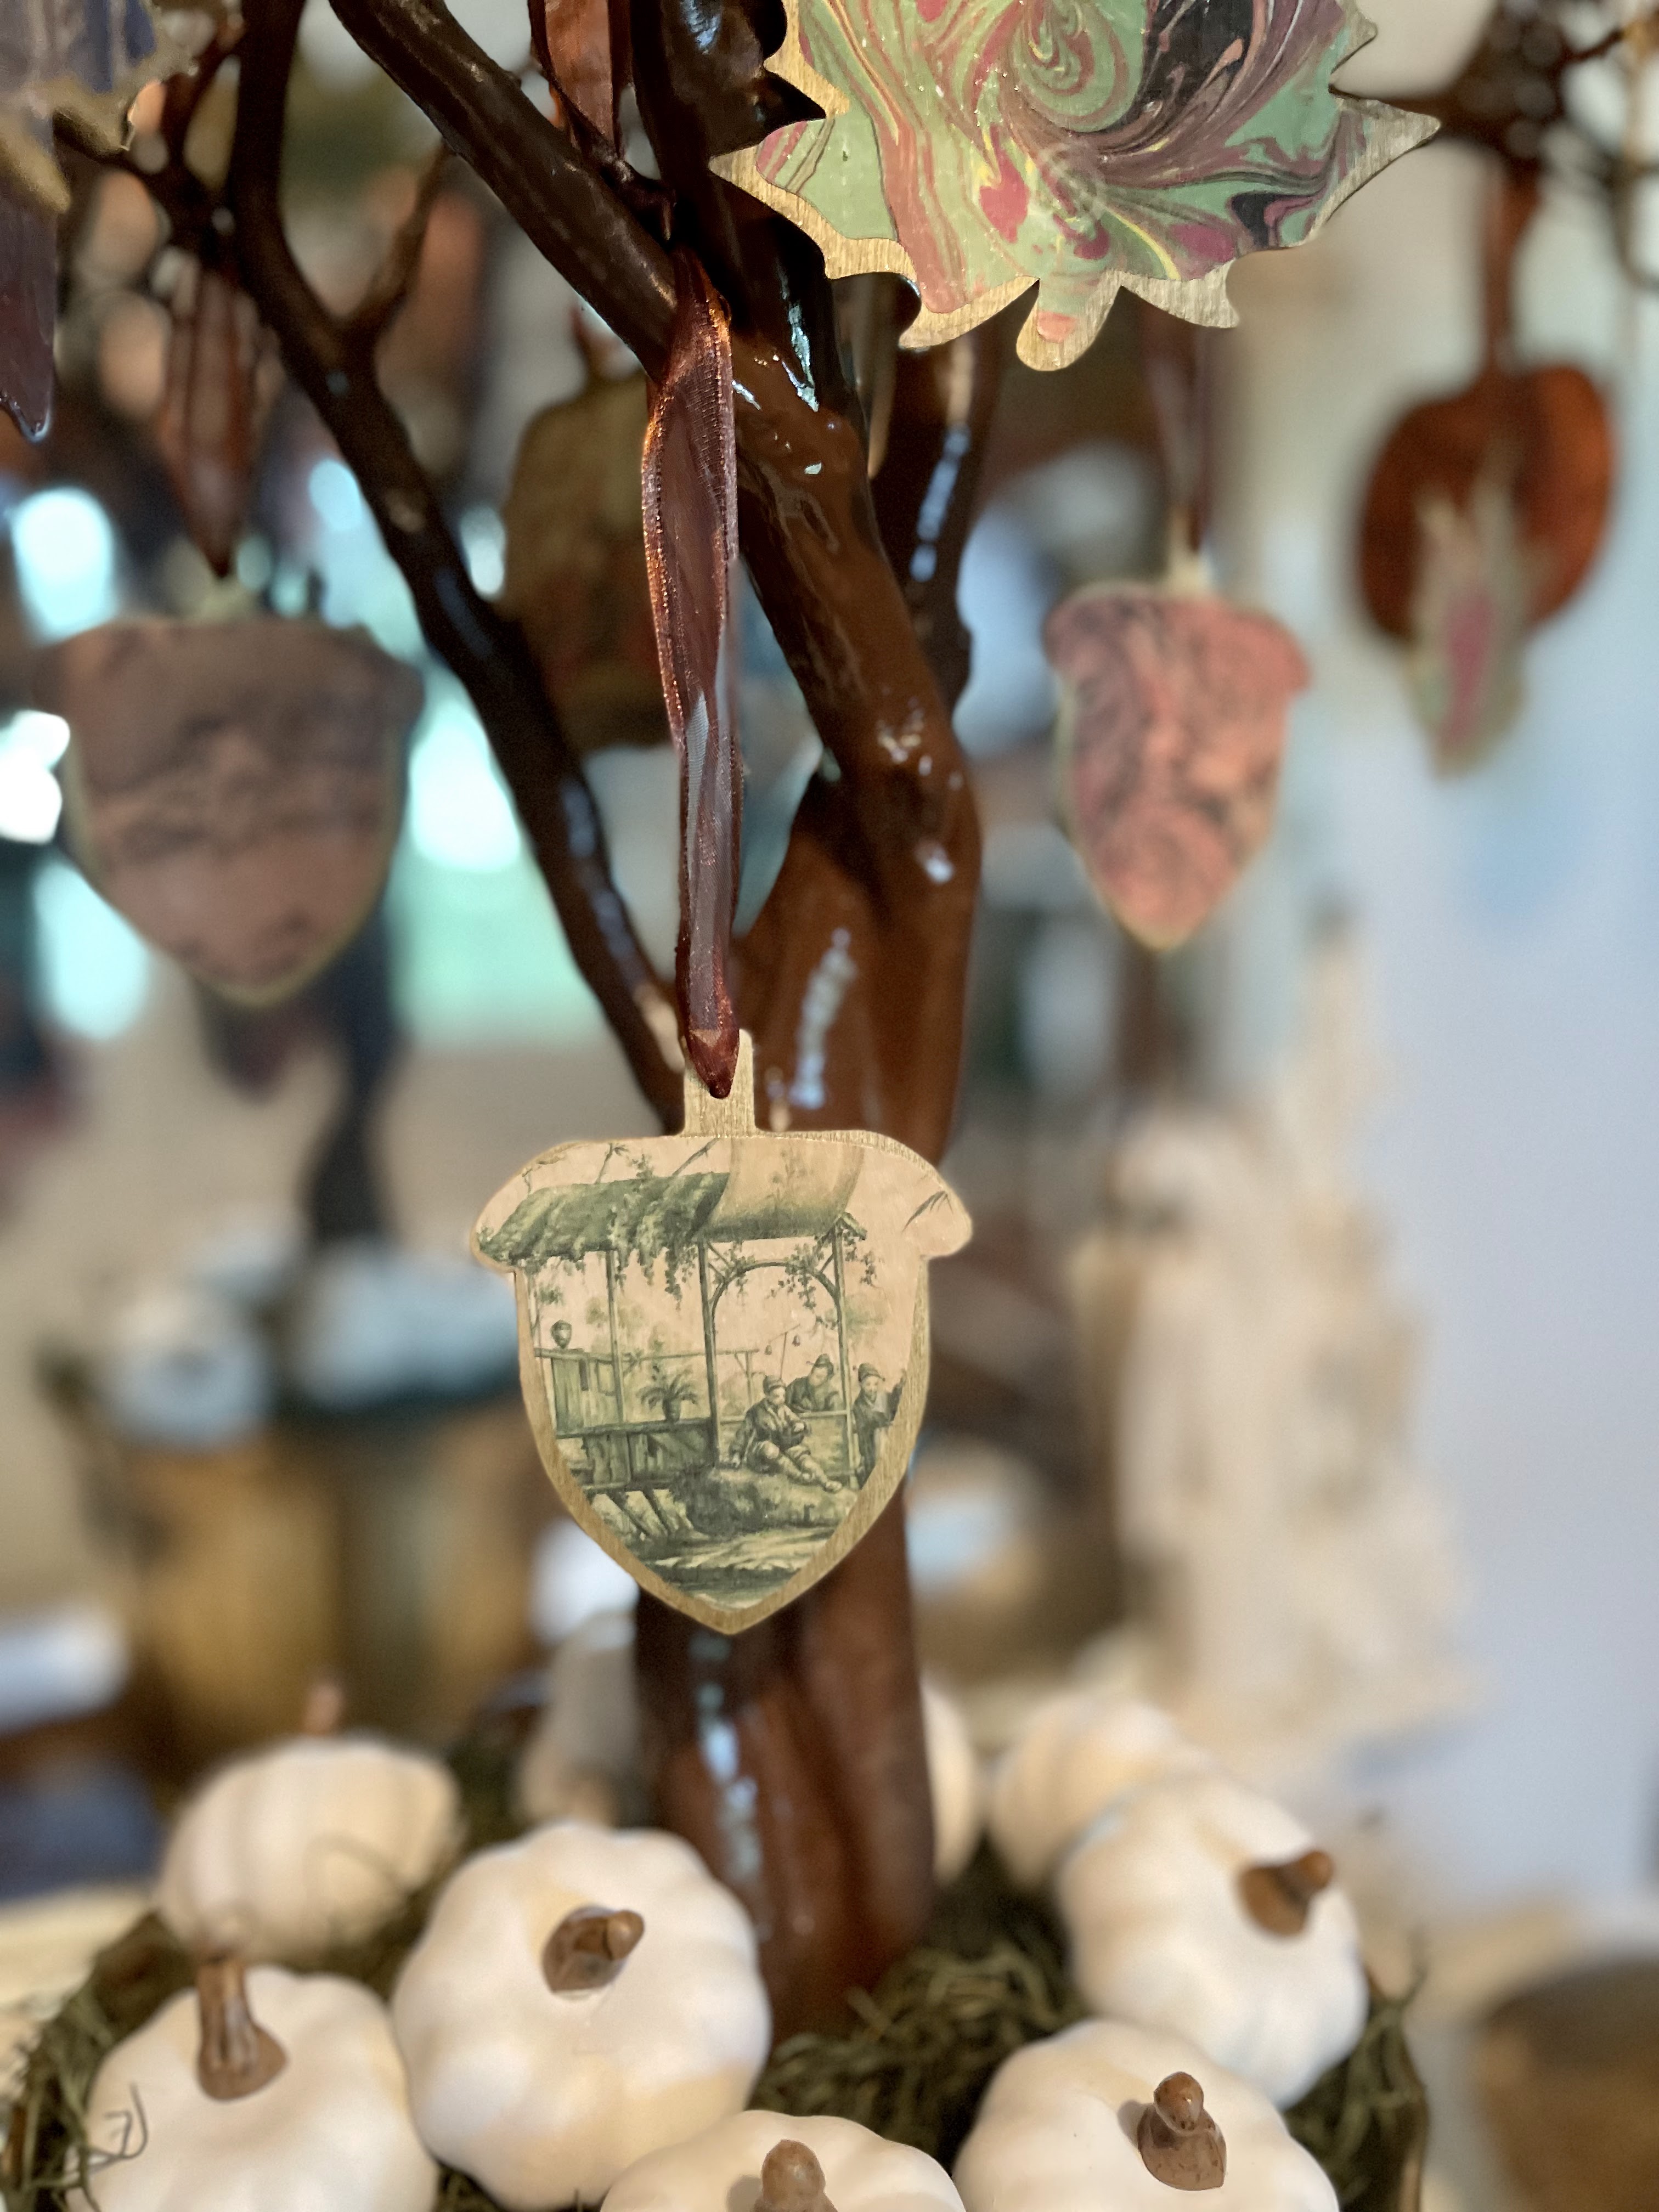
You may not remember my decoupage Christmas ornaments but they inspired the chinoiserie Easter tree which in turn has motivated me to create this fall version!

I'm not a big Halloween decorator - I'm more of a seasonal decorator using a lot of natural elements (I'm crazy for heirloom and mini pumpkins) more than themed items. That being said, I do have a collection of terra cotta pumpkins that I love to use all month long in October. (You'll be seeing those soon.)

But back to the chinoiserie fall tree. This is the easiest of projects and a lot of fun because you can get really creative with the papers and ribbons you choose. I wanted ornaments that mixed well with my "look" so chinoiserie it is! Making decoupage ornaments is so easy and fun that I decided to grab some fall shapes and see what I could come up. Be sure to watch this reel on Instagram to see more details. 

I used a couple of real branches for my Easter tree but I found this great faux branch tree at Goodwill a few months ago and I thought it would be perfect for my decoupage ornaments. For the fall tree I decided to paint it brown.

This is the same way that I made my chinoiserie and Audubon ornaments at Christmas time and the Easter Tree shapes as well.

Gather your supplies:

Flat wooden shapes from craft stores, Wal Mart or dollar stores. I found wooden shapes in pumpkins, leaves and acorns that are perfect for this project. Mine came for Dollar Tree and Amazon. 

Mod Podge (here's a funny about Mod Podge!)

A foam brush to apply Mod Podge. 

Gold spray paint (this is my favorite)

Sharp paper scissors (I use these  to be able to cute very crisp, detailed shapes. I've had my pair for years. Still sharp!)

Papers to decoupage onto your shapes. I used marbleized papers for the some of the shapes and chinoiserie papers for others. I like the mix. Marbleized papers can be found online and in the scrapbooking section of craft stores. The chinoiserie images were printed on copy paper. You can find copyright free images on museum websites. Just google it - "copyright free museum images" and the museum sites will pop up. Then just search the imagery you want- chinoiserie, florals, birds. It's easily available but it just takes a little bit of time. Print the images out and cut out your shapes. I cut my shapes slightly smaller than my wooden shape so that there is a border of gold around the edge.


Then follow the Mod Podge instructions to adhere your papers to your wooden shapes. After they are dry you can add ribbon to hang them on your tree. I put decorative papers on both sides because they can be seen from both sides on my tree. These also make great package toppers/name tags for gifts. If you are mailing packages they are pretty enough that you don't need a bow (which would be flattened anyway!)


The chinoiserie fall tree is a fun addition to our entryway. I used a lot of ornaments - I like it to be full. I plan to change the faux white pumpkins out with some colorful gourds and mini pumpkins in October but it's too warm/early where I live to get them. This chinoiserie fall tree can take us all the way through Thanksgiving decor wise. 

Be sure to let me know if you make one! Happy Fall.


Sunday, April 3, 2022

Chinoiserie Easter Tree

This is the easiest of projects and a lot of fun because you can get really creative with the papers and ribbons you choose. I wanted some Easter decor that mixed well with my "look" so chinoiserie it is!

This is the same way that I made my chinoiserie and Audubon bird ornaments at Christmas time.

Gather your supplies:

Flat wooden shapes from craft stores, Wal mart or dollar stores. There are even some on Amazon! I used eggs and carrot shapes.

Mod Podge (here's a funny about Mod Podge!)

A foam brush to apply Mod Podge. I used Matte.

Gold spray paint (this is my favorite)

Sharp paper scissors

Papers to decoupage onto your shapes. I used marbleized papers for the carrot shapes. Marbleized papers can be found online and in the scrapbooking section of craft stores. The chinoiserie images were printed on copy paper. You can find copyright free images on museum websites. Just google it - "copyright free museum images" and the museum sites will pop up. Then just search the imagery you want- chinoiserie, florals, birds. It's all available but it takes a little bit of time is all. Print the images out and cut out your shapes. I cut my shapes slightly smaller than my wooden shape so that there is a border of gold around the edge. 


Paint both sides of your wooden shapes gold.


Cut your papers into the shapes you need. I make a paper template that is slightly smaller than my wooden shape so that there is a gold border around the edge. Trace the template on your paper and cut with sharp paper scissors.


Choosing the papers and images is the most fun.

Then simply use the Mod Podge to adhere your images. Paint the entire shape with Mod Podge. Press your image down smoothly and then immediately top coat with Mod Podge working from the middle out to get rid of air bubbles. If you get a small one you can smooth it with your brush. If it is stubborn just leave it alone - they tend to flatten out as they dry if they are small. 


I put decorative papers on both sides of my ornament shapes. They tend to turn when hanging and I place my Easter tree in front of a mirror so it looks like there are twice as many ornaments on there! Add ribbon to hang them with.

That's all there is to it. I put some branches that fell in last weeks storm in a mason jar so that they would stand up straight in my pot. You can add some pebbles to weight it down. I put plaster of paris in my jar and stuck the branches in there. I like the wild and whimsical look of the long branches. I put the jar of branches in a vintage brass planter and added green dyed spanish moss around it.

There is a reel on my Instagram showing the steps and supplies I used as well. 


I hope you make some! It was a fun, easy and creative project and I love the results.  I think they turned out "eggs- trordinary" and the carrots are 'marble-ous"  ;) 


Thursday, August 5, 2021

Lamp Magic

 Lamp Magic - not Magic Lamps (like the kind with a Genie inside!) Lamps can add such an important touch to a room but they can be pricey. There are so many choices and styles plus add in decorative or colored lamp shades and the possibilities (and decisions) can be endless.  

But just like every other item in my home, I like to see if I can find an affordable and, hopefully, thrifted choice*. But sometimes those lamps just need help. 

Never underestimate the power of glossy white paint when it comes to lamp dilemmas. These are just a couple of examples of "lamp rescues" that I've done. 


This rather regal looking camel lamp is one of my favorite white paint "transformations."
Here is his before. Brown lamps with gold brushed accents just don't work for my style so I paint my lamps - if the before is more your style, please don't be offended!! 


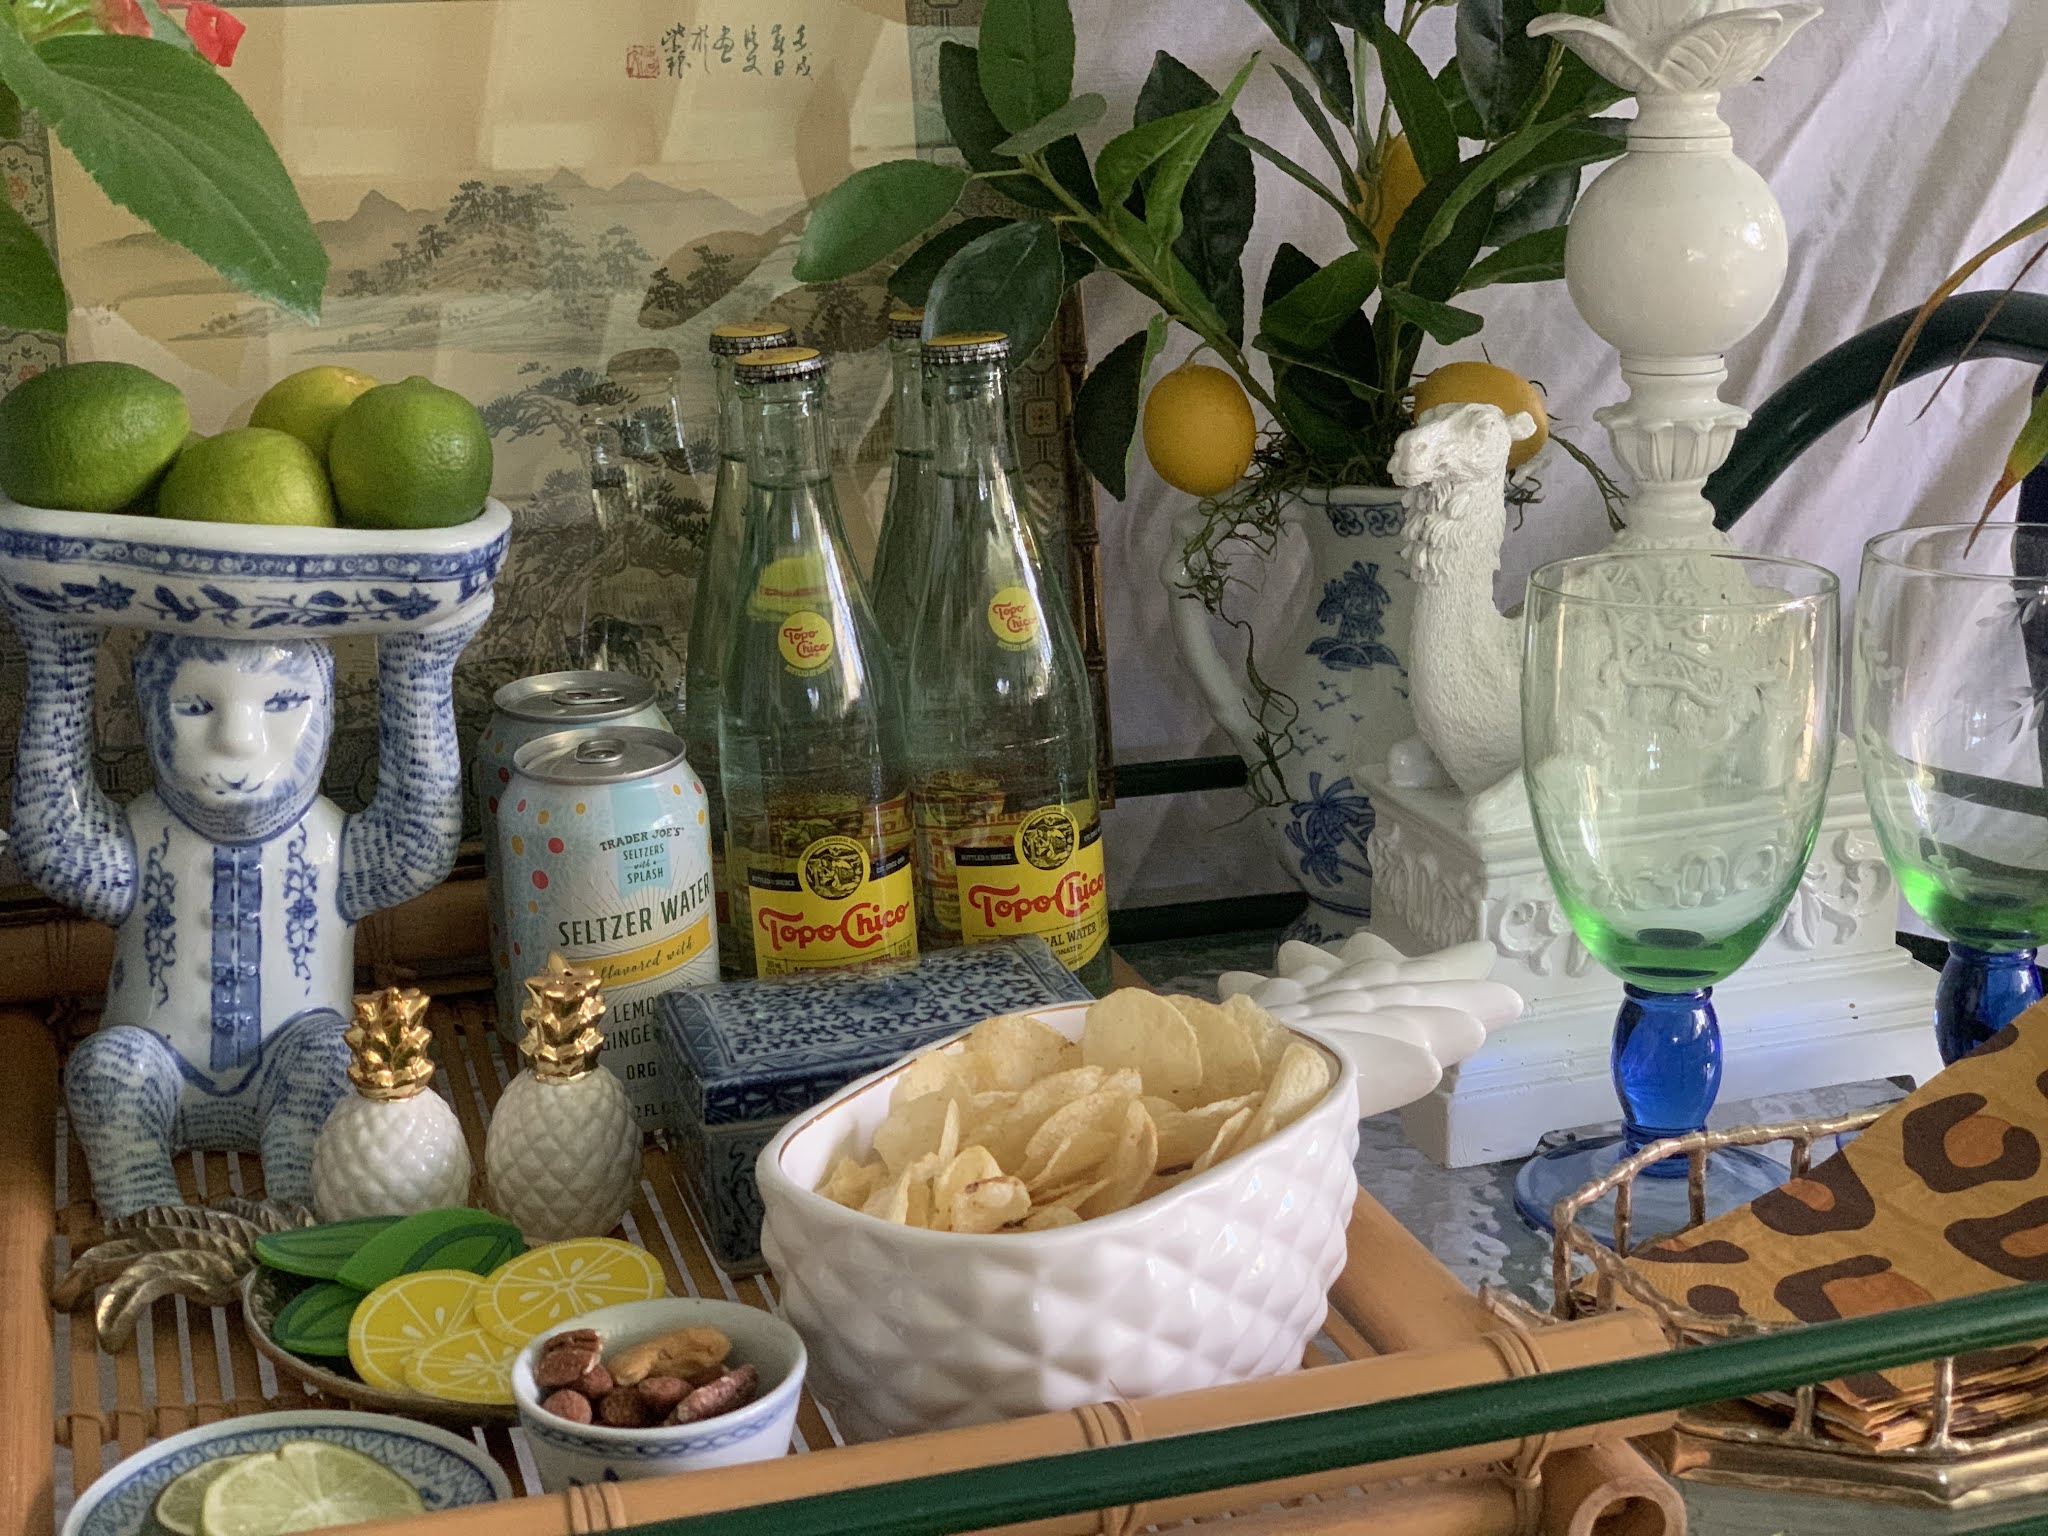
He happily lives on my screened porch bar cart - I just taped off the parts that shouldn't get paint on or in them and spray painted using my favorite spray paint. I know there are environmental issues with spray paints as well but a little spray painting keeps this lamp and all of it's electrical parts out of a landfill so I still consider it a plus. 


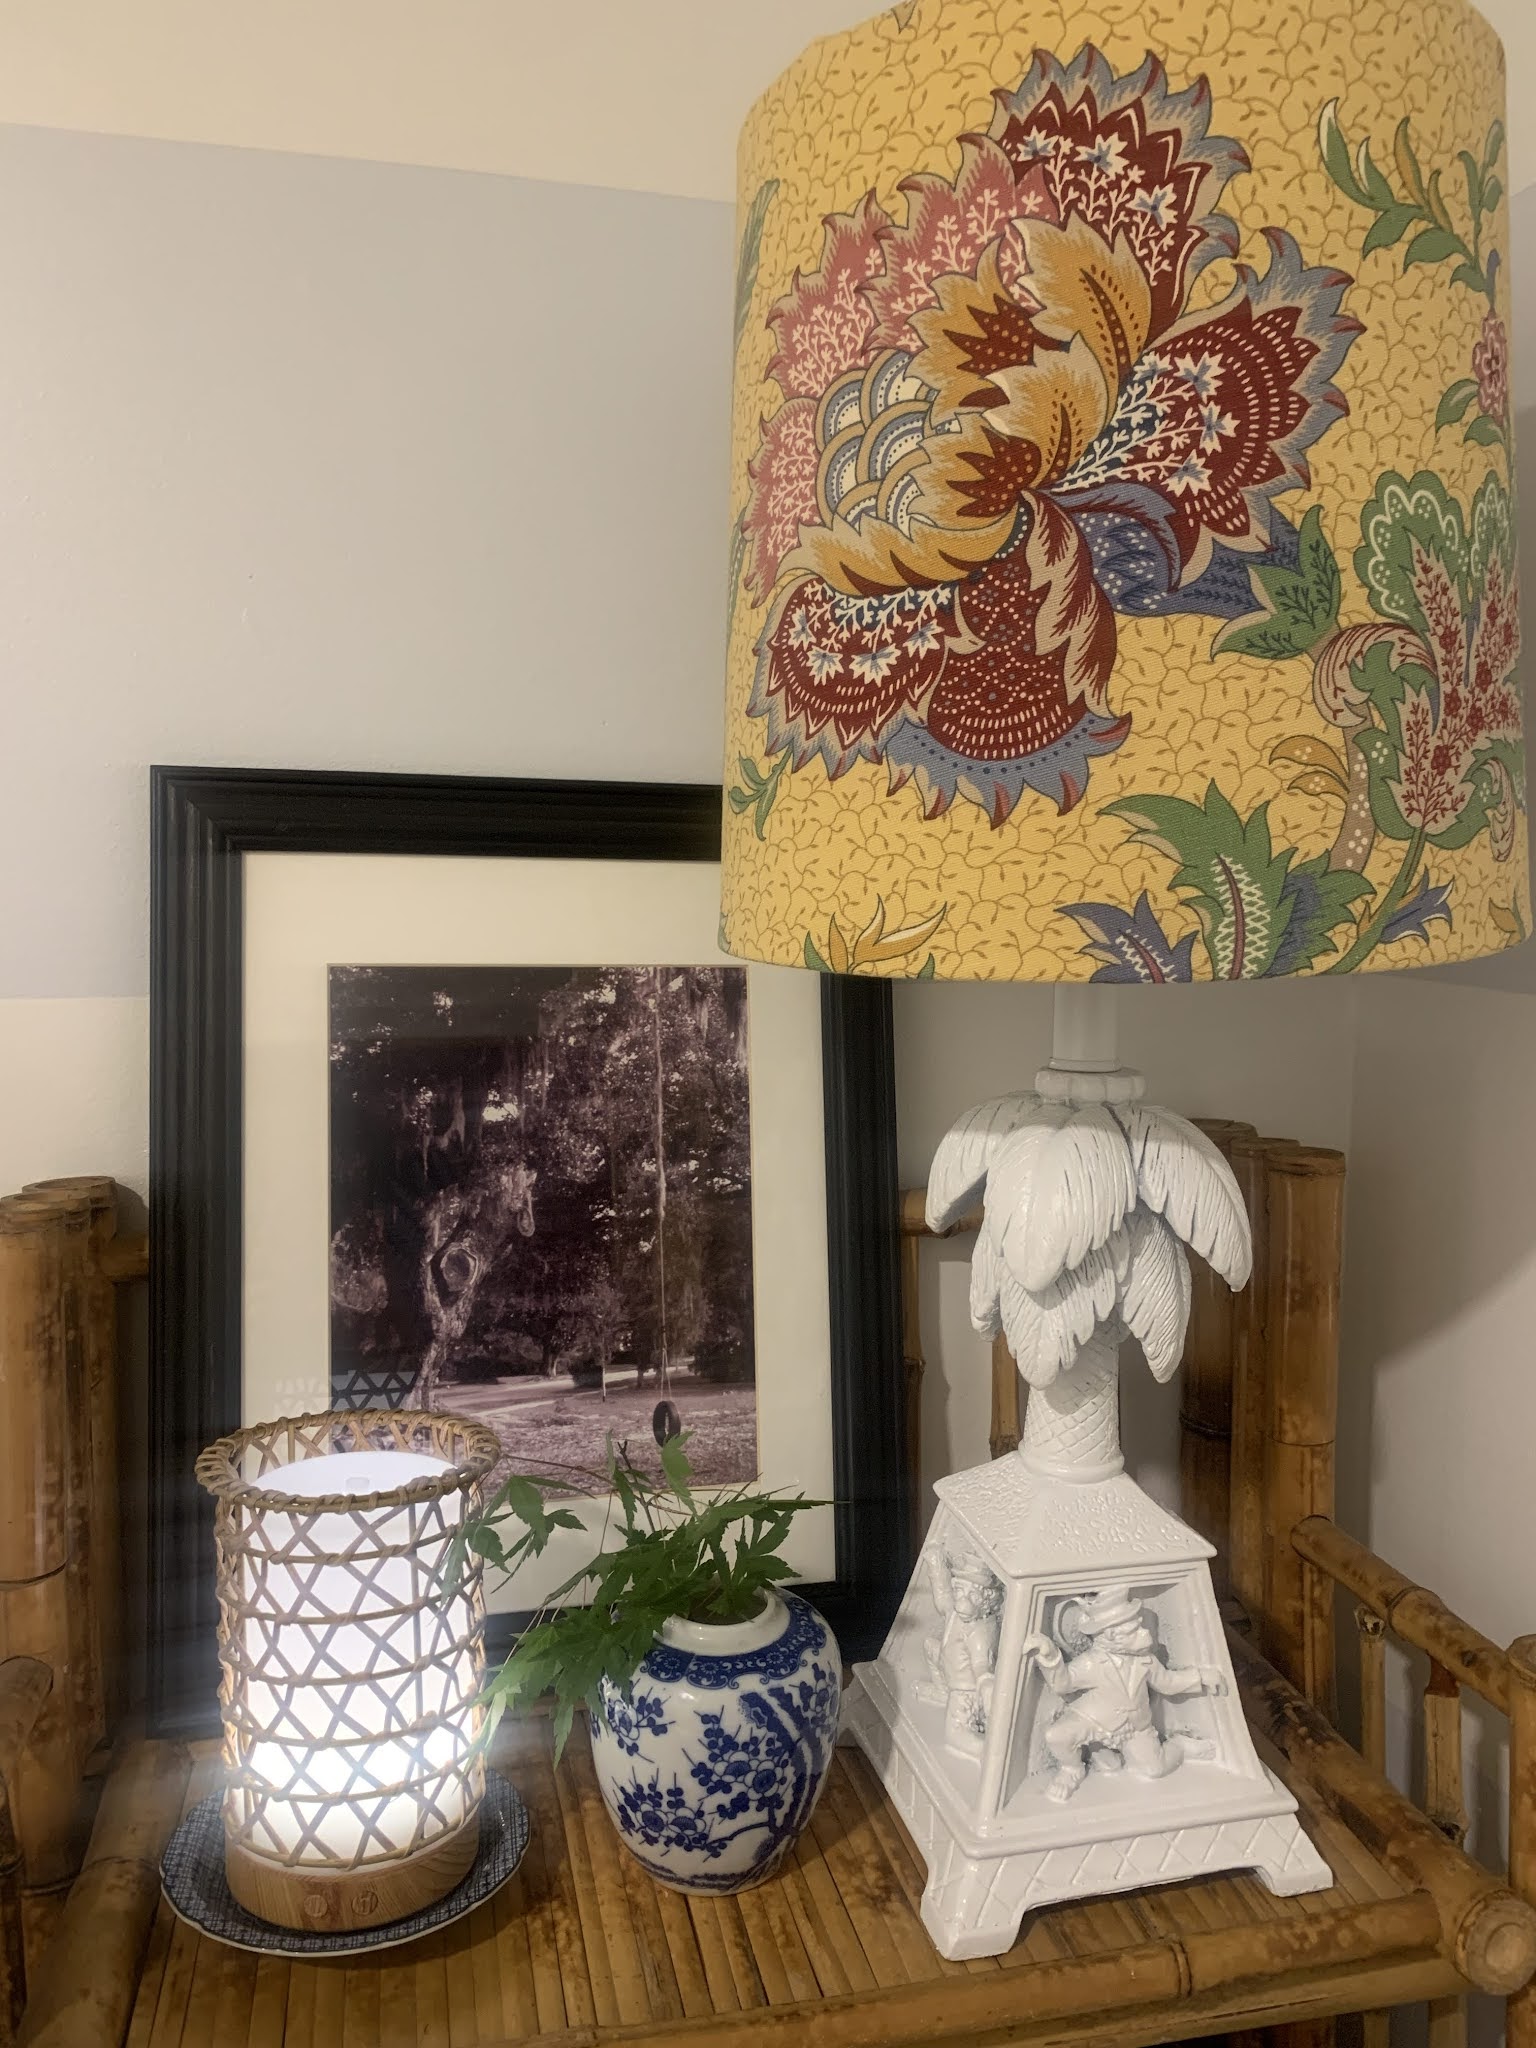
Last Summer I refreshed our main level powder room as part of the One Room Challenge and used a fun monkey lamp I'd been saving for just the right spot.


And the before:


I have a very difficult time leaving behind an elephant lamp when I go thrifting.
 I have a couple tucked here and there.
Just before my #thethriftedporch reveal I looked over and noticed this elephant lamp was still brown (it also still had the GW price sticker on it - welcome to my world!)


Freshened up with a coat of white spray paint and a thrifted white wicker lampshade. So much fresher and perfect on the porch. I think the white lamp shows up better and the details are more noticeable in the lighter color.


Not a great picture but he didn't look too 'great' when I found him.
Glossy white paint and a thrifted wicker shade made all the difference. 
Sorry for the holiday picture but that's probably when my kitchen was clean and photo ready! :)


I often use thrifted wicker and rattan lampshades on my lamps that I spray glossy white because I think the warmth and texture is a nice counterpoint to the lamps but refreshed, thrifted lamps are the PERFECT place to use one of my Faux DIY Pleated Lampshades. 


*Always check your thrifted lamp wiring for any safety issues. It is very easy to rewire most older lamps using rewiring kits. If you don't think you want to attempt rewiring yourself then it is not too expensive to have a lamp rewired at a local lamp shop. Even with the expense of rewiring, most thrifted lamps will still be far more affordable than a new purchase. Plus they often have a lot of character and it is environmentally sound as well to reuse a lamp that would be thrown out.
You just have to read the specs and choose the size that best fits your needs. And there are a ton of help videos on the internet if seeing helps you more than reading directions!

Wednesday, June 30, 2021

Because One Project at a Time is Not Enough

 One project at a time is actually plenty but that doesn't seem to be how it goes around here!

I had my #thethriftedporch refresh challenge going on in May along with my 11th One Room Challenge. But a very special opportunity also presented itself in May and I jumped in to a big, messy project alongside the others. 

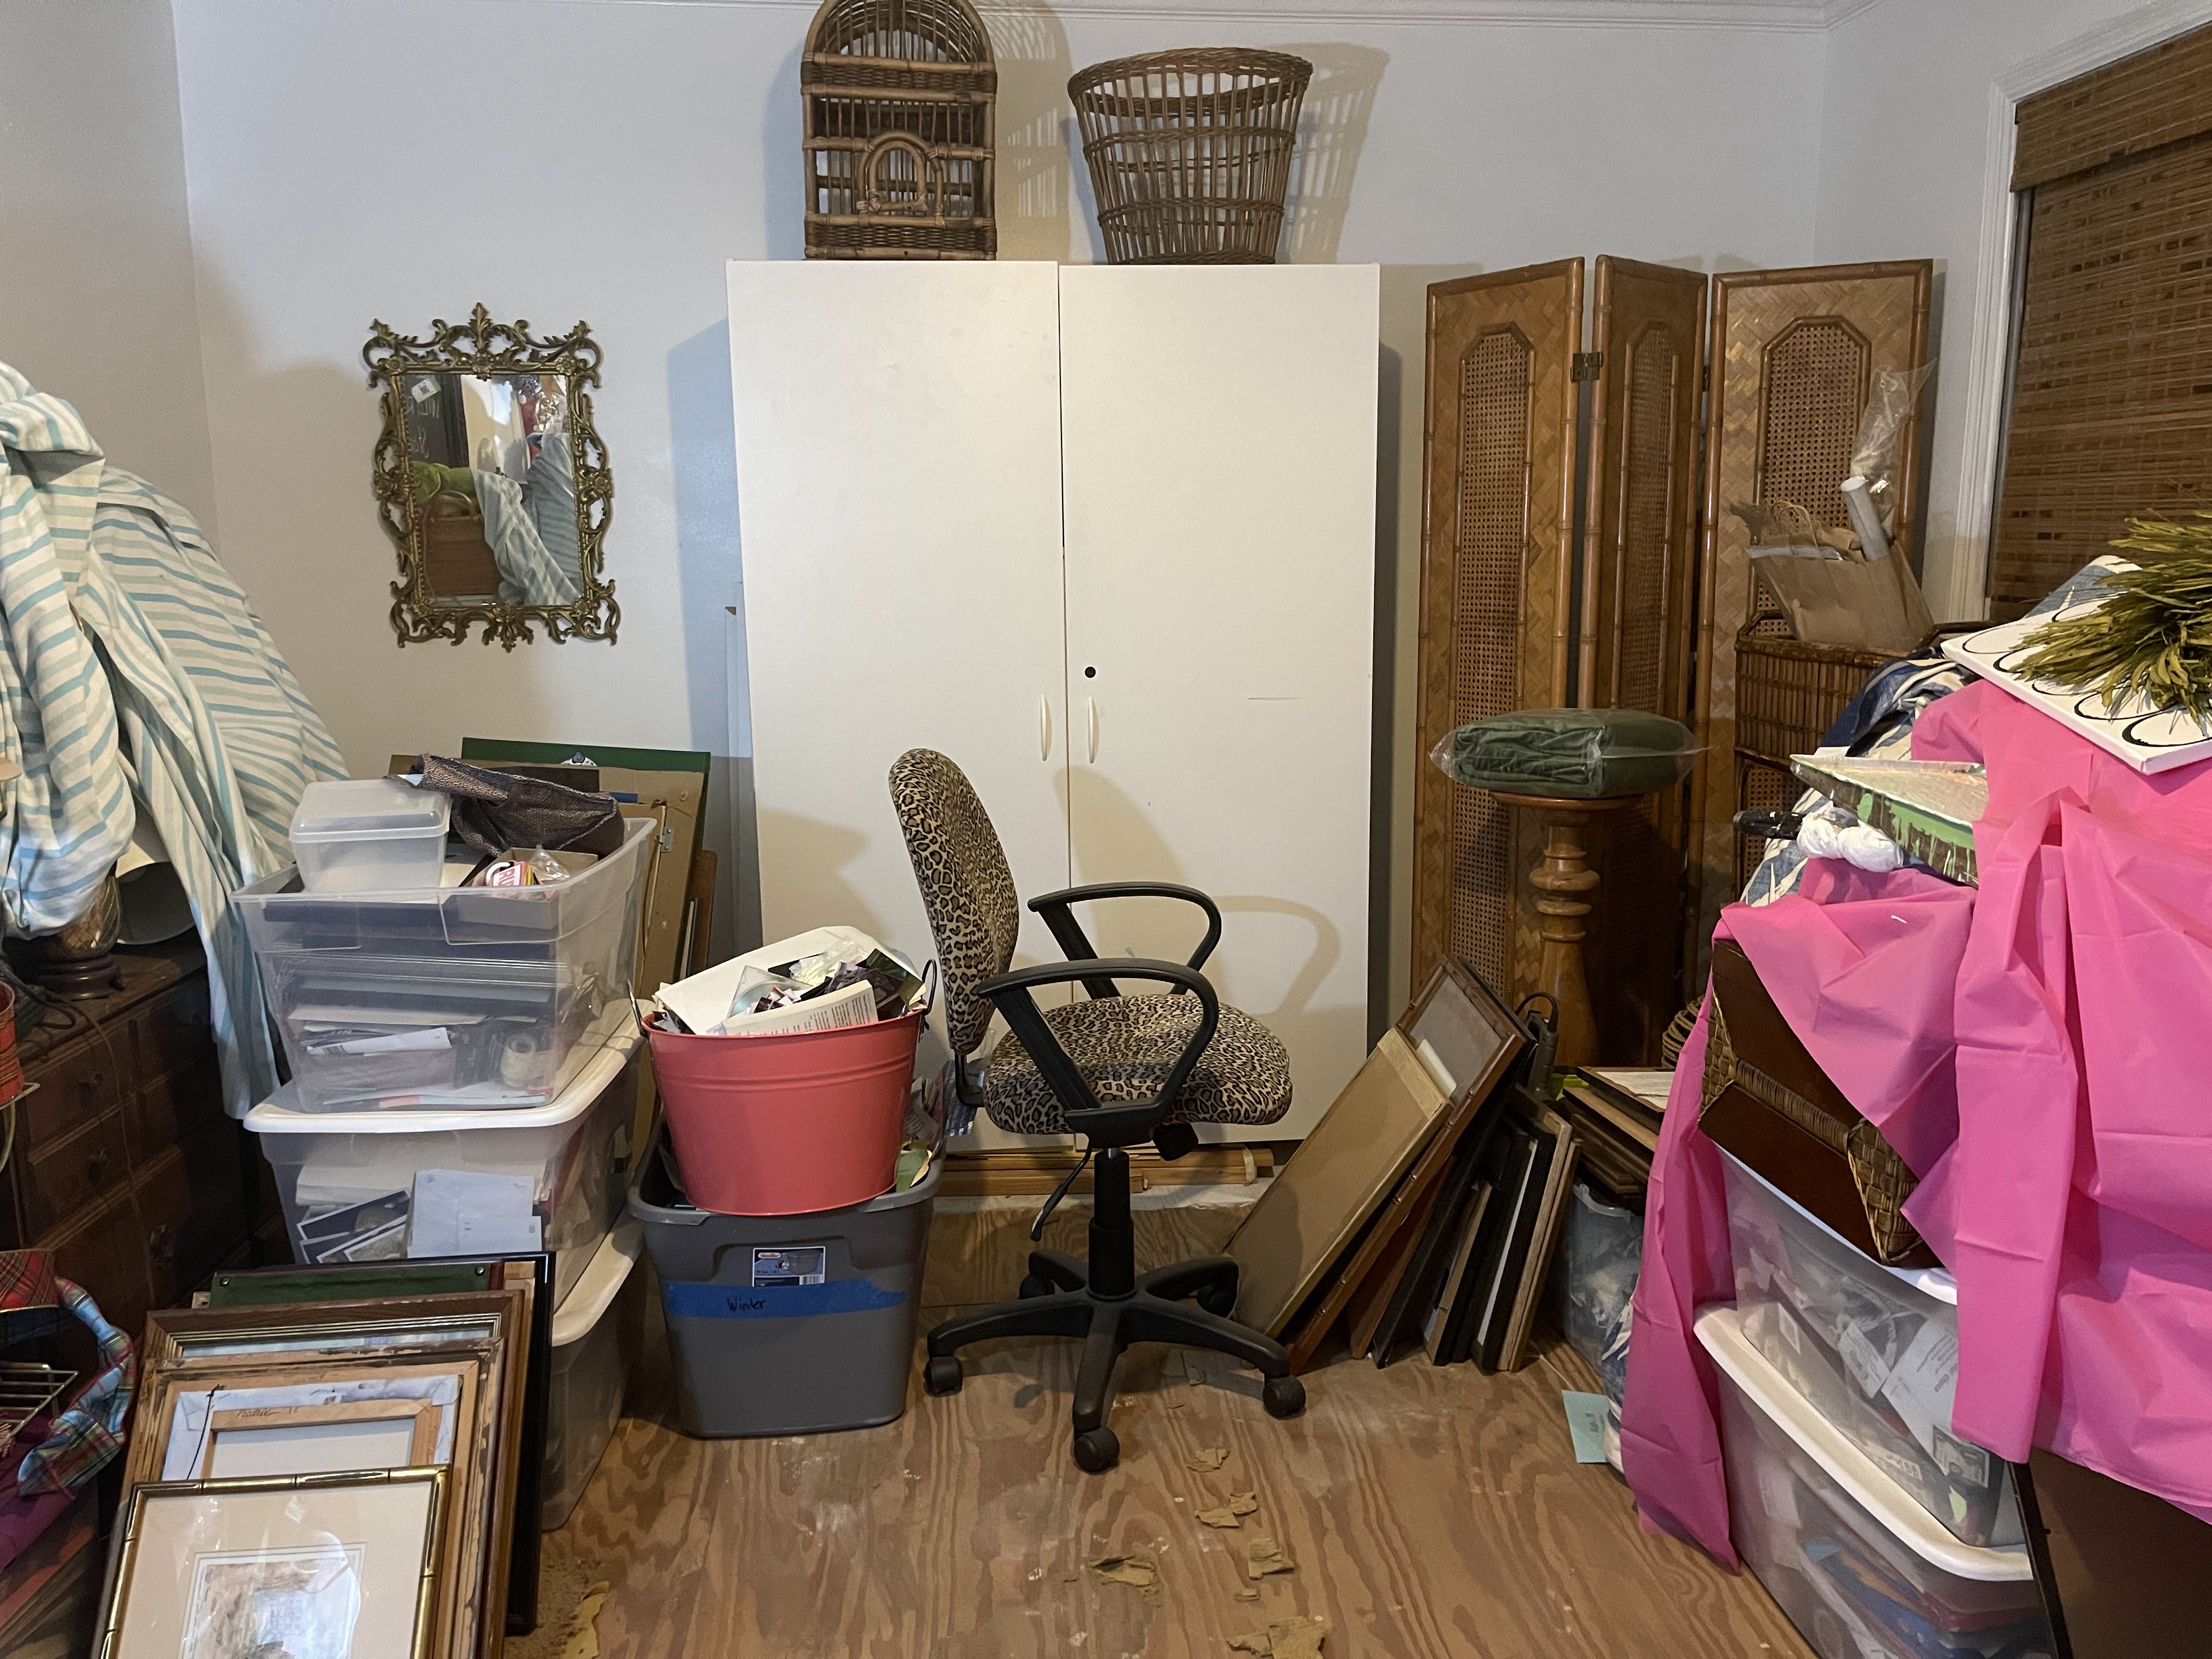
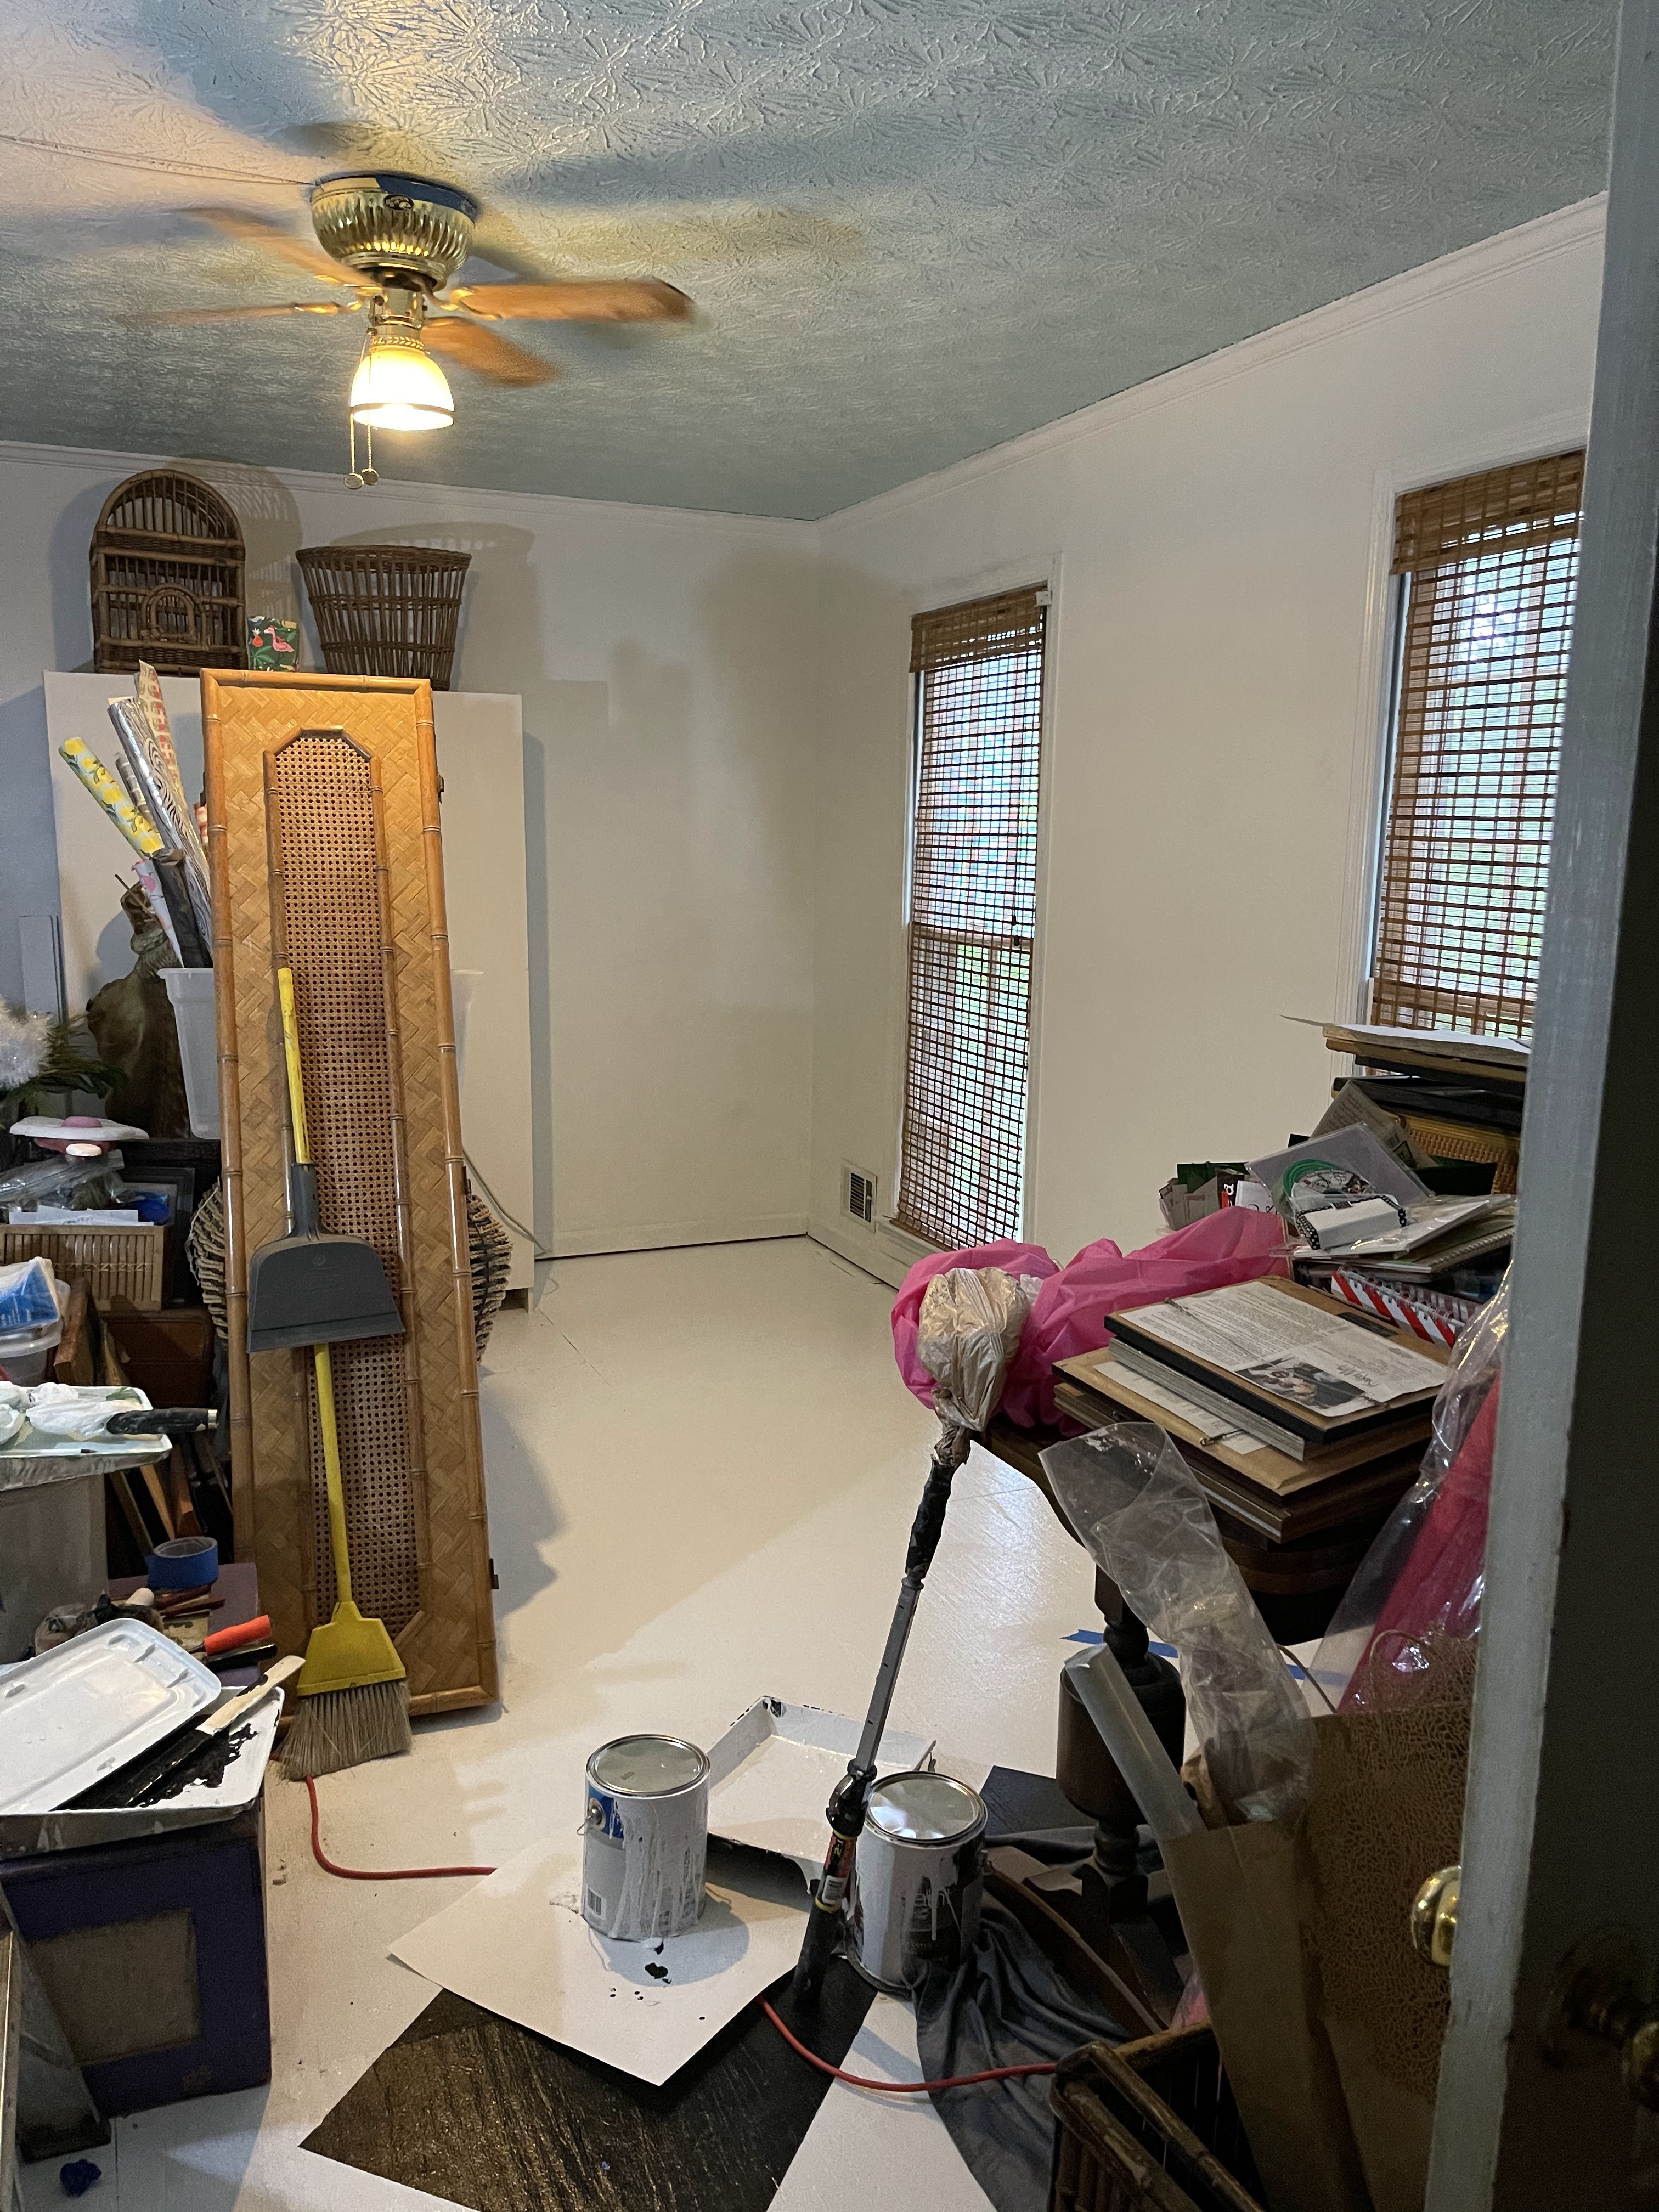
I was home alone for the entire month of May. Well, Cooper was here but Mollie and her dad went to Florida for the whole month for his sabbatical. That meant I could tackle the worst, junkiest room in the house. It had gotten out of control and was causing me a good bit of anxiety. Really. I didn't even take a true "before" picture. I knew this project would create a big mess in the rest of the house so having 30 days to accomplish the big clean out was going to be perfect! Spoiler: I didn't finish it. I worked on it continually but it was a lot of moving stuff, sorting, purging, etc. before I could even start to paint and deal with the old carpet in there. It dragged well in to June (and still going strong OY!!) but I'm so relieved I didn't give up!

This room is labeled "Living Room" on the original floor plan. When we moved in my husband needed an office with easy access to the front door. I insisted on French Doors immediately so that his stuff would be behind closed doors. I love those French doors in our entry.  My mom made curtains to cover the glass and then years later I did a faux antique mirror finish on the panes. Then my husband went to work for a company and traveled extensively. He didn't need the big space and I took it as my craft/scrapbooking/studio space. I enjoyed it for years and then it just started to be where we stashed stuff we didn't know what to do with and things for our little vintage business Elizabeth and Payne. I kept saying I was going to clean it out and use it more as a studio "when I had time." Guess what?? I had lots of time last year and I didn't clean it out, use it or get back to painting! Obviously having "enough" time wasn't the issue. I had also been thinking that we needed a bed on the first floor because we have a lot of steps but I didn't want the room to look like a bedroom. I wanted it to look nice, have more than occasionally being a bedroom as the function. I've also always loved a sunroom but this house doesn't have one, we aren't going to build one at this point (plus we have a fabulous screened porch we use non-stop across the back of our house.) This room does get great afternoon light and would be a good place to overwinter the plants that don't fit in the greenhouse and moving the daybed in our seldom used guest room would be a great way to have a non-bedroom looking place for someone to sleep. 

Whew- that's a lot of info but that's where this is coming from. And I wanted to use furniture, decor, fabric, paint that I had on hand. The budget was basically zero. Game on. 

This is what was floating around in my head...

The room is fairly large and the floor still had the original builder beige carpet. (We kept the French Doors closed and never let anyone in the space -it was that bad!!) Our house is not charmingly old, just middle aged and all that implies, and the carpet had to go. Remember: zero budget plus the fact that lumber has almost tripled in cost this Spring. There is a post-pan demic shortage. So what is the most economical decorating tool out there (and my favorite!)?? Paint. 

The plywood subfloor was in excellent condition except for a couple of spots and also confirmed my belief that wood quality has gone down over the last few decades. This subfloor had as good a finish as the "finished" plywood we purchased for our ORC flooring project. 

The "shove stuff around and work in sections" method is not one I recommend but it is the only way I could make this project happen. Also, every time I pull up wall to wall carpet I realize that I just need to have wood floors and rugs because I obviously don't vacuum often enough!!!

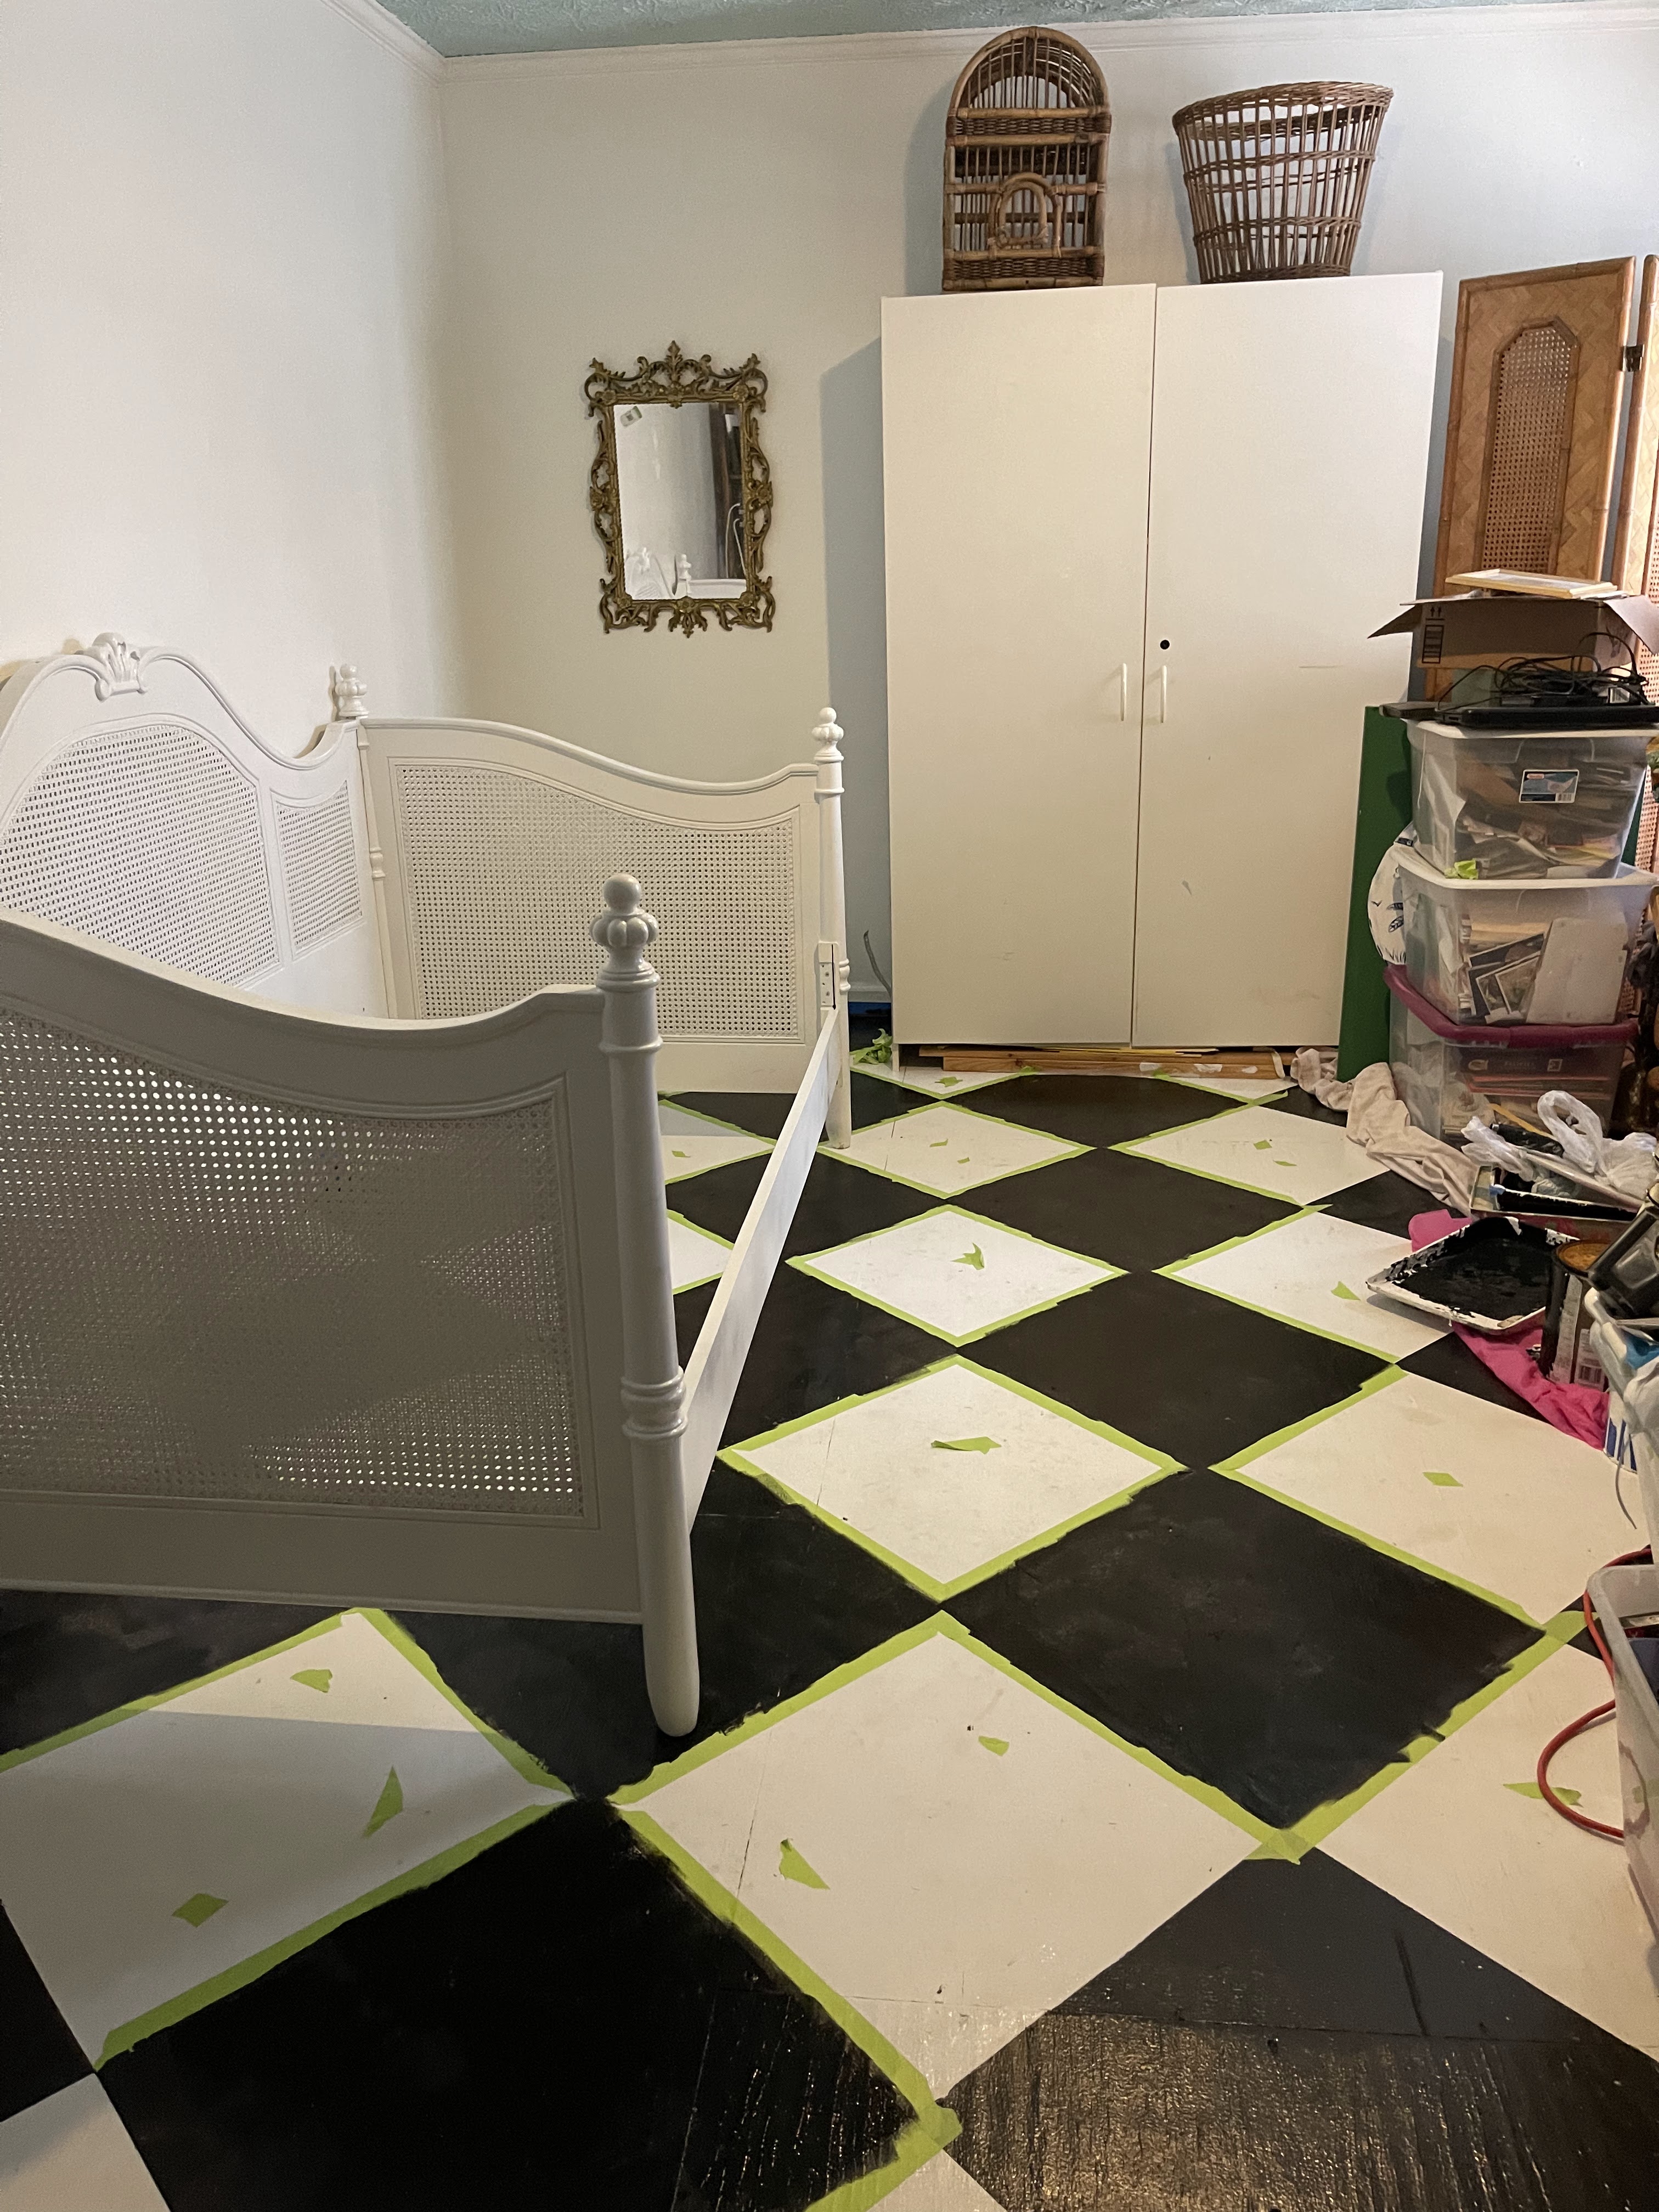
I love a black and white check floor, it fit the "sunroom" aesthetic I was aiming for and I had the paint on hand. Let the taping off begin!!


There was also a gallon of light blue paint sitting inside the doorway of the room
 so I took it as a sign to paint the ceiling blue!

Already in the room as well - 2 bamboo shelves on each side of the French Doors.  My plan is to gather up and/or thrift enough vintage wicker and rattan storage items to store the reduced amount of paint, ribbon and crafty supplies I do want to keep. And now that the doors will show from the inside the faux mirror overspray will have to be painted over. I'm thinking I might use an accent color instead of going with white. TBD.


This green shelf was also in this room before - on the opposite wall. I moved it over here because the daybed is going on the opposite wall. We had the opportunity about 40 years ago to take trim and a few other items from a 100 year old home in the Noonday area of our county that was slated to be demolished. This shelf is one of the items I saved. I love the hand cut scallops and I'm often amused when I read articles saying "scallops are the newest/latest design trend" or that they are "in" because this cute, scalloped shelf is over 100 years old. 
#timeless


I had to purchase the bamboo blinds. We have bamboo blinds on all of the rest of our windows so it was past time to get them in here. I order them from Amazon and recently it has been difficult to find certain sizes in stock. I like to order these because I like the valance that covers the hooks at the top. I do have both kinds in the house and the difference isn't really that noticeable once the curtains are hung.

The daybed was an amazing GW find several years ago and was in a guest bedroom that I zhushed during a One Room Challenge. I wanted to give it a fresh coat of white paint. It had the original finish which was either off white or had yellowed slightly.


Unexpected, unforcasted rain caused us to move the bed inside while still not completely dry so it had to be set up in the room beforethe floors were finished so that it could dry without ruining the paint. 


    I found the mirror at GW several weeks ago for $1.99. I would like something a bit bigger with the same ornate look but for the price I grabbed it as a placeholder until the right one comes along.
I have a fun DIY planned for that big white cabinet on the back wall. It is just a storage cabinet from a big box store but it needs to stay. It holds a ton of stuff.  I have this idea in my head and I'm excited to try it. Stay tuned.


I honestly thought I'd have a finished room and a "big" reveal by now but I'm excited about where this room is headed and the really slow, hard work like pulling up carpet and painting every surface is behind me. The prettier, more fun part is just ahead! 

Friday, May 14, 2021

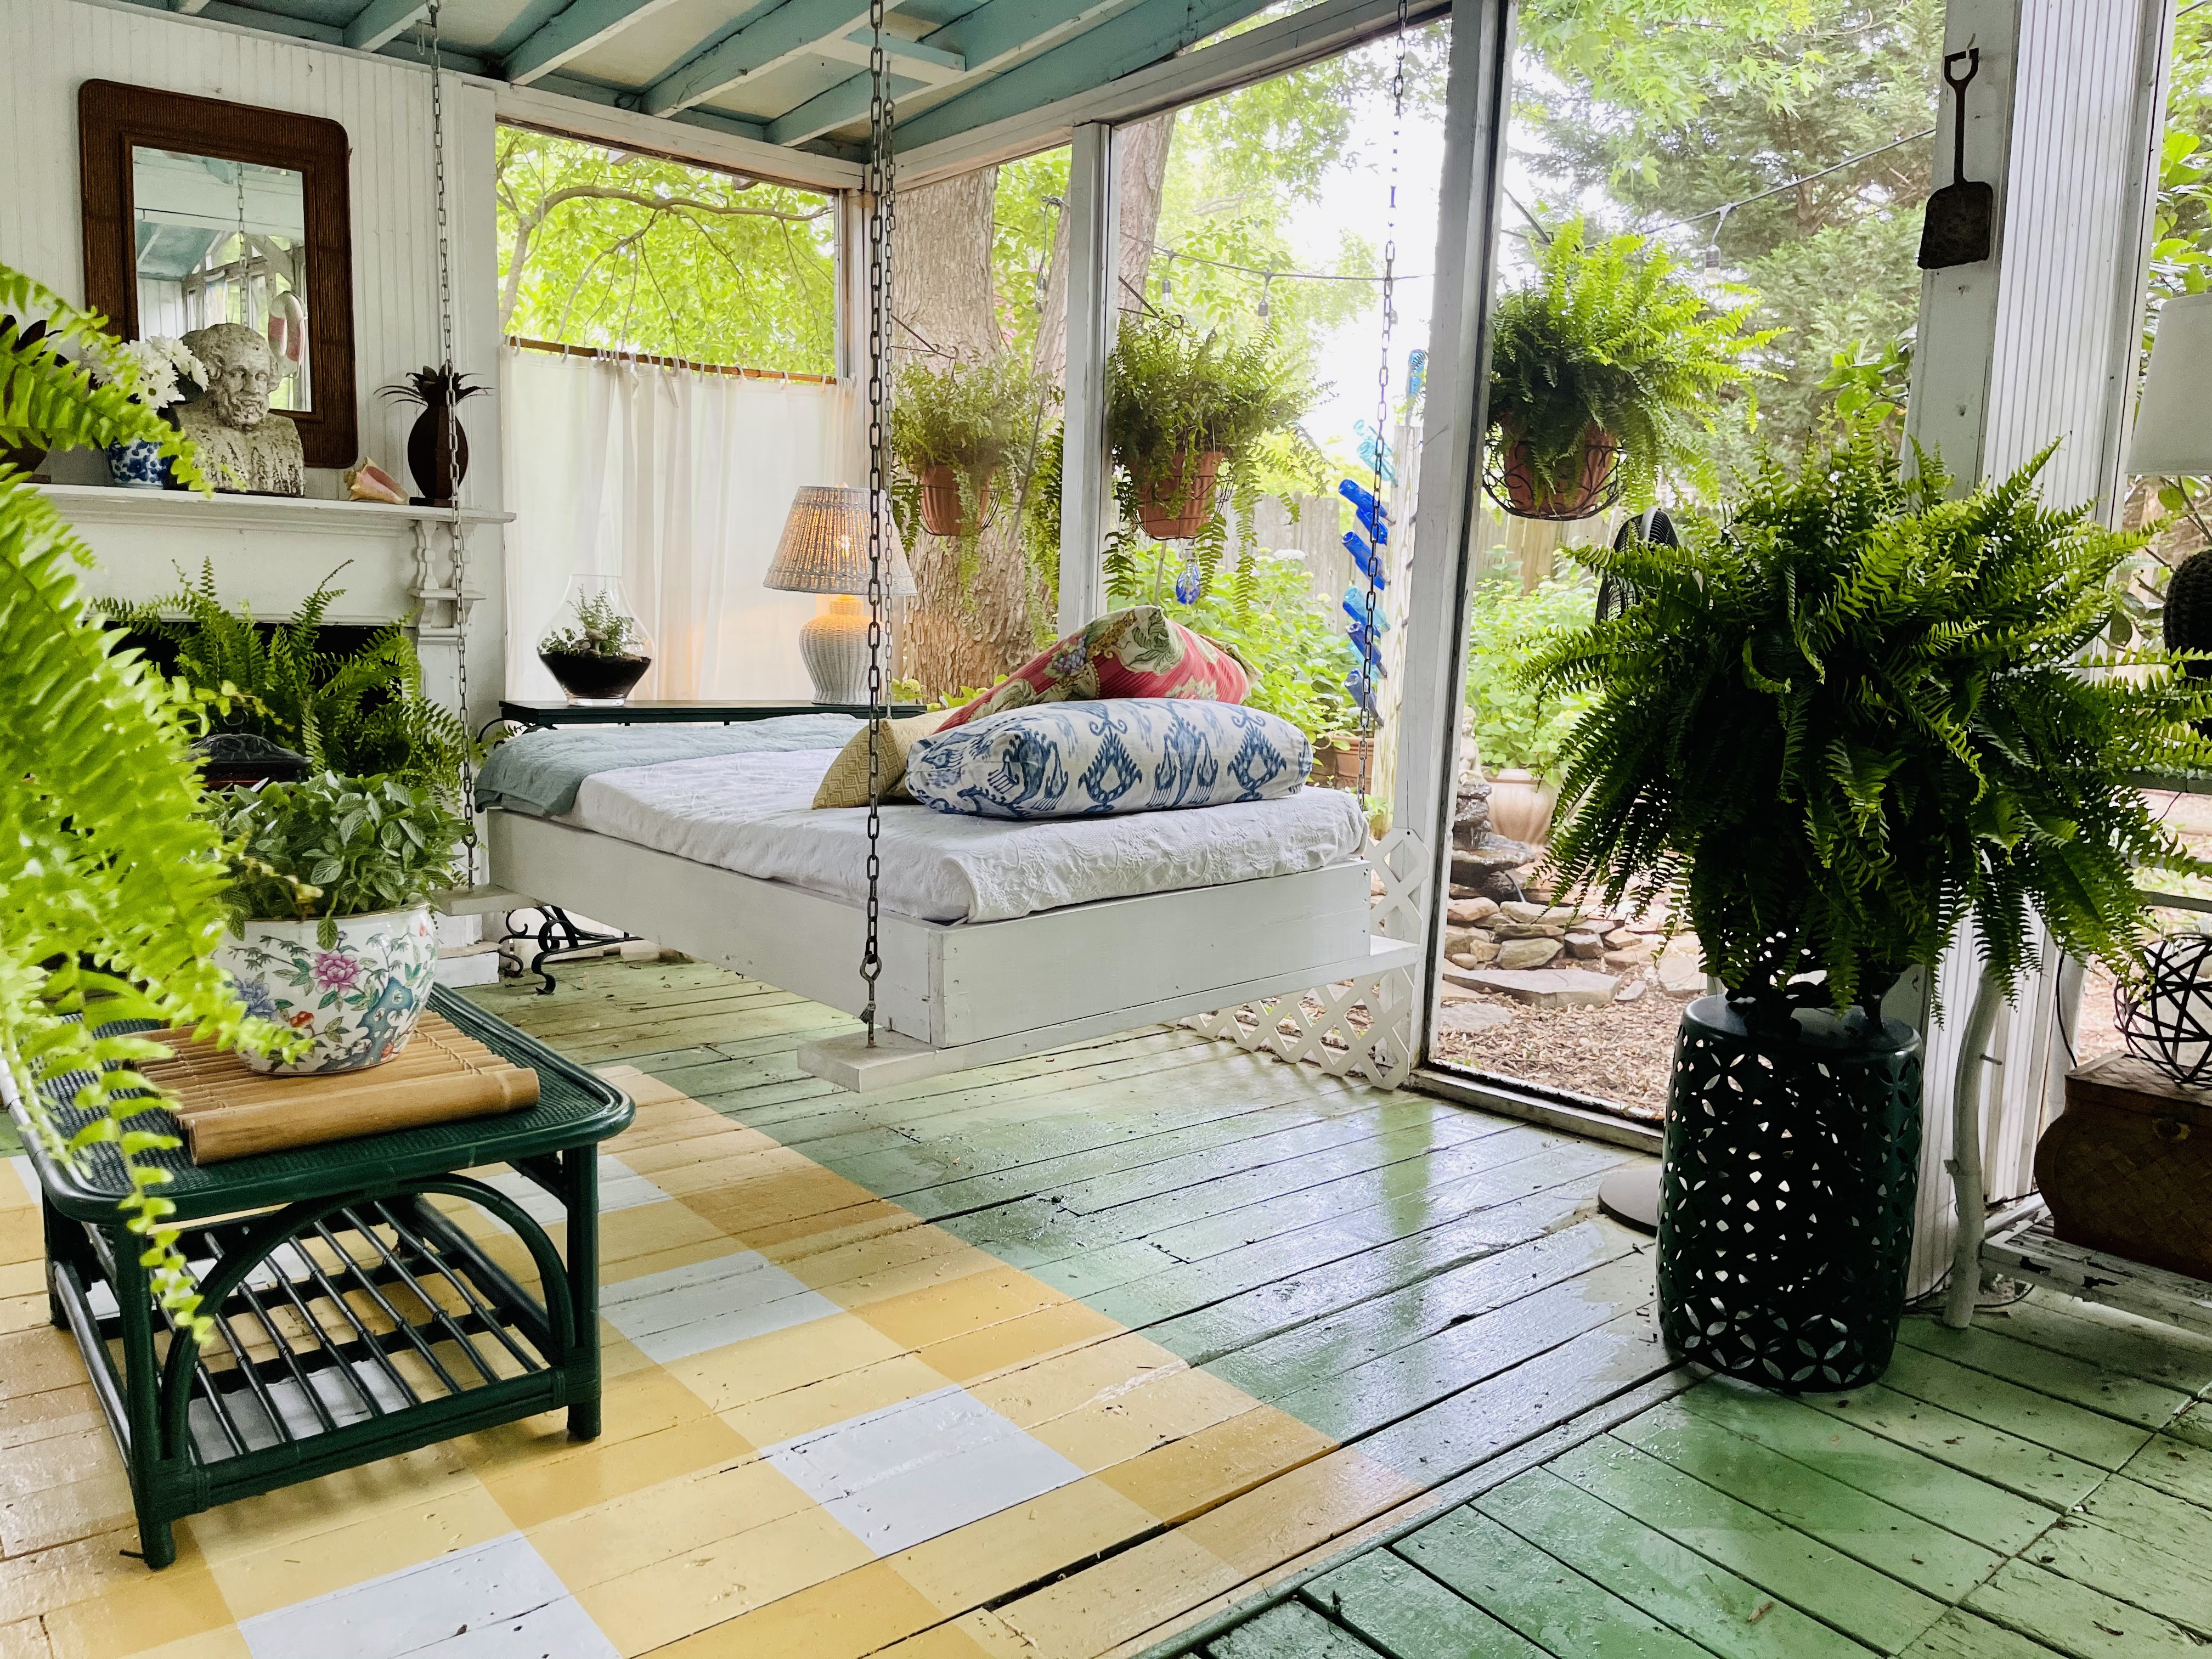
The Painted Rug from #thethriftedporch

 I'm sure there are a lot of tutorials out there on the web for painting floors so I'm going to quickly share how I went about mine and what I used just in case you are thinking about giving it a try.


I used the same materials and process to paint my Powder Room floor last Summer. 

Your floor needs to be clean and if it has a glossy surface I recommend lightly sanding.  I mopped my porch floor to get off the pollen and dirt tracked in.

The first step is to tape off your rug shape or if it's the entire room just tape off your baseboards. Then you prime. I use oil based primer and I did two coats- possibly overkill but my Powder Room floor has shown no signs of wear and it's been 10 months of heavy traffic. 


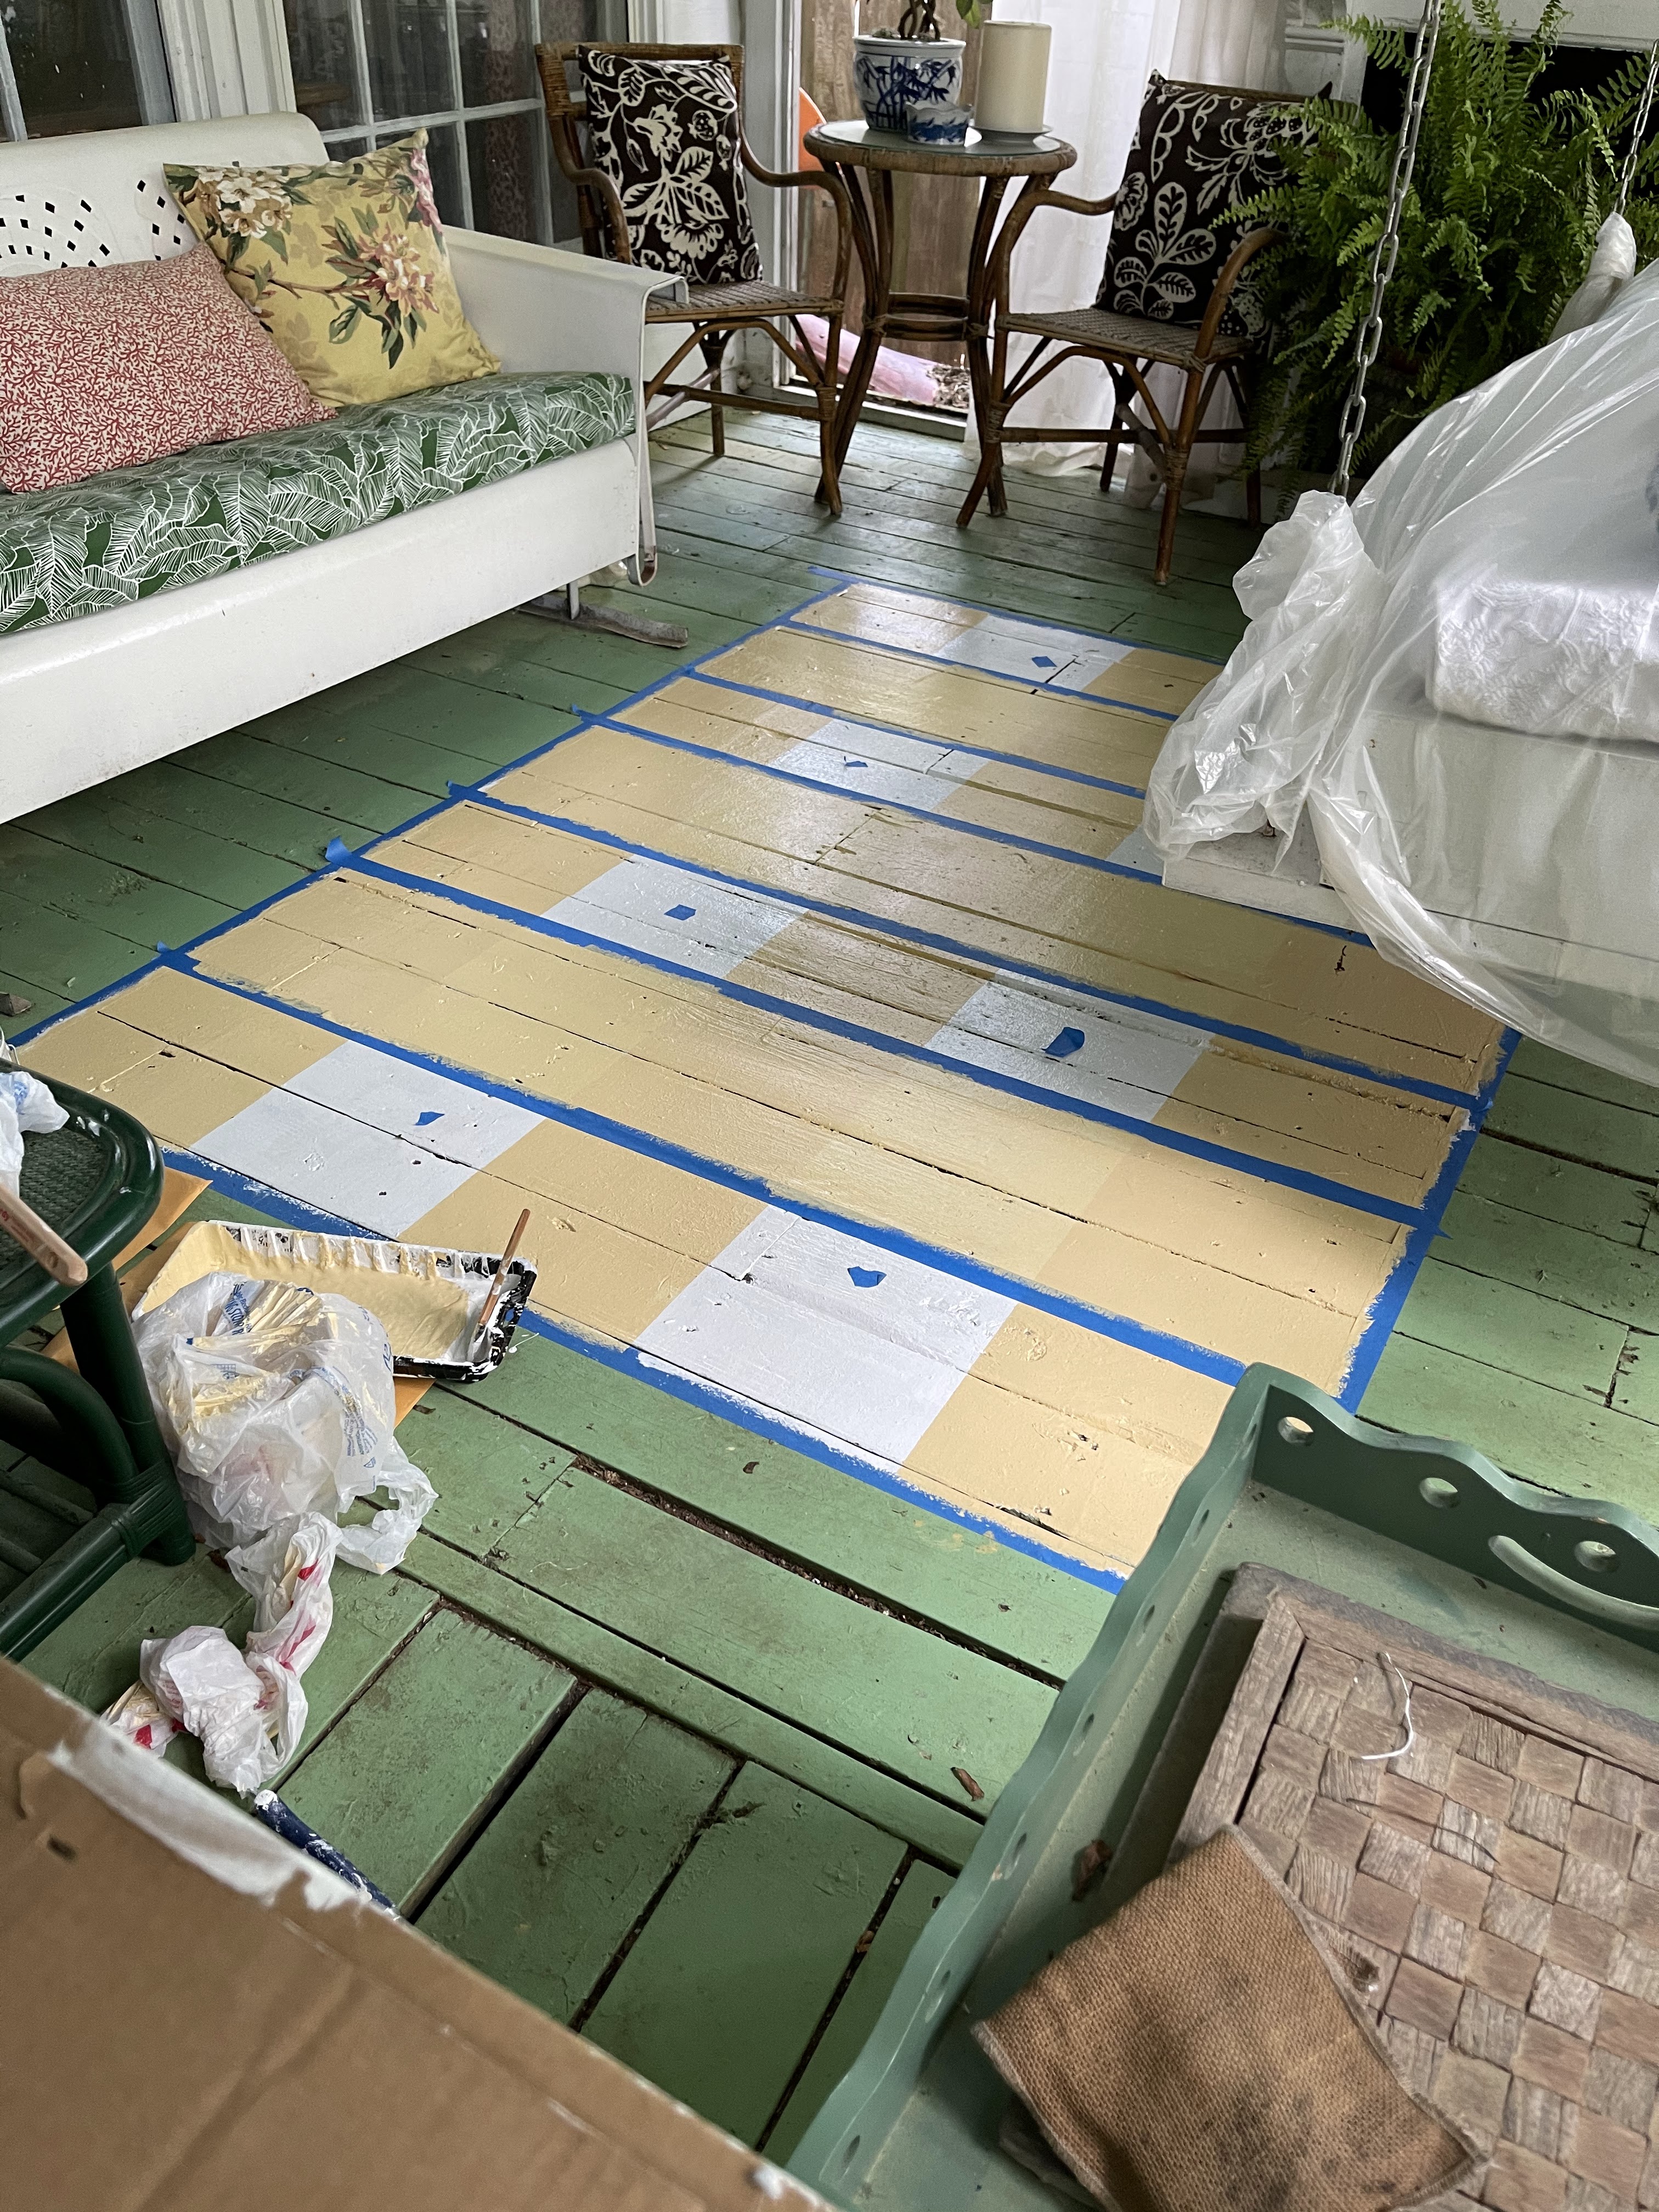
I let my primer dry overnight, painted the entire "rug" area white, let that dry and then I taped off the stripes lengthwise. I always put a tape dot in my "no paint" spaces while I'm in progress. It keeps me from making a mistake. You may not need it!


This is definitely a project where you want to measure twice before painting!! But if you make a mistake you can just paint over it and go again!!


I use Sherwin Williams Exterior Super paint on my floors. I've had great luck with it. #notsponsored
Because I was doing the checked pattern I mixed the Anjou Pear at about 1/3 AP to 2/3 white to get my lighter tone. Depending on your color choice you might have to adjust this ratio to make it work. 


Two coats of my lightened stripe color lengthwise. I let that dry overnight before taping off the horizontal stripes and giving them two coats of the same lightened AP.


After they all dried I taped off a "test" square where the stripes overlapped. I painted two coats of the full strength Anjou Pear to be sure the contrast was correct. I didn't want to do all the squares and then be unhappy when the tape came off!!


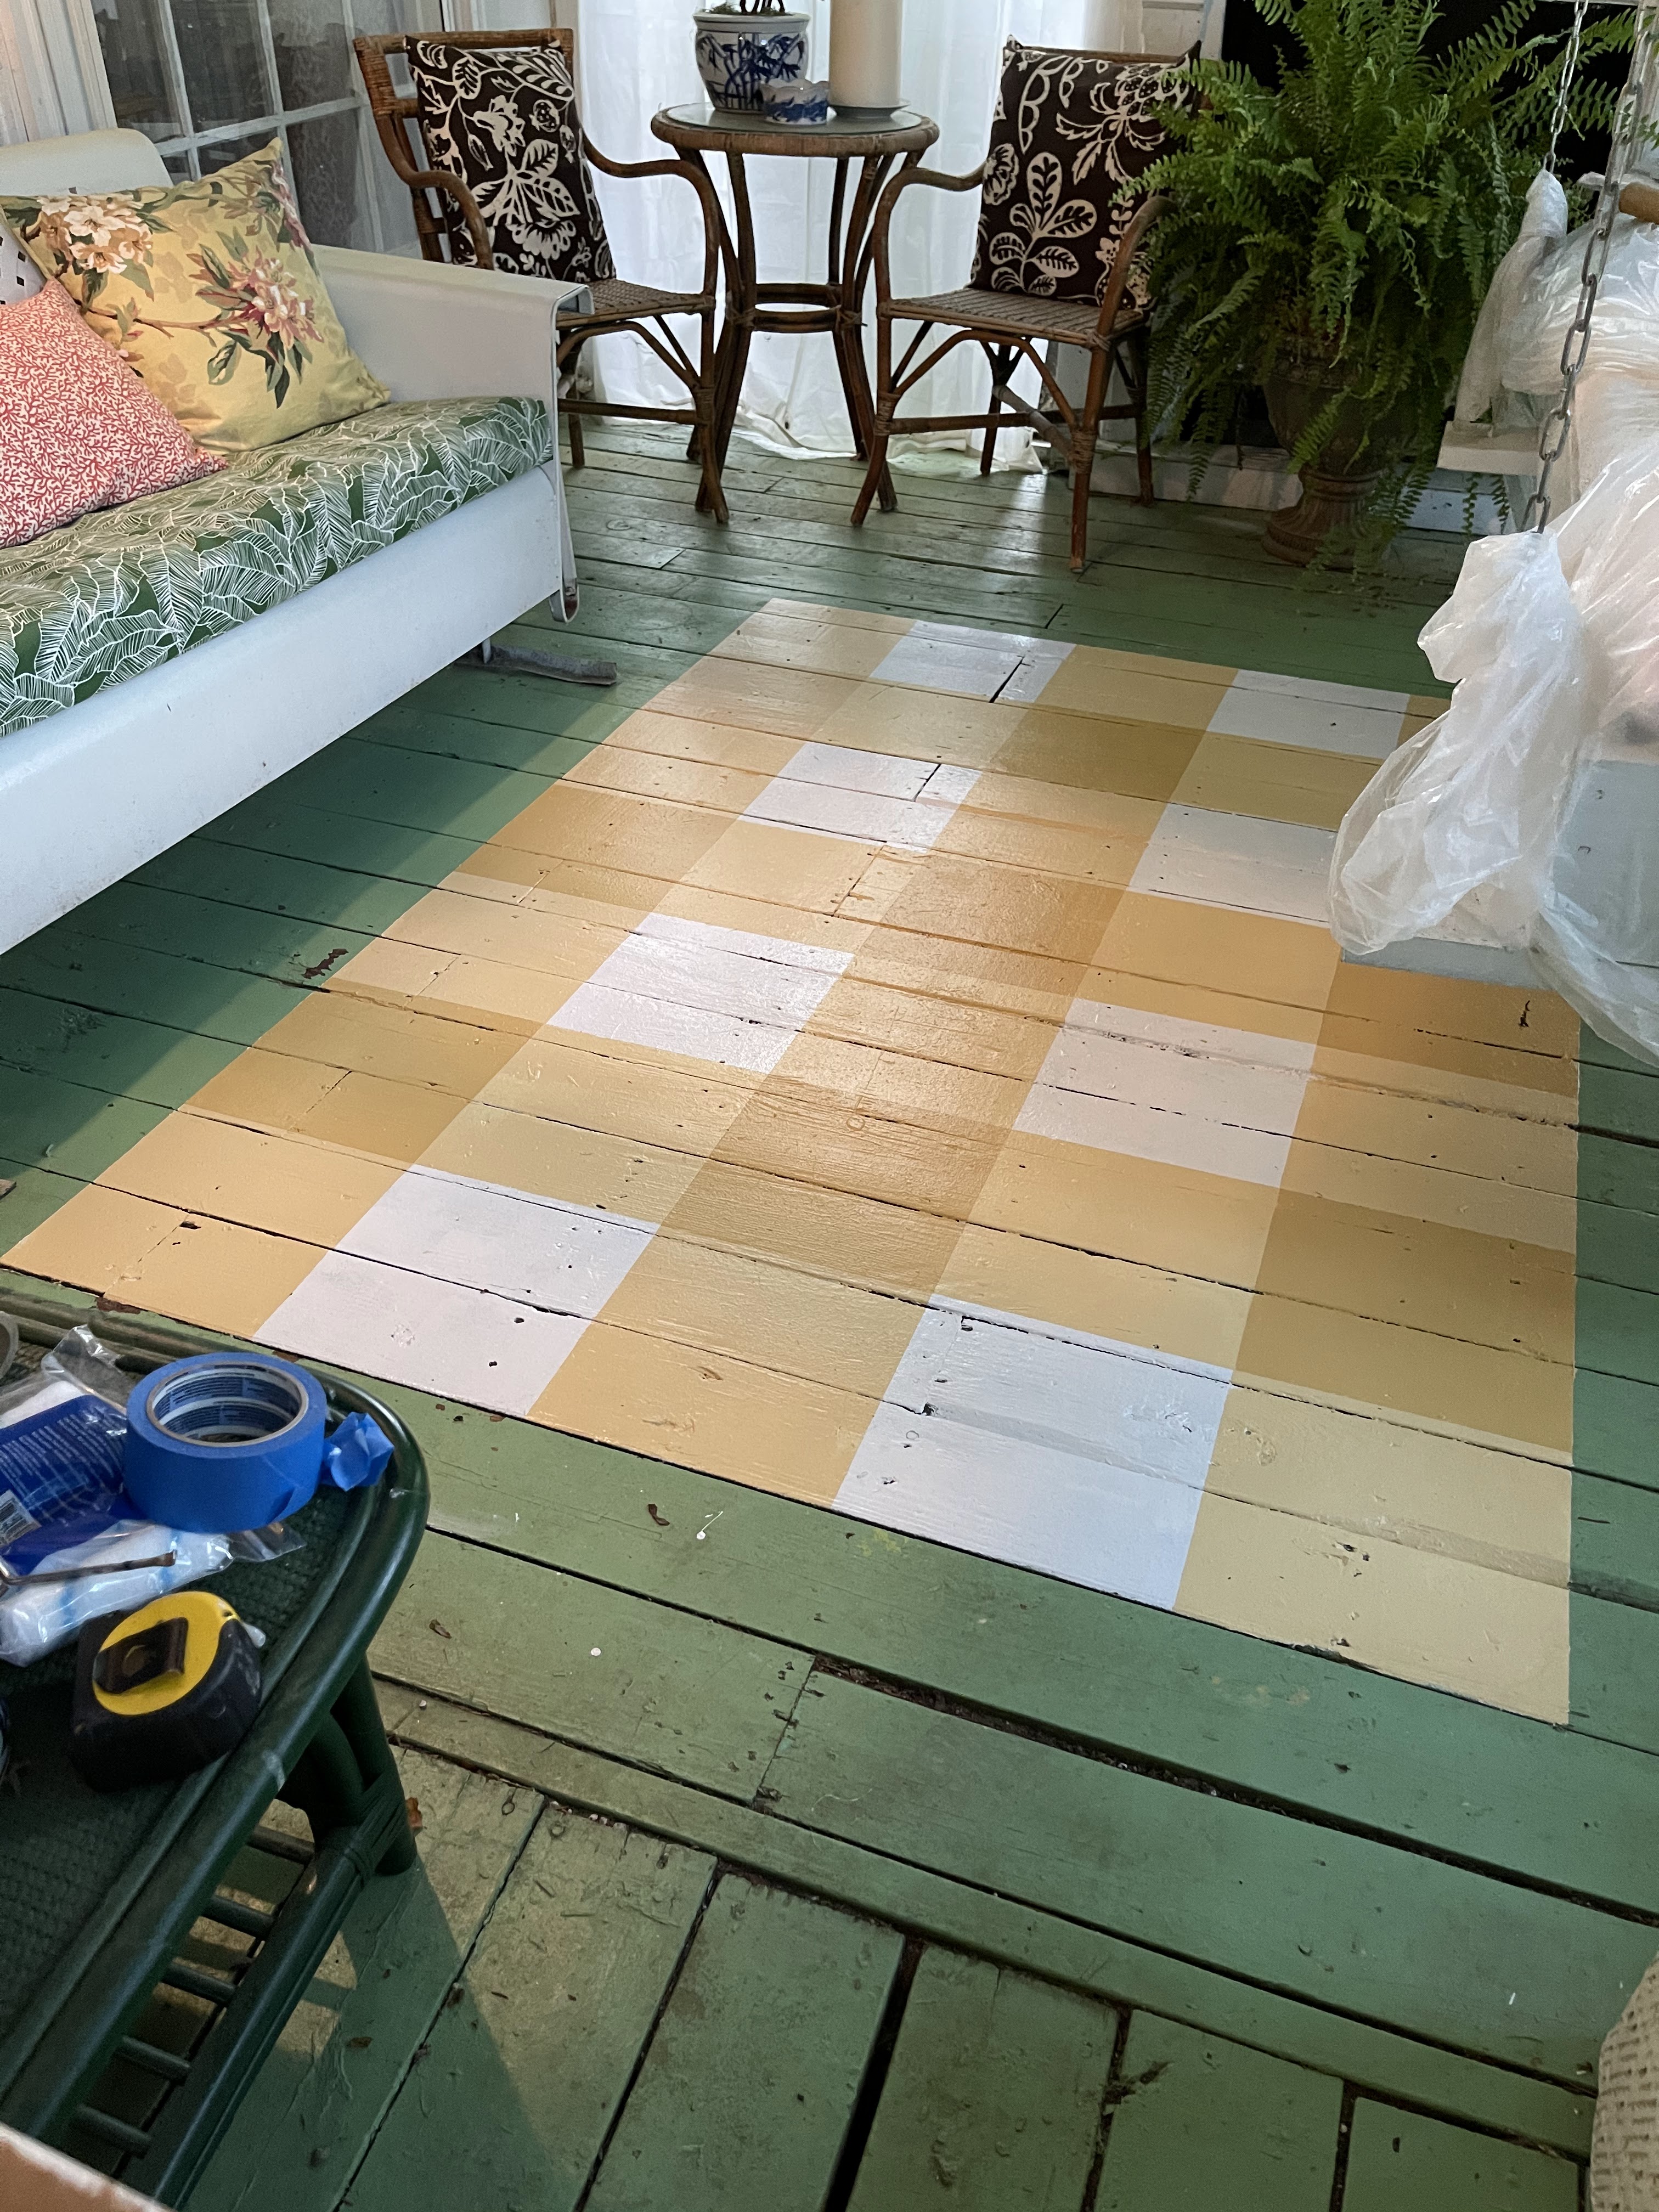
I liked it! It looked like gingham or buffalo check.
So I taped off the rest of the squares and painted them full strength AP.

Now for a confession. The furniture placement in this section is not perfectly balanced and the smaller rug I had in here before was off center so I knew the "rug" placement was a bit tricky. I debated forever about where I started it in relationship to the opening to the rest of the deck and the glider, etc. I should have gone with my first instinct because I ended up adding another 'row' of checks to that front edge after pulling all the tape up!!

Before the added row:


More measuring and taping to add the extra row of checks.

All of this taping and painting completely wore Cooper out!


 I think the proportion of the finished rug is better with the added row. I made the first outline 5 x 7 feet which is a traditional rug size. But that's the beauty of painting my own rug - I made it the size that "looks" right! 


It's a great, inexpensive way to brighten up a space! And it's just paint - if you want to change it then simply paint over it!