Showing posts with label Mod Podge. Show all posts

Thursday, September 22, 2022

Chinoiserie Tree for Fall

You may not remember my decoupage Christmas ornaments but they inspired the chinoiserie Easter tree which in turn has motivated me to create this fall version!

I'm not a big Halloween decorator - I'm more of a seasonal decorator using a lot of natural elements (I'm crazy for heirloom and mini pumpkins) more than themed items. That being said, I do have a collection of terra cotta pumpkins that I love to use all month long in October. (You'll be seeing those soon.)

But back to the chinoiserie fall tree. This is the easiest of projects and a lot of fun because you can get really creative with the papers and ribbons you choose. I wanted ornaments that mixed well with my "look" so chinoiserie it is! Making decoupage ornaments is so easy and fun that I decided to grab some fall shapes and see what I could come up. Be sure to watch this reel on Instagram to see more details. 

I used a couple of real branches for my Easter tree but I found this great faux branch tree at Goodwill a few months ago and I thought it would be perfect for my decoupage ornaments. For the fall tree I decided to paint it brown.

This is the same way that I made my chinoiserie and Audubon ornaments at Christmas time and the Easter Tree shapes as well.

Gather your supplies:

Flat wooden shapes from craft stores, Wal Mart or dollar stores. I found wooden shapes in pumpkins, leaves and acorns that are perfect for this project. Mine came for Dollar Tree and Amazon. 

Mod Podge (here's a funny about Mod Podge!)

A foam brush to apply Mod Podge. 

Gold spray paint (this is my favorite)

Sharp paper scissors (I use these  to be able to cute very crisp, detailed shapes. I've had my pair for years. Still sharp!)

Papers to decoupage onto your shapes. I used marbleized papers for the some of the shapes and chinoiserie papers for others. I like the mix. Marbleized papers can be found online and in the scrapbooking section of craft stores. The chinoiserie images were printed on copy paper. You can find copyright free images on museum websites. Just google it - "copyright free museum images" and the museum sites will pop up. Then just search the imagery you want- chinoiserie, florals, birds. It's easily available but it just takes a little bit of time. Print the images out and cut out your shapes. I cut my shapes slightly smaller than my wooden shape so that there is a border of gold around the edge.


Then follow the Mod Podge instructions to adhere your papers to your wooden shapes. After they are dry you can add ribbon to hang them on your tree. I put decorative papers on both sides because they can be seen from both sides on my tree. These also make great package toppers/name tags for gifts. If you are mailing packages they are pretty enough that you don't need a bow (which would be flattened anyway!)


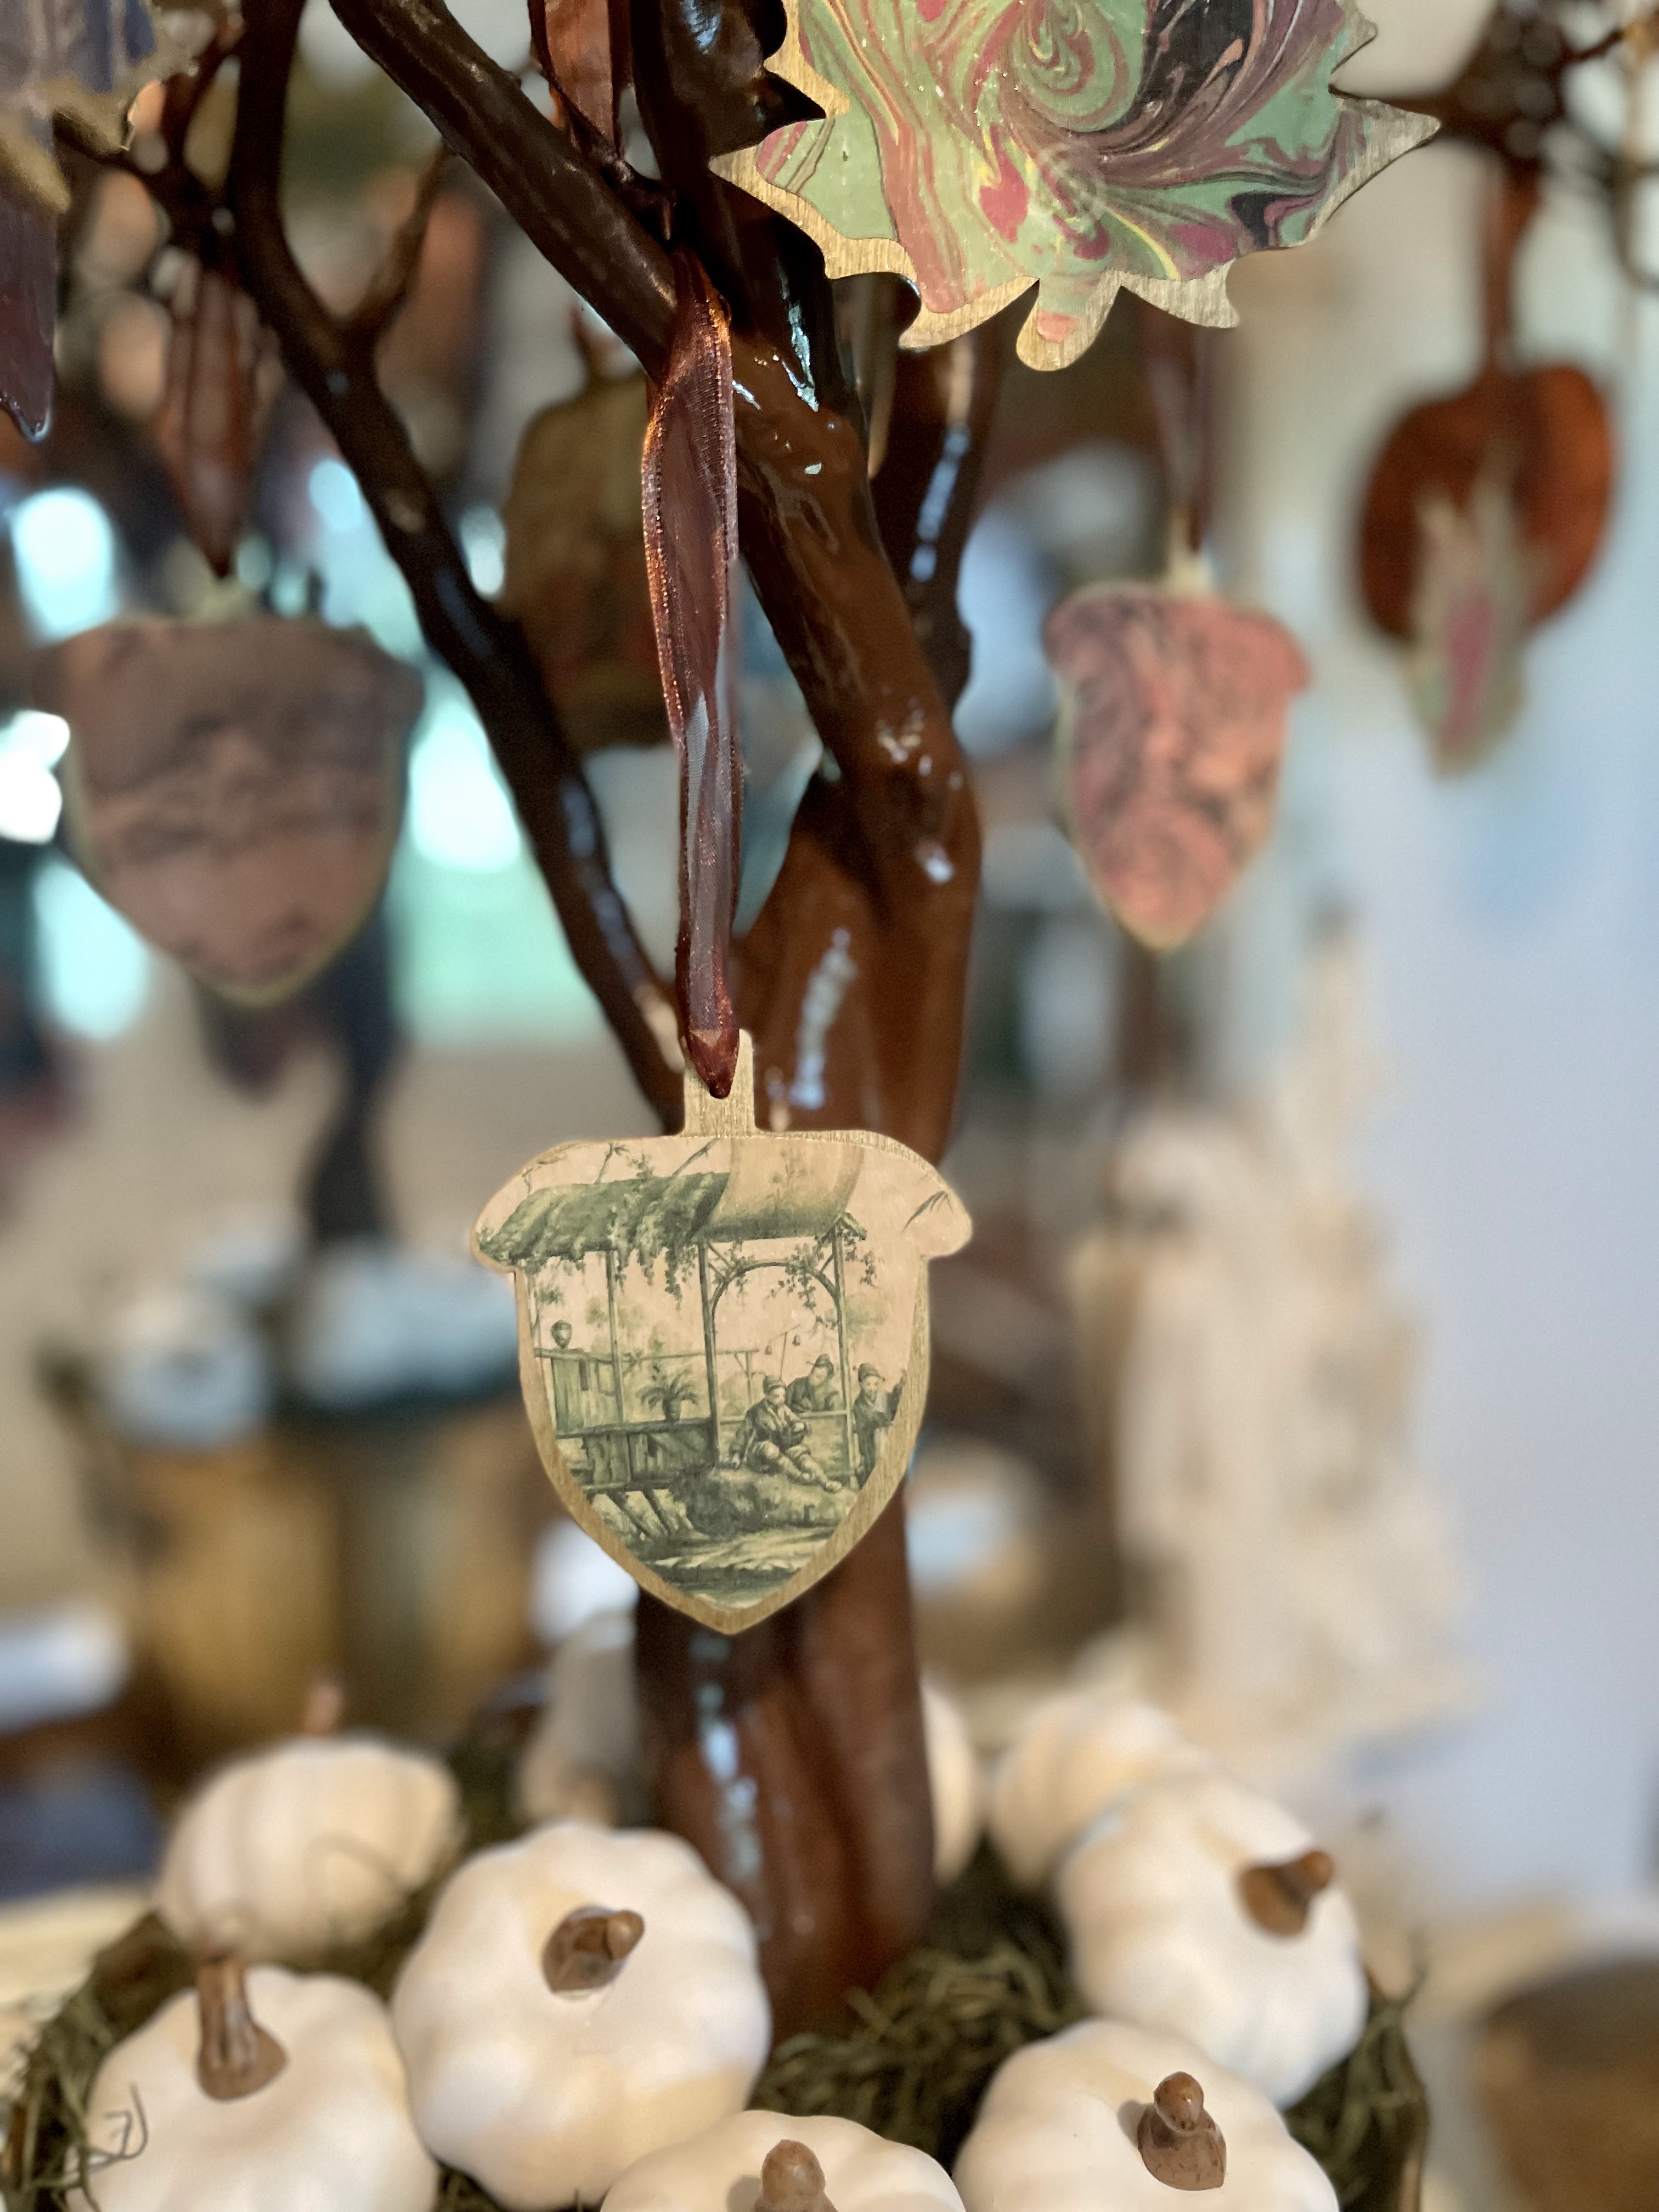

The chinoiserie fall tree is a fun addition to our entryway. I used a lot of ornaments - I like it to be full. I plan to change the faux white pumpkins out with some colorful gourds and mini pumpkins in October but it's too warm/early where I live to get them. This chinoiserie fall tree can take us all the way through Thanksgiving decor wise. 

Be sure to let me know if you make one! Happy Fall.


Sunday, April 3, 2022

Chinoiserie Easter Tree

This is the easiest of projects and a lot of fun because you can get really creative with the papers and ribbons you choose. I wanted some Easter decor that mixed well with my "look" so chinoiserie it is!

This is the same way that I made my chinoiserie and Audubon bird ornaments at Christmas time.

Gather your supplies:

Flat wooden shapes from craft stores, Wal mart or dollar stores. There are even some on Amazon! I used eggs and carrot shapes.

Mod Podge (here's a funny about Mod Podge!)

A foam brush to apply Mod Podge. I used Matte.

Gold spray paint (this is my favorite)

Sharp paper scissors

Papers to decoupage onto your shapes. I used marbleized papers for the carrot shapes. Marbleized papers can be found online and in the scrapbooking section of craft stores. The chinoiserie images were printed on copy paper. You can find copyright free images on museum websites. Just google it - "copyright free museum images" and the museum sites will pop up. Then just search the imagery you want- chinoiserie, florals, birds. It's all available but it takes a little bit of time is all. Print the images out and cut out your shapes. I cut my shapes slightly smaller than my wooden shape so that there is a border of gold around the edge. 


Paint both sides of your wooden shapes gold.


Cut your papers into the shapes you need. I make a paper template that is slightly smaller than my wooden shape so that there is a gold border around the edge. Trace the template on your paper and cut with sharp paper scissors.


Choosing the papers and images is the most fun.

Then simply use the Mod Podge to adhere your images. Paint the entire shape with Mod Podge. Press your image down smoothly and then immediately top coat with Mod Podge working from the middle out to get rid of air bubbles. If you get a small one you can smooth it with your brush. If it is stubborn just leave it alone - they tend to flatten out as they dry if they are small. 


I put decorative papers on both sides of my ornament shapes. They tend to turn when hanging and I place my Easter tree in front of a mirror so it looks like there are twice as many ornaments on there! Add ribbon to hang them with.

That's all there is to it. I put some branches that fell in last weeks storm in a mason jar so that they would stand up straight in my pot. You can add some pebbles to weight it down. I put plaster of paris in my jar and stuck the branches in there. I like the wild and whimsical look of the long branches. I put the jar of branches in a vintage brass planter and added green dyed spanish moss around it.

There is a reel on my Instagram showing the steps and supplies I used as well. 


I hope you make some! It was a fun, easy and creative project and I love the results.  I think they turned out "eggs- trordinary" and the carrots are 'marble-ous"  ;) 


Tuesday, December 18, 2018

Chinoiserie Ornament DIY


I never do this...
until I just did!
We have been decorated since December 1 because we kick off the season on the first Saturday in December with a merry get together.
My shopping is completed. 
Things are relatively calm around our house. 

But I kept thinking about making Chinoiserie ornaments
 and putting them on a little champagne colored tinsel tree.
So I dragged out the crafts supplies, moved the wreath off of the mirror in the entryway and made a little tree with ornaments to go on the chest in front of the mirror.

A last minute project!!
I have tried soooo hard the last few years to avoid the LMP (last minute project.)


These are so simple and easy. 
You, too, can succumb to the LMP :)

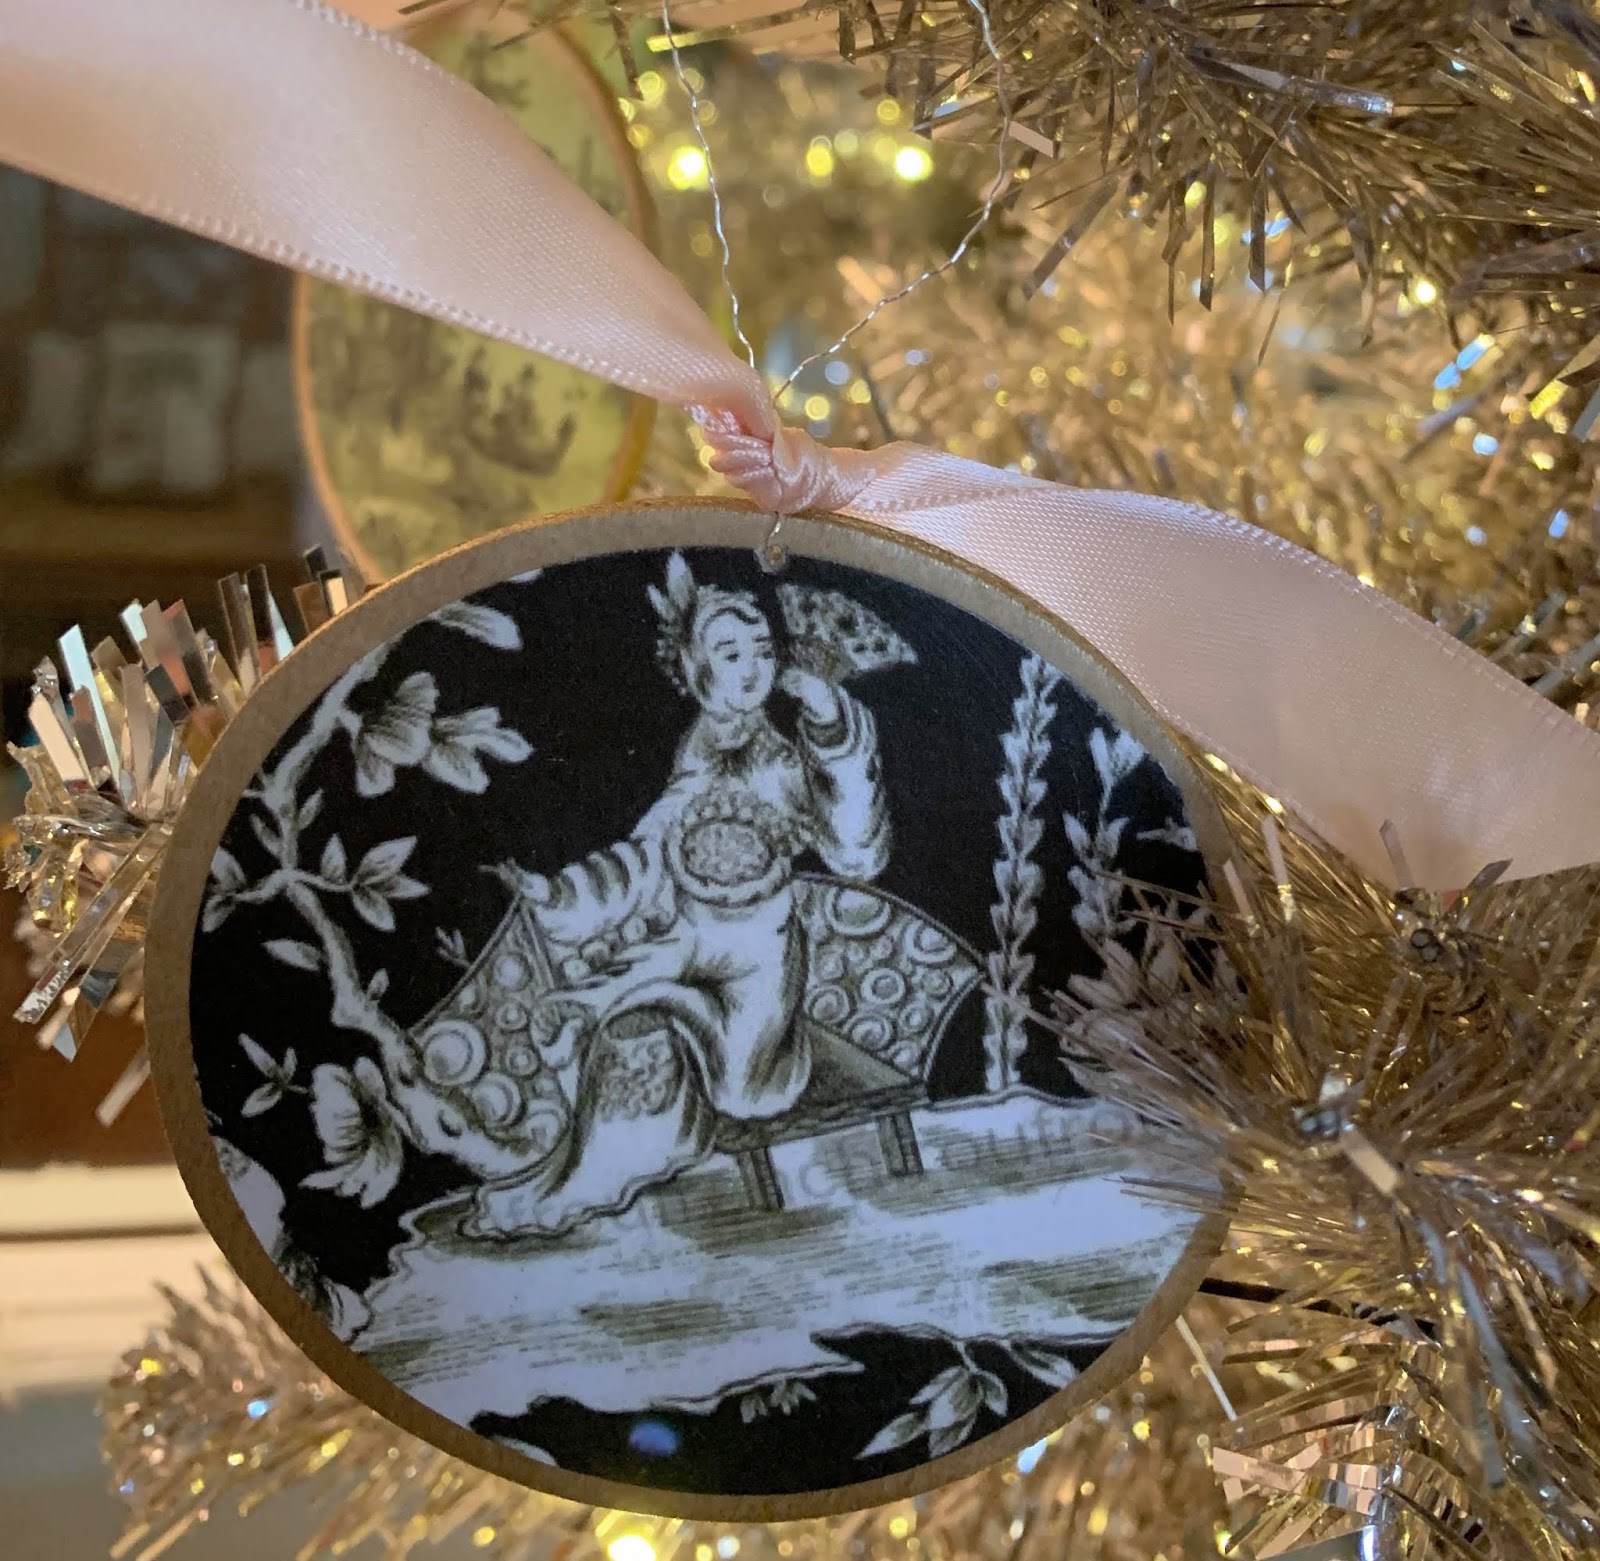
These little ornaments could be tied to packages or garland, given in a set of 4 or 6 to a fellow Chinoiserie fan or simply put on a tree like I did.

A few supplies are all you need.
I used 3" flat wooden discs. I purchased mine at Wal Mart and this was all they had
 because it's a LMP. 
I wanted flat, round papier mache ornaments but they are sold out this close to Christmas.
(I'll be ordering some for next year!)
You need Mod Podge. Please see this post for Very Important Info on Mod Podge.
A brush to apply the Mod Podge.
A large circle punch makes this quick and easy and the circles are perfect. You could cut them out with scissors or use a different shape of wooden ornaments. The punch is not a necessity but I bought mine on sale for 1/2 price so it was barely over $10.00. 
And it is so quick!

I painted my wooden discs with my favorite gold spray paint.

(Late at night on a baby gate box because puppies mean baby gates!)


And then you "Google" to find your images. 
I googled "copyright free chinoiserie images" and "free chinoiserie designs." 
I also googled "historical chinoiserie papers" or designs. 
Any of these combinations yields a variety of images. 
You must be careful to use images that are not copyrighted which is why the historical images  or images from museum collections work so well for this.
Then I printed them out on plain copier paper. You may have to work with the sizing at first but it's very simple to get 4 repeats on one sheet of paper that will work with the punch size.
Then you simply punch out the designs (turn the punch and paper over so you can see exactly what you will be punching out!), glue it down with Mod Podge 
and top coat with Mod Podge.

I actually put an image on each side of my disc so that both sides are pretty. My tree is in front of a mirror so it ensures a nice reflection all the way around.
Let it dry and add a hanger and ribbon. 
That's it. 
You could add more details - glitter around the edge, velvet ribbons and more.

Then find a cute little tinsel tree or add them to your "big" tree!

Saturday, May 16, 2015

A "Girlie" Party for Confirmation

 
This year our entire Confirmation Class at church was girls.
So we had some freedom to be a bit "girlie" in the things we did
and for our celebration at church after our Confirmation service.
 
I made each of them a 'banner" which in actuality was a canvas.
They hung in the Sanctuary.
I used a 12 x 12 canvas that I got in a package at JoAnn's using a coupon.
That made them very affordable.
 

I wanted them to be neutral enough that they could hang them in their rooms
no matter what colors they had.
I used grays and creams.
It was all done with scrapbook paper and Mod Podge.
I printed out our verse that we used throughout the process.
It's on our t-shirts, etc.


Late night banner making!


And then I set out to make the reception afterwards girlie, fun and
spunky like these 6th grade girls are :)
 
Oh, and on a budget and the reception is going to be where all church activities happen -
 in  the largest room at church and usually not super attractive décor.
In our case it's the gym which I love but not really a party atmosphere!
 
I found these super cute flower plates at the Dollar Tree months before our big day.
I bought black and white striped napkins at Wal Mart.
They had gift wrap to match the paper plates so I bought 1 roll of that
 and used it to make a table runner in the center of the tables.
It's narrow so it worked perfectly.
I do this all the time - just cut the ends in a big V like you do ribbons and it looks great!
 

 Then I made big balloon bouquets for the center of the table using balloons,
 black and white polka dot, chevron and striped paper lanterns from the Dollar Tree, and streamers of crepe paper and plastic ribbon. easy and inexpensive.
And I could do it a few days ahead!


If you've been reading the blog for very long then you will remember these "props" from some of my workshops I've led for teachers.
I brought them in and used them to decorate one of the side tables.
This table had a big photo collage of our time together
during the Confirmation classes, retreat, and meals.
And the gift bags held little photo albums I put together for each girl and a little gift that was from an inside joke from our overnight retreat - notice I didn't say SLEEPover!!!
 

 If you want to cheer up a big, boring gym
then I recommend black and white  polka dots and stripes!!


Tuesday, April 23, 2013

Teacher-y Stuff

College Girl's "Big" in her sorority is graduating in just a few short days and the girls all get together and give the graduates a gift basket to send them on their way. It's a wonderful send off and I like that they ask the Seniors for a "Wish List" so they can truly get things they need or want. College Girl's Big is an Education Major and is all ready to find a job teaching little ones (early elementary) and she wanted a basket full of classroom items. College Girl was in charge of her Big's basket and this is not the kind of "stuff" she knows about so she called and said, " Help. We need teacher-y stuff!" Well, not a problem here. Right up my alley. I was on it!! So fun to make and find "teacher-y stuff" for this enthusiastic future teacher.


We started off with this fun sign for the classroom ( you may remember it from before) and set the theme with the colors and polka dots - we were aiming for "instant classroom" and tried to be fairly cohesive and find things that the future teacher would love and could use for a long time. Polka dots and a chalkboard-look on black seemed fun and classic and easy to match when she goes to find more items for her classroom.
Next came the "basket" to hold all the other goodies...

 We went with a large galvanized bucket with a handle. So versatile and useful and I'm all about the galvanized bucket. This is actually the small trash can size from Home Depot and it is only $14.99 and has a handle and lid. She can use it for a zillion things in a classroom. It came plain, of course, and we went to town making it match our theme. And we personalized it. A little strange to thinkof "Big" as Ms. Petry!! :) Was it really three years ago that I met her for the first time at our first Chi O Family Day??

I painted the alphabet and more polka dots on the back. I went with the rainbow/spectrum for our polka dot colors so she can pull out her favorites and these gifts will work with whatever she decides to do in her classroom. I tied a rainbow of polka dot ribbons on the handle and made a name sign for her door.


A little Mod Podge and some cute polka dotted papers in a rainbow of colors ( plus owls since that is the Chi O symbol) and we have a cute clipboard and clipboards are an important part of every teacher's day! It might as well be cute!


A huge burlap pencil for fun and then we filled the bucket up with all kinds of goodies from the "teacher store" near us - Sharpies, notepads, post-it notes, bulletin board borders and a huge owl set for the bulletin board, owl bathroom passes, chore charts, stickers and more. It was overflowing with goodies!!!

Hooray for teachers! Hooray for Ms. Petry!!

Thursday, February 28, 2013

My Scrap Bin and a Board....


turned in to this:
A 6 foot long ABC picture.

I can't even figure out how to photograph the whole thing!

It's longer than my work table in the studio!

I've been seeing all the cute ABC signs and walls on Pinterest and I love anything with the ABC's, typography, fonts, etc. I didn't have any reason to make one until.... I decided to make one to donate to a Silent Auction at Georgia Preschool Association's Training Event  this weekend at the Cobb Galleria! Yeah - an excuse to go for it.
( wow - time to clean in the studio! and yes - phone still smashed.
 It's upgrade month! I just need to make time to go!!!)

I figured out that if I wanted the squares to be about 3 inches, which is about as small as I felt I could go and it could still be big enough to do letters and images and not be too small to see, that I would need a board 6 feet long.
That's 24 squares 3 inches wide which works by combining XYZ.

Seemed reasonable and didn't even seem that crazy until I got the whole thing done
and it is one big ABC board!!!

Of course, the "O" is an owl!!
 
So, here are my ABC's


.... won't you say them, please, with me?
 And hopefully it goes home with someone (who likes loooonnnnng art)
and is a good fundraiser for GPA!!!

I kind of want to make another one. True story.

Update : it sold and is going home with a very happy school director!!

Linking Up:
mop it up mondaysThe 36th AVENUE- A creative DIY blog. Sharing tons of recipes, gift ideas, crafts, home décor and home improvement easy to follow tutorials. Come visit to make the ordinary EXTRAORDINARY on a budget! www.the36thavenue Follow on Pinterest pinterest.com/...#recipes #crafts #decor