Showing posts with label ponds. Show all posts

Friday, June 16, 2017

I Love a Good Garden Center.

I love a good garden center.
To me that means it is charming and has paths, looks landscaped not like plants for sale on a bunch of big box store shelves and they don't care if I wander. 
I like atmosphere and ideas I can use.
You just know it when you come around the corner and spot one of these special places.


A couple of weeks ago I was visiting my parents 
and my mom directed me to the cutest garden center ever, Liberty Landscapes.


If you are anywhere near Bedford VA it is worth the trip. 
(The D-Day Memorial is in Bedford and it's amazing. 
Make the trip and see it, then go buy a plant. Or two.)
 #yourewelcome

(See - not your average garden center!! It's gorgeous! #backyardgoals)

This place is like wandering around a really pretty backyard on a garden tour. 
Except it's big and fabulous.
It is housed in an old coal and ice warehouse and railroad yard 
right along the railroad tracks.

 I could just move in.

(original, real deal sliding doors!)

It's good from the old rusty truck out front that announces they are open 


(don't you want to find an old, rusty truck now?)

all the way through to their social media presence
They post a plant of the day every day on IG with an informative blurb.  


Gardening eye candy and you learn something too.
#winwin


They are so nice.(Ask for Ashby - he's awesome!!)
 And obviously talented so be sure to go.
I tried to convince them to serve refreshments to me in the garden.
#umbrelladrink
#betterlucknexttime


I wanted all.the.plants.
I did buy a plant even though I was traveling.
The displays are irresistible!!

Thursday, May 25, 2017

From My iphone 5/2017

Some randomness from my phone.
It's a mixed bag for sure!

This one pan ( read 5 minute clean up) recipe is turning into a major favorite around here. I've made it for my parents when visiting and they are big fans too. The original came from Waiting On Martha but I have tweaked it slightly. 
I have switched WOM's green beans for the asparagus. 
The timing still works perfectly and we love it.
It's in the rotation!


I bought tickets to see India Hicks speak at a garden club fundraiser.
 I have been a fan since an article in a magazine decades ago. She's my hero - she ran away to  small island and lives in a big white house. What more do you need??
She was delightful.
Go see her if you have the chance.


I'm loving these two chinoiserie fabrics currently.
Where, oh where, can I use them?


(I've used this fabric before but in a different colorway. This colorway is growing on me!)

I posted pics on IG and on the blog of a blue version
of these hand stamped anthro knock off curtains. 
I printed the pink version for my One Room Challenge.
The details of how I went about it and what I used are here.
I will tell you that for the blue version I used old sheets, laid them out on a table and eye-balled the layout. You can read why time was a major factor.
For the pink version I was printing on IKEA panels and I laid them out and used painters tape and a t-square to create a registration process for the hand blocked layout. It didn't take much longer to do the measured registration if you feel the need for more definite order. However, when the two different treatments were hanging I couldn't really see where the more precise layout made any difference. So if you are pretty sure handed and can eye things then you may not feel the need to register the block printing.


Then I felt the need for a pink pagoda pillow. The example I found while making my Olio Board was $91.00. So you know what that means? I had to make my own! I used a white pillow cover I happened to have, some of  the gorgeous Sherwin Williams paint - Ruby Shade- I used for my block printed curtains, and a small flat brush and painted it freehand.
 I like it. 


I am currenty obsessed with the Watermelon Mint Lemonade at Chic Fil A.
It is sooooooo good!


Where have I been??
I just discovered @blueandwhitehome on IG. 
Great feed!
Look at this porch. I want to be there. Sipping Watermelon Mint Lemonade!!


I'm also loving this blog right now!
I fell in love with their room on the One Room Challenge that I just participated in and now I'm reading the blog like a book!
J and J Design group.
This room!!!!


And school is out here. 
So we are putting together a Summer Bucket List and getting ready for FUN!!


For us that means lots of porch time with friends. Grilling. Relaxing. Chatting!
BTW, Chloe is more excited than she looks!


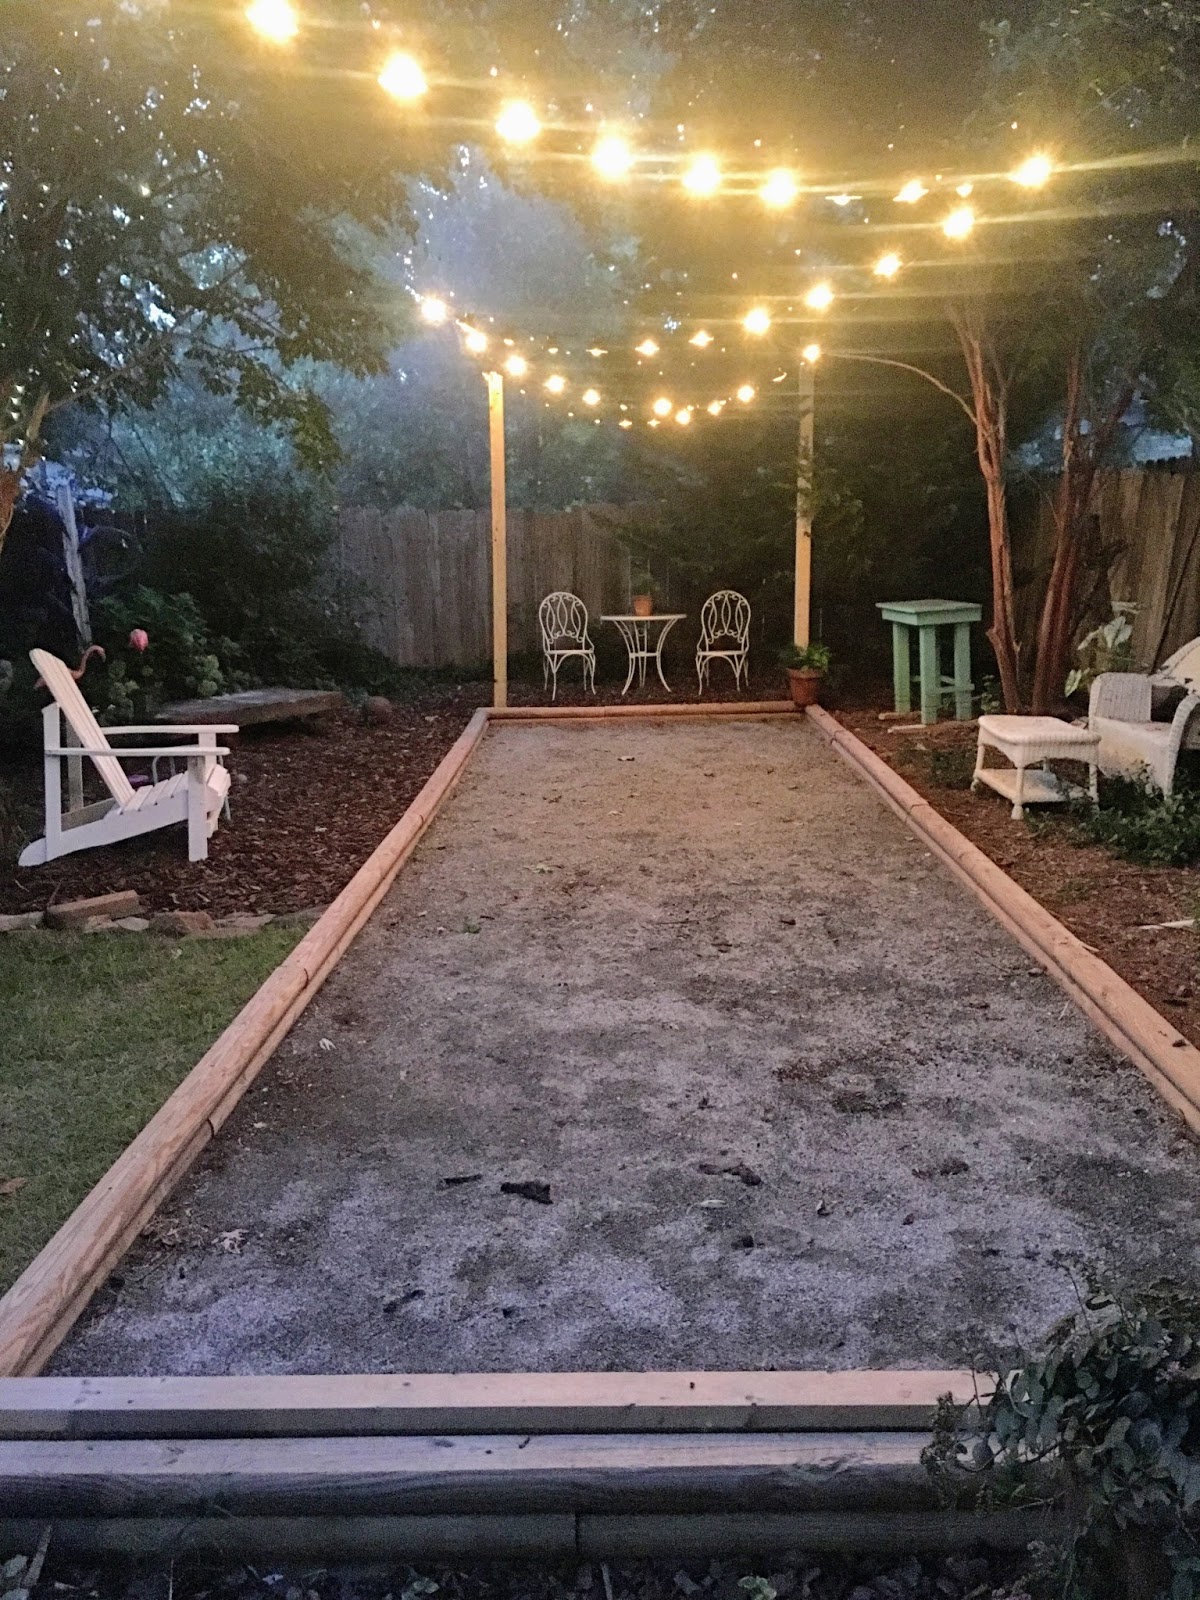
Time on the Boules court...
And maybe an umbrella drink around 5 o'clock right here on the shady chaise!
 

Happy Summer!

PS. I love to see pics of fabulous backyards to hang out it.
Tag me on IG if you post your backyard hang out spots!


Wednesday, October 12, 2016

#porchliving

As we transition into Fall in the South we have cooler evenings and
 occasionally cooler days in September and October,
 but it can still be very warm during the day. 
 The 80's are not out of the norm in Atlanta.
 That makes dressing in blanket scarves and boots a bit tricky early on but it makes for absolutely perfect #porchliving.
I'm also addicted to Southern Living mag.
I recently ran across this article about Southern Living on Lonny called the
"Essentials of Southern Girl Style."
Got my attention.
I'm in total agreement from top to bottom, coming in with 9 out of 10
( with 4 being Monograms in general, in my case.)
No Mint Julep cups... yet!
And sitting right in the middle of the SL list was this picture below of a perfect porch
and the statement that we revere our porches.
 Laurey W. Glenn/Southern Living

5. Porch swings

"In the South, the porch is a sacred place, and there’s no better way to enjoy one than a well-designed porch swing.”


True Story SL!!

At our house we decided to take the porch swing a bit further and put a hanging bed on our porch several years ago.
I've had some questions about our porch bed (best napping spot in the South) so I'm going to show you how incredibly easy it is to have a hanging bed of your own.

So this is just a simple rectangular box framed to hold a mattress. Their are cross pieces on each end with large eye bolts in them. The bed is propped on buckets to make it easy to work. It's pretty solid and heavy. Our bottom board is removable. That's up to you.


In between the ceiling joists we have braces that are secured with screws.   
Then the eye bolts are screwed in to those.
Check the weight allowances for the eye screws and chain and be sure that everything will support the weight that it will hold. 
We went with heavy duty eyes and chain.  We reallllly overcompensated.


We use it all the time. It's the best napping spot in the land!
In the morning the sun shines in. In the Fall it makes it warm and cozy.

Here it is all freshly painted and ready to relax in. 

We have some old cushions that fit in the recessed frame and then we have an IKEA mattress topper on top of that. We used the IKEA topper because we had it from Mollie's many college moves. (Lots of previous posts on this topic!!)


We just rearranged this section of the porch,
moved the hanging bed (previous arrangement here), 
freshened up the paint
and added all of this great bamboo furniture that came from a local thrift store!
My husband sent the picture below and a text asking, "Do you want this?"
Am I breathing? 
And after my ridiculous "No" on the wicker couch a few weeks back I did not hesitate!! #yesplease


Such a score!!!
#nobambooleftbehind


And while you are relaxing on the swinging bead snoozing or reading a book you can hear the trickle of the mermaid fountain right outside the porch.
See it peeking through the ferns?


It's cool and shady in the afternoon.
In the Summer it's perfect with the fan circulating the breeze.
And if it's a little chilly on shady Fall evenings we have cozy blankets 
and there is a gas insert in the fireplace beside the hanging bed.


Yep, #porchliving is best!

Friday, August 19, 2016

On Garden Pond...

Remember when I was pondering a few months ago?
These are the ugly 'befores."
We had to move a pond due to another project 
and I was definitely  not  "all in" on the work involved.
My husband reallllly wanted a pond at this end of the porch still 
(there's another little one at the other end of the screened porch)
where he could hear the trickling water sound from "his" chair on our beloved porch.


So I grumpily began moving the liner and pump from the previous location.
I was determined to use what we had laying around.
After a few changes in layout plans I hit my stride and it went together very quickly. I had to build a small 'retaining wall" from some pavers we had hauled home years ago when a house nearby was having a concrete driveway poured to replace the creamy gold pavers that had been there for over 40 years. 
They gave them to us and we have used them for so many projects.


Then I filled the area with dirt left from the Boules Court project (here)
I used the pavers from the previous pond and a firepit project. They are not exactly the same color. As soon as it cools off a bit I will paint them with a buttermilk concoction
 and try to grow some moss on them. 
I love moss in the landscape and I think it unifies different finishes and things that look too new.


I had the two large pots and the one in front hanging out in my potting area. I divided some hostas and a few other plants and started planting.
I also bought a few plants from the  clearance area in the Lowe's garden Center. (No sponsorship here. Just a tip that they mark plants down to a dollar or two and all they need is some water and maybe a little fertilizer)
I bought the butterfly bush from in front of my Kroger for $4.99 and put it in the largest pot. It has doubled in size. 
I couldn't plant until I got back from my mission trips and things have filled in quickly.
#gooddirt

So this pond barely cost a thing to install.
Bargain plants filled in with some TLC.
And the trickling sound is relaxing when we sit on the porch.

So if you are pondering installing a small pond, I say go for it!

Thursday, May 19, 2016

Hydrangea Love!


(taking a little break from all the ORC chatter!)
I love my hydrangea bushes.
A lot. Probably more than I should.


 I had to dig them up and put them in pots a few years ago because
 I really love my two big Goldens as well and they are not easy on gardens.

The hydrangeas outgrew those pots and this year my handy husband
 used pallet wood and a plastic bin to create some great big planters.


An aerial view: We decided to build around the plastic bin to help the wooden framework hold up better and to allow for legs on the bottom so that we could level the planters on sloping ground.
We looked at a lot of ideas on Pinterest and then just went for it.
 I'm sure there are some good DIY's to follow if you want to make some. 
We didn't take step-by-step pics because there is a ton of info out there already!


They are very simple and rustic. 
We knew they would be covered by the plants and 
we really didn't need anything too formal or fancy. 
I just needed a very economical way to get really big planters. 
The pallets were free and the tubs were less than $5.00 at Wal Mart.
 Seriously, nothing swanky going on here.


And look at how the bushes have taken off!! 
They are covered in blooms about to burst into color!!
I'm obsessed!!


The hydrangea behind the pond is in a huuuuge pot and is loaded with buds this year, too.


I add something to the dirt to convince my blooms to be blue but I have lavender and pink blooms this year anyway! I think it must be all the extra soil added to those huuuuge planter boxes. I'm just happy to have so many blooms - whatever the color!


And this hydrangea bush is Limelight and makes all the other bushes green with envy!

#summerinthesouth