Showing posts with label door hangers. Show all posts

Monday, April 24, 2017

Front Door Confessions

The sad truth is that our first impression isn't so great right now. 
Our house faces West and our front door takes a beating from the sun.
(Here's a picture from December - lots of beige brick! 
Traditional metro Atlanta 5, 4 and a door.)


And all of our stormy rains seem to blow in from the West. 
It's time for some maintenance and some paint so I am day dreaming about the possibilities.

I do not like our brick but I have to make it work.
I would love to paint it white. 
(I love white painted brick so much! Look at this beauty.)

7 Brick Houses Done Right - Rooms For Rent blog:

Painted Brick. A dream come true for me but makes my husband twitch.
#nothappening


Our front door is SW Urbane Bronze. It's off of "my strip" as I have mentioned before. 
All of my seasonal decor looks great against it...


 ...but maybe I'm ready for something peppier. Or brighter.

Here are some first impressions I really love.
I've been searching for  a big concrete dog (I can afford) for quite some time. 
Remember my trip to Concrete World?? 
Someday my dog will come!
(I compensated with a giant Santa at Christmas)

7 Fabulous Front Door Ideas:


Can't go wrong with white on white on white,
The striped pots and coral mailbox don't hurt a bit.

photo 6:

This green door sitch is fabulous. 
My doors were green a few years ago. Maybe I should revisit green.

Give guests a warm welcome with friendly tones of green, gray, and blue. This grand double-door entry is balanced by its easygoing, leafy hue and simple carving. The weathered patina of the pendant lantern suggests a home that's mellowed over time.:

And how about just green with envy...

Norman Askins Atlanta designed home via Pinterest

Coral is always a win in my book but maybe not with my brick.

Blushing Salmon Beautiful | ZsaZsa Bellagio - Like No Other:

Mmmmm. Turquoise...

Turquoise front door in Greece. -  Photograph by Tom Gowanlock:

or darker turquoise...

Turquoise Houses of Seaside, Florida:


This would not work with my brick but it is all kinds of perfect!!

Dream door with ivy:

Usually when I paint I like to make a change. 
I mean, if I am painting it might as well look different but I'm sooo undecided. 
I love the Urbane Bronze. I haven't gotten tired of it and that's saying something!
What color is your front door?

Thursday, February 11, 2016

Pink Chinoiserie!

For Valentine's Day!


I had a scrap of birch plywood on the porch
 and I had not put anything on my front door since the Christmas decorations came down

So I cut out a big, fat heart.


I put a quick primer coat of white paint on it.
And then I grabbed some pink paint.
A little bit of quick sketching.


And then I just quickly painted some images
 from my favorite blue and white dishes that I have around the house.


 It was a lot of fun.
 You just need one color of paint and some white paint. 
That's it!
I used Sherwin Williams Eros (deep pink.) 


I wanted to freshen things up a bit. It's been so gray lately.

And Mollie has a friend coming to stay for the weekend. 
A group of them are going out to celebrate "Singles Awareness Day" this weekend. 
The name for February 14th if you are unattached :)


I had the perfect pink Greek Key ribbon!
A quick bow and on the front door it goes!


 There! 
Nothing says "hello" like a pink Chinoiserie heart
 and some sunshine!

This was a quick and easy project. 
And since I have wanted to make blue and white Chinoiserie Christmas ornaments for literally two years
 I'm feeling pretty accomplished to get this painted 
and show the front door some love!!

Saturday, June 20, 2015

Banner Making


Soooo, every year the team gives a banner to the village we visit in Honduras.
There is always a welcome banner hanging up at the school when we arrive 
and we present ours when we are preparing to leave. 
They keep the banners and display them in the village. It's very sweet.

Wellll, I volunteered to make the banner.
 Months before the trip.
Literally months.
Last year we did it at the camp one night and I thought that it would be nice to do it in  advance with all my supplies close at hand.
Makes sense. Except I procrastinated. 
I had a zillion things going, deadlines, etc. and I just didn't get on it.

I thought about it. 


And I barely took any pictures when I finally did it.
And when I did, it was dark and I was working on a table outside on the screened porch.
So this is what I've got :)

I made the banner from a remnant of bleached drop cloth.
 It's about two and a half feet wide by 5 or 5 1/2 feet long.
I made two rod pockets - top and bottom 
and straight stitched the sides because drop cloth ravels like crazy.


I outlined a big flower in black and College Girl and I painted it with lots of bright colors.
We used craft paints and Sherwin Williams Color To Go samples.
We used big brushes and blended the colors in big strokes on the banner. 

I slid a slender branch into the two rod pockets.
I tied twine on the top branch to make a hanger and
 the branch in the bottom rod pocket was to give the banner weight 
so it would hang straight after being rolled up in a suitcase and hauled up a mountain!


But the really fun part of this banner 
was the rainbow ribbons I sewed to the bottom 
and forgot to take a picture of!!

This is the only shot I have of the completed banner which we all signed 
and gave to the village on our last day.

We provide the food for a fiesta which is a big deal and a lot of fun. 


Everyone in  the whole village gets to eat a big meal.

We sing our respective national anthems, there are a couple of speeches, games
 and hugging and goodbyes.
It's hard to leave.

Saturday, May 16, 2015

A "Girlie" Party for Confirmation

 
This year our entire Confirmation Class at church was girls.
So we had some freedom to be a bit "girlie" in the things we did
and for our celebration at church after our Confirmation service.
 
I made each of them a 'banner" which in actuality was a canvas.
They hung in the Sanctuary.
I used a 12 x 12 canvas that I got in a package at JoAnn's using a coupon.
That made them very affordable.
 

I wanted them to be neutral enough that they could hang them in their rooms
no matter what colors they had.
I used grays and creams.
It was all done with scrapbook paper and Mod Podge.
I printed out our verse that we used throughout the process.
It's on our t-shirts, etc.


Late night banner making!


And then I set out to make the reception afterwards girlie, fun and
spunky like these 6th grade girls are :)
 
Oh, and on a budget and the reception is going to be where all church activities happen -
 in  the largest room at church and usually not super attractive décor.
In our case it's the gym which I love but not really a party atmosphere!
 
I found these super cute flower plates at the Dollar Tree months before our big day.
I bought black and white striped napkins at Wal Mart.
They had gift wrap to match the paper plates so I bought 1 roll of that
 and used it to make a table runner in the center of the tables.
It's narrow so it worked perfectly.
I do this all the time - just cut the ends in a big V like you do ribbons and it looks great!
 

 Then I made big balloon bouquets for the center of the table using balloons,
 black and white polka dot, chevron and striped paper lanterns from the Dollar Tree, and streamers of crepe paper and plastic ribbon. easy and inexpensive.
And I could do it a few days ahead!


If you've been reading the blog for very long then you will remember these "props" from some of my workshops I've led for teachers.
I brought them in and used them to decorate one of the side tables.
This table had a big photo collage of our time together
during the Confirmation classes, retreat, and meals.
And the gift bags held little photo albums I put together for each girl and a little gift that was from an inside joke from our overnight retreat - notice I didn't say SLEEPover!!!
 

 If you want to cheer up a big, boring gym
then I recommend black and white  polka dots and stripes!!


Tuesday, March 31, 2015

Burlap and Bunnies

While the burlap and paints were still hanging around
 I made last week for a friends' Girls Night Out activity,
 I decided I should at least make an effort to put something on the front door that would give us a little Easter decor before it's too late.
 
 
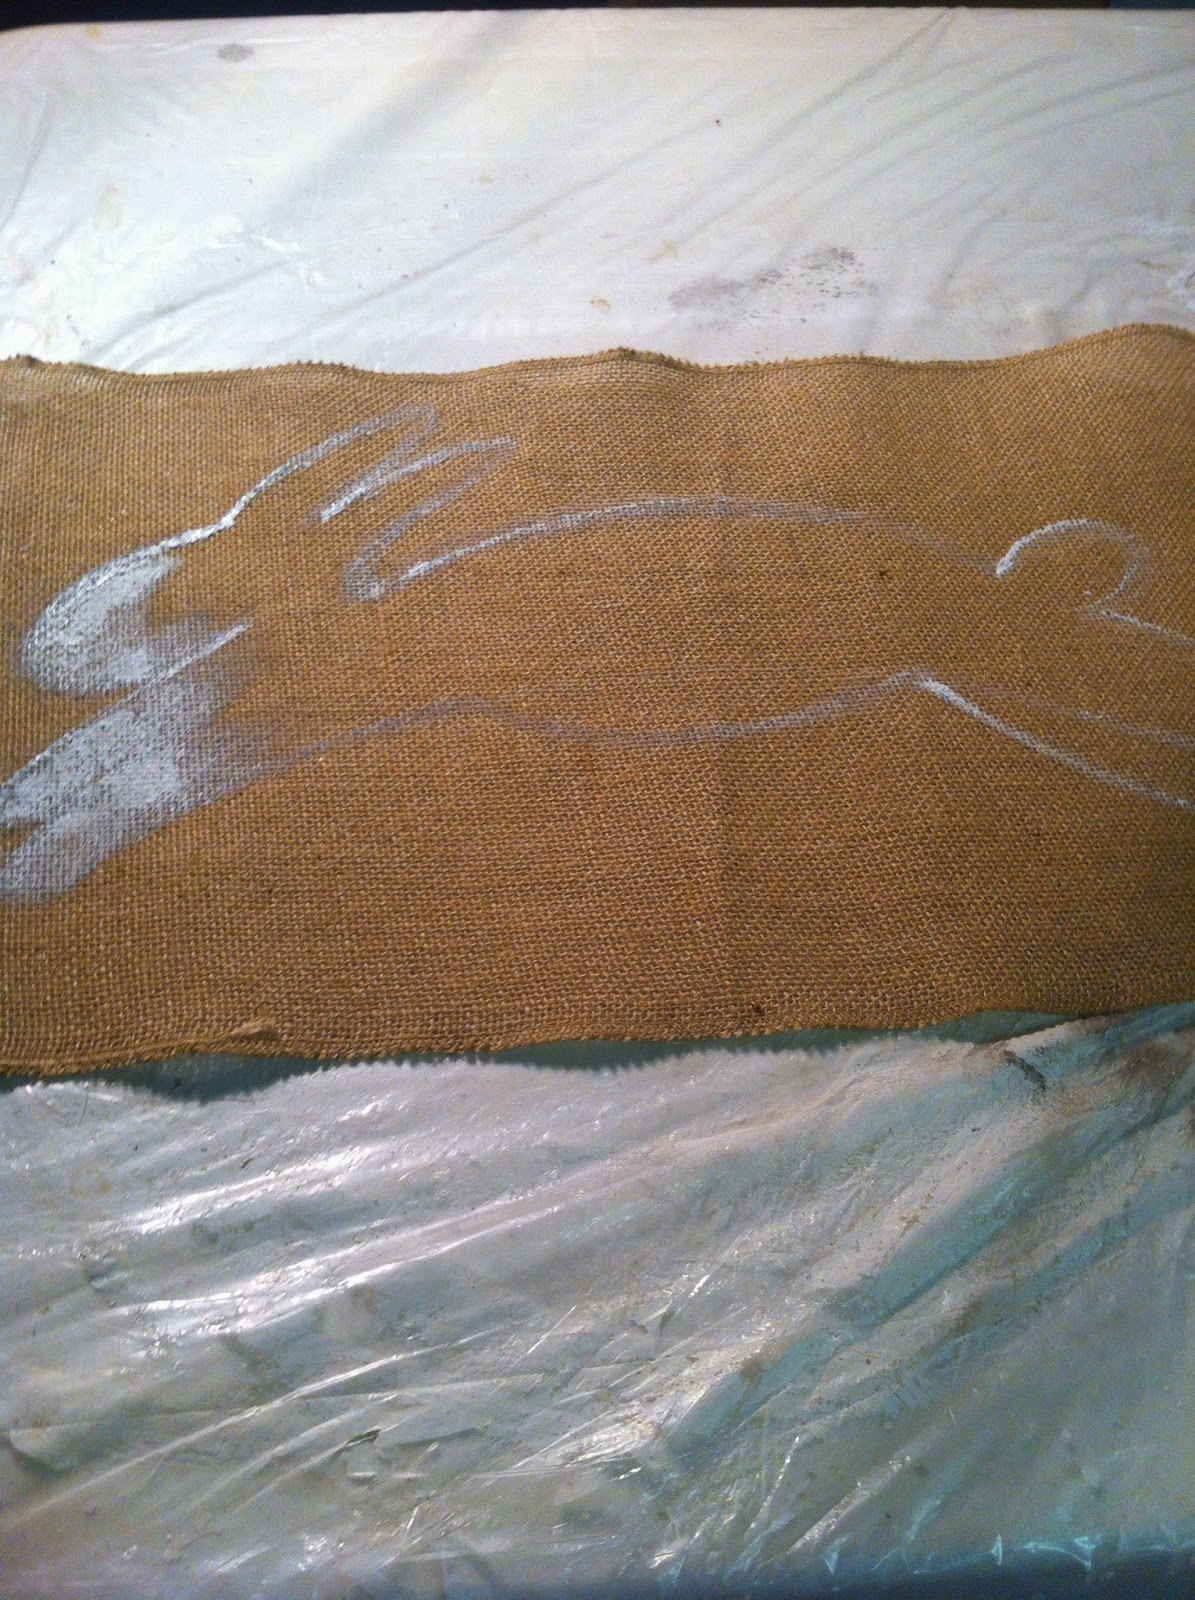
So Burlap and Bunnies it is!
 
 
A quick outline on the burlap runner remnant.
 I just use a flat paintbrush about 1/2 inch wide and paint the shape.
 
I filled it in with a larger brush and then while the white was still wet,
 I gave the bunny pale pink insides of his ears and cheeks.
I love to paint leaping bunnies.
 
 
I sketched in some carrots at the bottom
 and started painting grass in multiple shades of green.
All very quick and simple.
 

I painted lots of blades of grass.
Then I used a Spouncer and added yellow polka dots all around the bunny.

 
I gave him a pink nose and a black dot for an eye.
After he dries I will erase the chalk outlines you can see around the carrots.
I'll use a sharpie to draw a few whiskers!
 
And it's on the front door -and it's not the day before!
Time to spare.
 
I didn't have a dowel rod long enough so I used a fairly straight branch from the yard.
 We've been pruning so plenty of branches on hand.
 
 
It was impossible to get a non- shadowy picture on the front door yesterday so I took one of it flat on my kitchen table so you can see the branch.
I just added a hanger from orange gingham ribbon.
 I had it on hand and it looks good against my SW Urbane Bronze front door.

So quick and easy with the hemmed burlap table runner.
Other than drying time this whole project takes less than an hour.
So, hop to it and get one made before Easter!!


Tuesday, March 24, 2015

Burlap Banners - Quick and Easy!


I know these are everywhere and there are tons of tutorials
but after I posted a picture on
I had a bunch of how-to questions and promised a tutorial.
 
 
These are so quick and easy.
 
 
Wow - that's blurry.
I bought a roll of burlap ribbon/table runner from Wal Mart. It was on an end cap.
It is 12 inches wide and has finished edges.
It was $5.97 and will make several.


I cut a length 21 inches long.
 I didn't measure but a friend texted me
and wanted to know the dimensions, so I measured.
I folded it in half and cut it at an angle.
 
 Think about it before you cut and make sure you are angled the right way!!
I mess up at least one bow every Christmas!!
 
I ended up with this 'pennant" shape.
You could leave it straight like I did on this one.


This was a scrap of burlap with frayed edges on all 4 sides.
It was drying here - the tape came off later.


Then I took a piece of chalk and lightly doodled a whimsical letter on the burlap.
Just work with it until you are happy with it.
The chalk lines will wipe right off later.
 
If freehanding and whimsical is a little outside your comfort zone
 then you can print off your letter in any font you like.
 Just enlarge, enlarge, enlarge until it's the right size
 and you can see right through the burlap to trace it with chalk.
Seriously that easy!
 
Tonight a friend hosted a Ladie's Night Out and I was the entertainment - LOL!!
They ate and chatted and created.
It was a relaxing, creative evening for all of them -11 total.
They had a great time!
( Two of them work together at a school and
 I think they are going to have this as a staff meeting!!
 A treat for hard working teachers.)


Then take a flat edged, fairly stiff bristled brush
 and trace the letter lightly in your paint color.
The brush I used was about 3/8 to 1/2 inch.


And then with either method just start painting the letter
 and filling it in until you are happy with it.
 
And then we used spouncers to add polka dots.


I put gold dots on my banner because it is headed for College Girl's front door.
 
 
 And she loves gold polka dots on burlap.
 
Then you can sew a rod pocket at the top and slide a dowel through
or glue a scrap of lattice across the top and then add a twine or ribbon hanger.
 
I didn't get that far tonight but I'll try to put a picture of the finished banner
on FB and IG so be sure to look for it in a day or so.
 
And not everyone painted their initial.
You can do anything you want on a burlap banner.
 
 
 These are so quick and easy (and inexpensive) that you can still make some for Easter gifts!!
 
Linked up at: