Tuesday, November 29, 2022

Coffee Table Books and a Christmas Tradition.

We started a new to us Christmas Eve tradition a few years ago (and it was a nice one to have the last couple of Christmases!) I've written about this before. I wanted to share again for two reasons. One is that once children are grown and some of the "Santa" traditions don't happen anymore there is a bit of a void to fill after Christmas Eve service and a special dinner. The second is that I have a lot of great books to share in case you want to start this year. 

And, really, there's a third reason - it's never too early to start this tradition even if you are still leaving cookies out for Santa!

The tradition is called Jolabokaflod and it originated in Iceland. 

"This tradition began during World War II once Iceland had gained its independence for Denmark in 1944. Paper was one of the few commodities not rationed during the war, so Icelanders shared their love of books even more as other types of gifts were short supply. This increase in giving books as presents reinforced Iceland’s culture as a nation of bookaholics.

Every year since 1944, the Icelandic book trade has published a catalogue – called Bókatíðindi (‘Book Bulletin’, in English) – that is sent to every household in the country in mid-November during the Reykjavik Book Fair. People use the catalogue to order books to give friends and family for Christmas.

During the festive season, gifts are opened on 24 December and, by tradition, everyone reads the books they have been given straight away, often while drinking hot chocolate or alcohol-free Christmas ale called jólabland."                                                               From Jolabokaflod.com

We are a family of readers (we love to eat, too, but we turned our dining room into a library - we are definitely readers!!) but this is still a great tradition if you have a few less enthusiastic readers in your family. There are books on every hobby and interest and for every age. And just like the Icelanders you may foster a love of reading. I would include comic books and make and do books like paper dolls if that's what it takes to get someone to read! And it doesn't hurt that hot chocolate or chocolate candy is involved! Books that favorite movies were based on would be a way to interest a reluctant reader as well. 

I purchase the books each year for everyone in the family. The first year or two they were surprises but now they start telling me about books they want months in advance! And, of course, I choose my own books carefully. 

I have gotten some beautiful books as my Jolabokaflod books and it's so much fun to look forward to opening them. 

Here are a few favorites:

Safari Style is one of the most elegant design books ever. I have wanted to go on safari since I was young but even if that's not on your bucket list this book will intrigue you. And there are design ideas that are relevant to any suburban, non safari style, home. If you love following Serena Crawford's adventures on IG then you'll love this book. 

Rattan is an all time favorite. It is full of amazing, inspirational photos and a great history of  fabulous rattan furniture produced all over the world.

I treated myself to Dragons and Pagodas: A Celebration of Chinoiserie last year. 

I loved Chrsitopher Spitzmiller's book, A Year at Clovebrook Farm. I love books that are structured that way. Do you?

I own all of India Hicks books. They are all so beautiful and so much fun to read. She is very entertaining. I have this one this one  (probably my favorite) and this one. I gave my mother this India Hicks book and she loved it. 

This Mark D. Sikes book is one I can look through over and over again. Sometimes I reread and sometimes I just soak up the beautiful images.

I gave my mother this book several years ago as she was quite the blue and white collector. Now the book is in my collection and I've enjoyed reading it and ooh-ing and aah-ing over the fabulous blue and white pieces in the book. 

And I must include this favorite. I don't know how many times I've read this book by the late, great Furlow Gatewood. This book is a must-own.

This is another book that I gave my mom and now have in our library. I love this book and I am excited to hear that Nora Murphy has another book coming out - 2023 I believe. 

I could go on and on but I can't end the list without gushing about how much I love Island Hopping by Amanda Lindroth. 

Oh, and any and all of the books by that boy from Perry, Georgia - James Farmer. I gave my mother one for Christmas and he wrote the sweetest note inside - not just an autograph! She loved his books. 

I hope you give (and get) books this Christmas. We love to give books for all occasions but I'm especially taken with the history behind Jolabokaflod.


Sunday, November 27, 2022

Can You "Spot" the Newest Ornament?

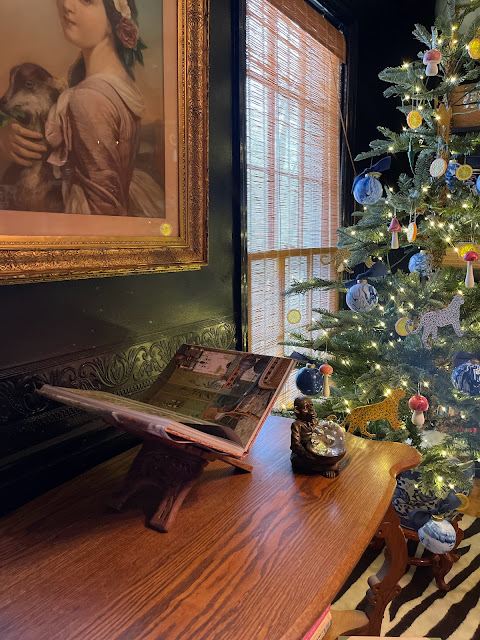
You didn't really think I'd decorate my new King of Christmas Tree and not include leopard print in some way, did you??

I decided to go big and incorporate leopard print by including the leopard itself! I found these leopard shapes back in the summer. I could immediately imagine them on my tree. I liked that they were a little larger. It adds a nice variation in scale and it only takes a few to make an impact on the tree. 

I painted the first one or two in "traditional" leopard tones - golden tans and black spots. 

And then, I wondered about a fun colored leopard and tried a couple of blue ones! 


Now I can't decide! Tan only? Blue only? Or both on the tree? 

What do you think? 

Be sure to keep following along because I still have a couple more DIY ornaments to create for the tree. I'm not finished yet!

Thursday, November 17, 2022

My Paperwhites Are Planted.

I'm excited because I am never, ever this on top of it. I usually have paperwhites for Valentine's Day not Christmas. It's actually a nice touch during the cold, gray days of February, but this year, just maybe, I will have paperwhites for Christmas!

Do you like to force paperwhites? I love them and I love the scent. Some people do not care for them but I think they smell nice. They don't smell as good as a forced hyacinth in the house but that is for late Spring.

This year I found bulbs at my local garden center. I never found any bulbs last year so this was a good sign for my rather haphazard bulb forcing history. There are plenty of places to order online but that requires even better planning!


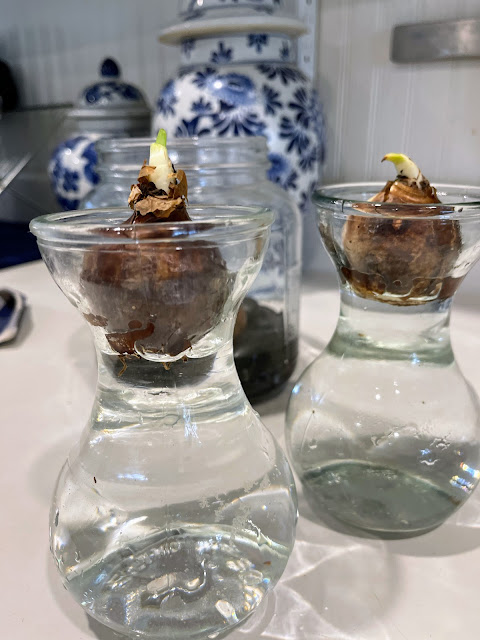
I decided to use an old square-ish jar for some of my bulbs. The stalks will grow quite tall and the jar provides some support and I think it will be a fun look. I already had a bag of dark rocks from the dollar store so I decided to use those.


I nestled the bulbs on the rocks - wiggle the rocks until they are fairly even and your bulbs sit steadily on the rocks. This is important when you are adding the water. 


I used a cup to slowly pour water just to the bottom of the bulbs. Be gentle because you want your bulbs to stay in place. You don't want your bulbs to sit in water because they could rot but the water should just brush the bottom so roots can begin to grow. 


I also had several bulb vases that I saved from last Spring when I purchased hyacinths at Trader Joes. Just one hyacinth in bloom can make the room smell amazing. You just fill with water and add the bulb. So easy. 

Another reason I wanted to use the jar for my bulbs? It has the perfect neck for a ribbon! That makes it even more festive- especially if you give these as gifts!


I hope you try forcing some bulbs this winter. It's also a lot of fun to do with children because they can see all of the parts of a flower through the clear container. The paperwhites grow very quickly so it's very gratifying too!


Sunday, November 13, 2022

Marbleized Mushrooms? What's Next?

There seems to be no end in sight when it comes to marbleizing items around here!

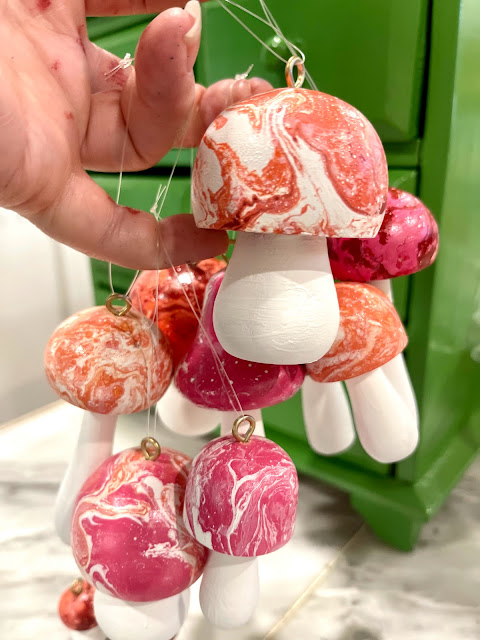
Today it is mushrooms - wooden ones, not the real thing.


I used the same technique to marbleize my wooden pieces as I did the Christmas ornaments. Full DIY here. You can see a video of the mushrooms here.

I used my favorite Rustoleum 2x spray paint in Berry, Blossom White and Coral to create my mushrooms. You can find all kinds of wooden shapes to marbleize but I chose mushrooms this time.

I painted my mushrooms white before dipping. Here they are drying under Cooper's careful supervision :)


I had to go back and touch up the stems a little after the marbleizing dried. 


I added screw eyes and fishing line so I could hang them on my new King of Christmas Noble Fir tree.


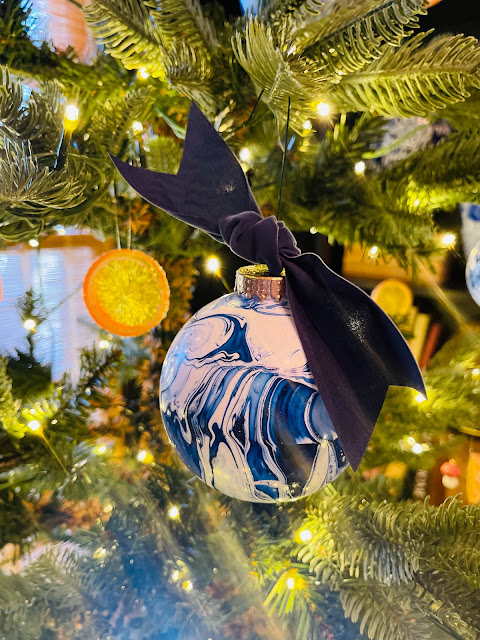
I'm loving the warm colored swirls on the mushrooms with the blue and white marbleized ornaments.


Be sure to follow along. I have a few more ornament DIYs planned for this tree in our Library. 


Thursday, November 10, 2022

Marbelized Christmas Ornaments

I'm having so much fun DIYing ornaments for my new King of Christmas Noble Fir. You can find the first DIY here


If you've followed me on Instagram  for any length of time then you know I have been on a marbleizing kick for a while. I marbleized some mini pumpkins last year and then marbleized all the pumpkins this year. I tried my hand at some Easter eggs last spring. I've had so many questions on IG about which technique I use so I decided Christmas ornaments would be next so I could show you how I marbleize.


Marbleizing Christmas ornaments is nothing new. I did this the first time a long, long time ago - I think it might have been a Martha Stewart craft years ago but there have been a lot of tutorials and methods around for ages. I'm going to share what works for me - I use spray paint. But you can also google it or check Pinterest and find a lot of methods and ideas to inspire you.

You will need: 

Spray paint. I use Rustoleum 2x (not sponsored but I wish they would send me a can of every color so I could go wild!) We do this outside on a plastic covered table.

Container for water. It will be covered in paint so use an old plastic container. It needs to be wide enough to get your item in with some space around it and deep enough that your item can be submerged without touching the bottom. Your water needs to be "room temp" not cold. Cold water will keep the paint from staying loose and smooth when you dip. Change your water in between colors and I think it helps to let the overspray on your container to dry before you spray a new color.

Plastic gloves and a spray paint mask if you choose.

Skewers to swirl the paint.

Ornaments. I think the marbleizing shows up best on white ornaments. You can use plastic or glass. You can find them at craft stores, Wal Mart, Target.

And you need a place for your ornaments to dry. I'll touch on that later.

Gather everything and get ready to get creative. This is not a precise process and every ornament turns out differently so just relax and experiment until you figure out what works for you.

Here's what you do:

Fill your container with water and choose your paint colors. 

I tend to use one dark color plus white but you can use any combo you want. Experimenting is what makes this fun. You'll want to have plenty of blank ornaments on hand.

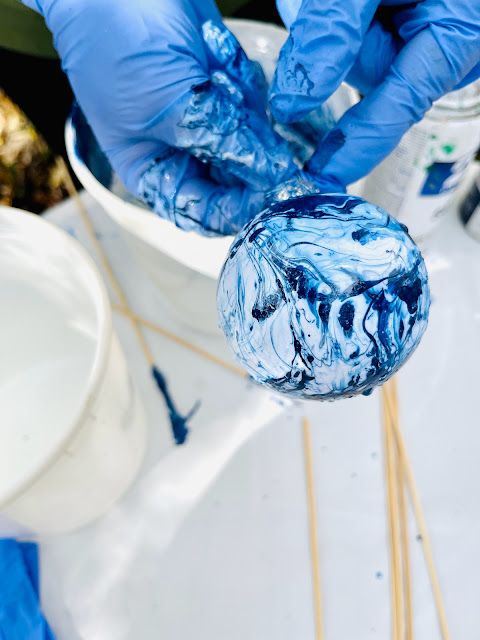
Next you quickly spray your colors onto the surface of the water. I alternate color, white, color when I spray. You may need to spray one of the colors an extra time. You'll get a feel for how much you need and also depending on how much coverage you want on your ornament.

Use the skewer to swirl the paints together lightly so that they look like marble. 


Now you want to dip your ornament slowly into the bucket of water and paint. I like to twirl my ornament slowly as I dip it to get a little more "swirl" and it helps to cover the ornaments surface. You can see a video of these ornaments being dipped here.


You can also place a dowel stick or skewer into the ornament and secure it with painters tape. I planned to paint my ornament caps gold so I didn't mind if they got a little paint on them. If you want to preserve your ornament caps then just remove them and set aside until your ornament is dry and use the tape and stick method.


If you use the method where your ornament is taped to the stick simply turn it upside down and place in a jar so the ornament can fully cure and the water droplets left on it will evaporate. If you use the method with the ornament cap left on you can simply use an ornament hanger to hang it up to dry. You can use a coat hanger to hang a few on but if you are like me and can't get stopped then string up a clothesline by your work table.


Once they have dried they are ready to enjoy. Add a ribbon and hang on the tree, pile in a bowl, use on top of a package, give them as neighbor gifts! Be sure to let me know if you create your own marbleized ornaments this year!
And be sure to check here on the blog and on IG because I have a couple more DIY ornaments to share. My new tree has the perfect shape for lots of ornaments!


Every ornament turns out a little different. This isn't a precise process. Relax and enjoy being creative.


Tuesday, November 1, 2022

My New Christmas Tree!!

I have admired King of Christmas trees for a long time. I even recommended one to my friend Julie last year and she loves hers. I love the open branches of the Noble Fir so when King of Christmas asked me to choose a tree I knew what I wanted without having to look! The box arrived quickly and I couldn't wait to see it. They come with a fabulous remote, gloves to wear while fluffing (and mine was so easy to fluff) and a bag for off season storage - no stuffing it back in a tattered box year after year!

I have several DIY ornaments planned for my tree which is going to be in my library this Christmas. In a blue and white chinoiserie planter! (Mine is thrifted but this one is similar.) So exciting. 

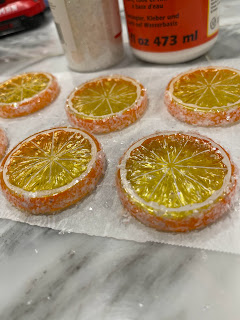
The first "layer" for my tree is the simplest DIY of all. I ordered these faux orange slices. In most instances I like to use "real" items but I'm a little funny about using food in ways that it can't be eaten later (you do you, but I've spent a lot of time with people who are food insecure so I chose faux for this.) Citrus is traditional in Christmas decor and I wanted to add orange slices to my tree. 

I used a very small drill bit to put a hole all the way through my orange slice.

I decided to glitter the sides of my slices for a little extra sparkle because I'm not going for a farmhouse or country look. You can definitely skip this step. I used Mod Podge and coarse crystal glitter that I already had (similar glitter) to "sugar" my orange slices.


After the glittered sides dried I used clear fishing line to create a hanging loop so the orange can easily hang in the open places between the branches. 

The space for ornaments and movement in the silhouette of the Noble Fir is the reason I chose this particular tree. I also went with a 6 foot tree so I could place it in a chinoiserie planter on a stand. 


The faux orange slices are the first layer on my tree. I have several more DIYs planned  (there is a little peek at the next one - any guesses??)s o be sure to follow along here on the blog and on my instagram!