Tuesday, March 31, 2015

Burlap and Bunnies

While the burlap and paints were still hanging around
 I made last week for a friends' Girls Night Out activity,
 I decided I should at least make an effort to put something on the front door that would give us a little Easter decor before it's too late.
 
 
So Burlap and Bunnies it is!
 
 
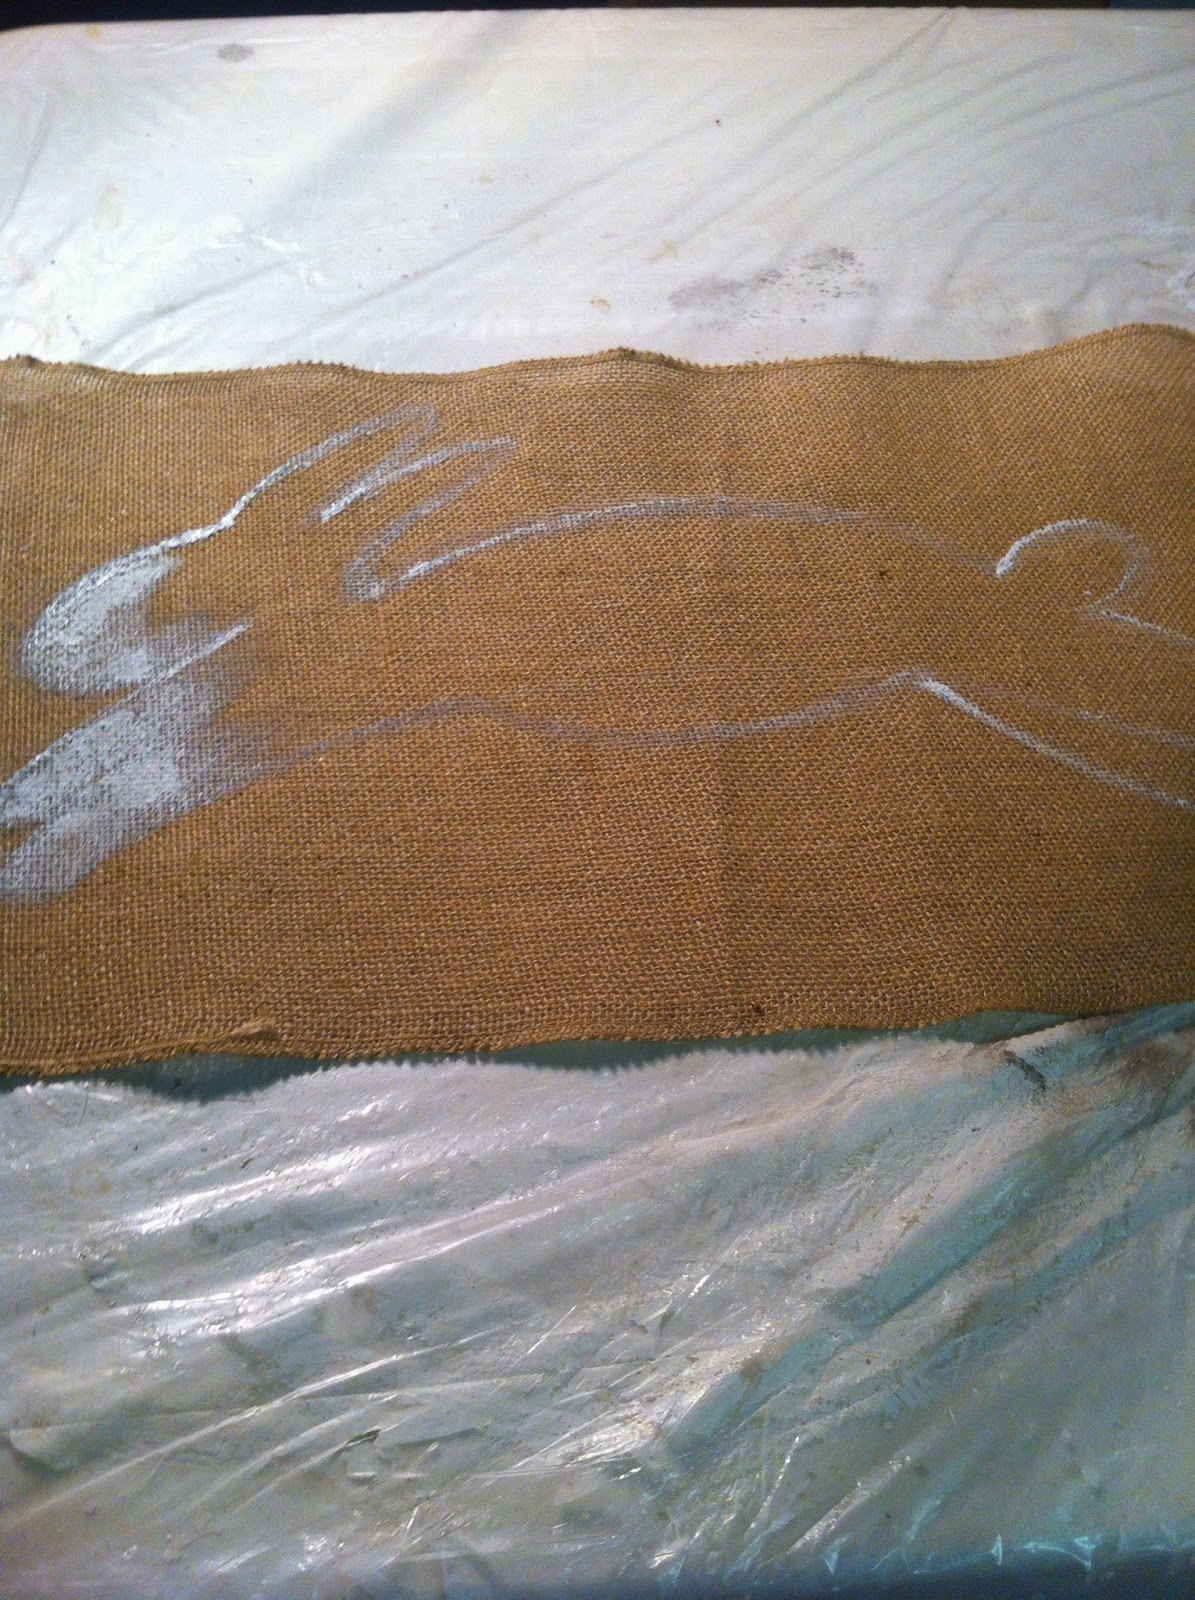
A quick outline on the burlap runner remnant.
 I just use a flat paintbrush about 1/2 inch wide and paint the shape.
 
I filled it in with a larger brush and then while the white was still wet,
 I gave the bunny pale pink insides of his ears and cheeks.
I love to paint leaping bunnies.
 
 
I sketched in some carrots at the bottom
 and started painting grass in multiple shades of green.
All very quick and simple.
 

I painted lots of blades of grass.
Then I used a Spouncer and added yellow polka dots all around the bunny.

 
I gave him a pink nose and a black dot for an eye.
After he dries I will erase the chalk outlines you can see around the carrots.
I'll use a sharpie to draw a few whiskers!
 
And it's on the front door -and it's not the day before!
Time to spare.
 
I didn't have a dowel rod long enough so I used a fairly straight branch from the yard.
 We've been pruning so plenty of branches on hand.
 
 
It was impossible to get a non- shadowy picture on the front door yesterday so I took one of it flat on my kitchen table so you can see the branch.
I just added a hanger from orange gingham ribbon.
 I had it on hand and it looks good against my SW Urbane Bronze front door.

So quick and easy with the hemmed burlap table runner.
Other than drying time this whole project takes less than an hour.
So, hop to it and get one made before Easter!!


Tuesday, March 24, 2015

Burlap Banners - Quick and Easy!


I know these are everywhere and there are tons of tutorials
but after I posted a picture on
I had a bunch of how-to questions and promised a tutorial.
 
 
These are so quick and easy.
 
 
Wow - that's blurry.
I bought a roll of burlap ribbon/table runner from Wal Mart. It was on an end cap.
It is 12 inches wide and has finished edges.
It was $5.97 and will make several.


I cut a length 21 inches long.
 I didn't measure but a friend texted me
and wanted to know the dimensions, so I measured.
I folded it in half and cut it at an angle.
 
 Think about it before you cut and make sure you are angled the right way!!
I mess up at least one bow every Christmas!!
 
I ended up with this 'pennant" shape.
You could leave it straight like I did on this one.


This was a scrap of burlap with frayed edges on all 4 sides.
It was drying here - the tape came off later.


Then I took a piece of chalk and lightly doodled a whimsical letter on the burlap.
Just work with it until you are happy with it.
The chalk lines will wipe right off later.
 
If freehanding and whimsical is a little outside your comfort zone
 then you can print off your letter in any font you like.
 Just enlarge, enlarge, enlarge until it's the right size
 and you can see right through the burlap to trace it with chalk.
Seriously that easy!
 
Tonight a friend hosted a Ladie's Night Out and I was the entertainment - LOL!!
They ate and chatted and created.
It was a relaxing, creative evening for all of them -11 total.
They had a great time!
( Two of them work together at a school and
 I think they are going to have this as a staff meeting!!
 A treat for hard working teachers.)


Then take a flat edged, fairly stiff bristled brush
 and trace the letter lightly in your paint color.
The brush I used was about 3/8 to 1/2 inch.


And then with either method just start painting the letter
 and filling it in until you are happy with it.
 
And then we used spouncers to add polka dots.


I put gold dots on my banner because it is headed for College Girl's front door.
 
 
 And she loves gold polka dots on burlap.
 
Then you can sew a rod pocket at the top and slide a dowel through
or glue a scrap of lattice across the top and then add a twine or ribbon hanger.
 
I didn't get that far tonight but I'll try to put a picture of the finished banner
on FB and IG so be sure to look for it in a day or so.
 
And not everyone painted their initial.
You can do anything you want on a burlap banner.
 
 
 These are so quick and easy (and inexpensive) that you can still make some for Easter gifts!!
 
Linked up at:


Saturday, March 21, 2015

Painted Furniture. And Frames.


This sideboard was an awful color but had great lines.
The requested color was Lusty Red (Sherwin Williams)
We styled it up a couple of different ways in the studio. Just for fun.


This was a very old but cute little piece.
 It was dark and beat up
 so we gave it a "peachy" outlook on life.
 It's actually Sherwin Williams Coral reef.

 
These are grainy iPhone pics. Sorry they aren't better because the colors are great.
 
And I am so sorry that I don't have any before pictures or better after pictures of this turquoise ombre dresser.
A client found it on a trash pile and brought it by for us to "save."
 She thought we could do something to it and it would probably sell in the shop.
She couldn't bear to see it go to the dump.
Sell it did, in less than 3 days!


There were 2 of these.
 They were an orange-y stain color. And pretty rustic.
 A coat of khaki paint and they were headed off to perk up
 a client's daughter's college apartment.
 A great size to fit in a small apartment and great storage as well.
 
 
This dry sink was stained a yellow, early American color.
The customer is going to use it for a coffee bar in her kitchen
now that it has some personality.
The recessed 'sink" area is lined with a nice, heavy duty copper tray
 so it's perfect for a coffee bar!!
 
 
And we painted stacks of those bright brassy gold frames that are everywhere right now!
Some had mirrors in them and the empty ones we fitted with chalkboard panels!
Everyone wanted ornate chalkboards.
Especially for Christmas décor.

 
We painted them grays, creams and khaki colors.
One right after another.
And if I had a few minutes to spare I doodled on the chalkboards!!


It would be fun to paint one of these frames a bright Spring-y color or glossy white
 and put a Summer bucket list on it!!
#anotherproject

I'll let you know if I find one to paint a fun color.

Friday, March 20, 2015

Chick Night

Two weeks ago we had our second ladies night at church.
I realized I never posted about the first one :)
 
 
The theme for the first one was literally chick night
 and somehow that became the name of our ladies night
 even though the theme changes every year.
I say "every" tongue in cheek because I changed church jobs a little over two years ago
 and we have just had our second chick night at my new church.
 
But it has caught on and we are already thinking about the next theme.
 
Chick Night was a super cute, fun and easy theme.
We went with pink and yellow for everything so it was very cheerful and perky.
I made tons of signs with these cute chick faces on them.
Just circles cut from yellow scrapbook papers - solids and patterns.
 Orange triangle beaks and button eyes.
 And I bought one package of real yellow feathers to add a fun touch.
 I hot glued those and pink ribbon bows on the tops of my chicks' heads.
The signs had funny sayings that were plays on the words having to do with the chick theme.
 
"Why did the chicken cross the road? To get to Chick Night!!"
 
"Which came first? The chicken or Chick Night?"
 
You get the idea.
We had fun door prizes. We had Peeps and feather boas for one thing!
 Just silly little 'peep' and chicken themed prizes.


I  used chicken wire and twinkle lights on the serving table.
 I stretched the wire in old frames I had and around some scrap squares of wood I had at home  and had already  painted white.
We draped them with twinkle lights and cute pink and yellow buntings.
 
Easy and used items I had at home because the budget was very, very small.
 

I bought fake daisies at the dollar store and put them in mason jars I had on hand.
 
 
I made the chicks from yellow paper lanterns.
I found them for a dollar and they were already yellow
 but I had already planned to spray paint them
if all I could find at the dollar store was white.
 I've painted them before and it works just fine if you do light coats.
Again, I used a triangle of orange scrapbook paper for the beak and buttons for eyes.
I cut ovals of yellow paper for the wings and added some yellow feathers
with little dabs of hot glue.
I cut a strip of yellow scrapbook paper about 3 inches by twelve and cut it into a fringe.
 I just rolled it up and slipped it in the opening at the top of the paper lantern.
You can secure it with a dab of hot glue if you need to.
I put them in galvanized buckets that I found at the dollar store and the Target Dollar Spot.
We put some raffia around them to look like straw.
 
These lanterns are great for fun, inexpensive décor.
I've used them for this and this.
 
But the table centerpieces were the hit of the evening!
 Remember, we are in the metro Atlanta area,
 but I found a feed store between home and where College Girl is at school
 and bought galvanized chicken feeders for less than $3.00 each!
I had the mason jars at home.
 I washed the heck out of those new feeders and
then went on a quest to find something fun to fill them with.
The custom pink and yellow m and m's were too expensive.
I explored a couple of other possibilities and
then I saw the bags of pre-popped popcorn at the dollar store!
Seriously, I should have thought of that first.
Corn. Chicken feed!! Brilliant.
And it was the right color for our theme too!!
 
 
We put one in the center of each table and the ladies of all ages went crazy over them!!
There wasn't a speck of popcorn left at the end of the night!
 
Every chick there had a great time!
 
We really changed it up for the Chick Night we had a couple of weeks ago-
Breakfast at Tiffany's.
Everything was white and Tiffany blue and pearls.
We challenged the ladies to wear black and white, their pearls or even a tiara.
Some of them channeled their inner Audrey and came dressed to the nines!
Such fun!

Tuesday, March 17, 2015

#green

I love the color green.
 I'm not a cold weather kind of gal so green is important to me.
 Green grass. Green leaves on plants and trees.
Looking out of the windows and seeing green scenery.
I love green moss.
 I even like green veggies and salads.
I don't get to use  green all that often at the design studio where I do some free lance painting.
But green is practically a neutral. It looks good with everything.
A room can look perfect and then you add a green plant and it goes to another level.
I just need green in my life.
 
 
I've talked about this bamboo mirror recently. It is Ryegrass by Sherwin Williams.
It's a new favorite green.
 
 
College Girl chose this fabulous mint-y green ( Sherwin Williams Kiwi )
 for our $5.00 yardsale mirror score.
 It hangs right in her entry way and is fabulous.

 
Looking at turquoise-y blues and greens for a project.
  It's a process :)
 

This was the view from my chair for a while.
Indecision, indecision.
The light in this room really affects blues and greens!
 I usually am more impulsive with color and just grab a brush and go,
 but I painted this room a soft blue gray years ago
(without looking at a swatch in the changing light)
 and it looked baby blue - like nursery baby blue. Oy!
But we have reached a decision and the paint is here
 and waiting for the opportunity to paint the cabinet.
We ended up with a turquoise on the blue side not the green side.


 This is a humongous console. It was black and pretty beat up.
This was a re-do for a huge, newly renovated home in Buckhead.
And the designer chose the fabulous green SW Ryegrass.
I was so excited. I paint a lot of white, gray and black for people so a pop of color is exciting.

It turned out fantastically and I have neither before, after or install pics.
It happens sometimes.

Happy St. Patrick's Day, buy some green paint and remember...


Monday, March 9, 2015

Decorating in Real Life...

...and REAL time!
 
Keeping it real here.
I started painting my powder room, family room and foyer last year in October.
 
Planned on being finished well before Thanksgiving Christmas.
I finally put the ladder away and threw up some Christmas decorations.
Happy New Year and planning to get right back on it.
Valentine's Day has come and gone.
Pinch me! It's almost St. Patty's Day and here we are.
 
 
I painted a yard sale mirror in Sherwin Williams Kumquat a couple of weeks ago.
It's a great color. Just sounds yummy!
 
 
I bought a shade for the amazing pineapple lamp I found at Goodwill a couple of weeks ago.
I really coveted lamps like these on our trips to Hawaii.
And I think finding the right lampshade size is very hard.


Are you starting to see the "real" in these pics?
I hung the mirror and put the lamp on a family antique, a desk I love.
I hung a favorite Haitian metal artwork above the light switches.
 The jar on the desk contains "paper money" leftover from travels to other countries
 and the tray in the middle has coins from everywhere we've been.
 Because the exchange rate in places like Haiti and Honduras is not too good
the only value is in memories.
 
That's all good but...
the reflection in the mirror is a dresser on a pair of handtrucks that made it up one flight of steps and not the next. All in good time.


 And if you can tear your eyes away from the perfect bamboo chair that I found in a very tiny, crowded, maybe a little scary thrift store on Saturday
 you will notice that there isn't a light switch cover on the switches above it.
I took down a brass switch plate when I started painting
 the other day months ago.
I don't want to put brass back up.
I don't know if I should go white to just blend in because, really,
how attractive can you make switches?
 But I just don't know.
This is hard - just like lampshades which I tend to buy in either black or white.
I'll probably just admire the bamboo chair
and worry about the switchplate dilemma another day.
I have wanted a folding bamboo chair for ages...
I passed one up at Ballard's Backroom years ago and
wished I hadn't!!
If you like something for that many years
 then it's a safe bet that it will work someplace in your house.
I'm not sure if the chair will reside in this spot but it's a keeper.
(Especially for the price!! It was the only gem in the place and waaay under $20!!)
 

Thursday, March 5, 2015

Everything I Need to Know...

...is right here in black and white.
And I probably did learn it in Kindergarten!
Do you remember that book??
 
I posted a few glimpses of a our powder room redo last time.
It's still a work in progress- the whole fabric for the window thing
 and great indecision about hanging art ( which is weird for me because I used to hang walls and walls of art in a gallery and I usually just grab a hammer and go for it.
That's how I usually roll.
 Maybe it's maturity.
Or more likely the fact that it took a lot of hours
cooped up in that tiny room to get the walls just so.
No, let's go with maturity.)
 
 
This print has found a home in the powder room for sure and it kinda says it all.
Just be kind. Period.
I bought it in Charleston SC when we were there for our
annual Thanksgiving family get together in the best  place in the world.
 (I am biased but it's pretty awesome and I'm glad I get to say I was born there.
 I'd be even happier if I got to say I lived there!!)
We stay out at IOP and wander around the island and Sully's and College Girl and I do the majority of our Christmas shopping on King Street before Black Friday ever hits!
This was the second print I bought by this artist when I found her at the Farmer's Market in Marion Square on Saturday morning after Thanksgiving.


This is actually the first print I bought
 and I found it at an amazing shop on a little side street.
 The shop is called Candlefish.
 It's on Wentworth and if you visit Charleston be sure to wander all the side streets
because they are filled with fabulous shops and great homes and gardens.
But back to Candlefish. The shop is brilliant.
 I have said for years that someone should sell white candles that are scented in great scents - not just vanilla and white cotton.
 I only use white candles in my house and I don't actually like vanilla candles.
It has been hard to find great scents that aren't funky colors.
Enter Candlefish.
Go to their FB page to see a photo of their amazing candle wall
where you can sniff all of the yummy scents.
 We bought a combo with lavender in it but everything smelled amazing.
 I'm dying to go back and sniff out another favorite.
 
And they had these wonderful block prints by a lady named Stacey Bradley
who prints under the name of PerlaAnne Press on Etsy.
I follow her on Instagram so I can see the latest prints. ( I am IG addicted)
 
I couldn't leave without one.
I love black and white.
I love quotes and typography art.
I love to buy local art on trips.
The best souvenir in my opinion.
Saves you from wearing those t-shirts that say
"I went somewhere and all I got was this t-shirt."
 
Then when I found her three days later at the Charleston Farmer's Market I couldn't resist buying more.
 I bought this print for College Girl.
I have always loved the quote and she loves quote art, too.
It looks great in her apartment and
when I was there the other day we both said we would like another PerlaAnne print.
We're hooked.
I'm thinking about this one
and College Girl likes this one.
And there's a new ship in a bottle, gum pods and one of CG's favorite Marilyn quotes on IG.
You won't be able to choose just one!
Check out these Charleston favorites.*
 
* I do not personally know either of these artists
and have not received any incentive for this post.
I'm just sharing because their products are awesome!