Wednesday, February 24, 2021

Blue and White Chinoiserie Wall Pockets


As a child my grandmother had a ceramic wall pocket that looked like a bird on a branch hanging on her breakfast room wall. She rooted cuttings in it and I was intrigued by it. 

So it is no surprise that when I saw blue and white chinoiserie wall pockets I was hooked. I have collected quite a few. Not all of them are currently hanging but I enjoy the ones that are. 

The wall pocket hanging in my kitchen is the largest one I own. I love having it under the lamp at the kitchen table and changing out the greenery (real or faux) seasonally. 

(See how to make this "faux' pleated shade here.)

I used a small one on my screened in porch when I redid it for an One Room Challenge a couple of years ago. This one is filled with a few, fairly convincing fake succulents.


Mollie has one in her bathroom - filled with eucalyptus for that spa like feel! 


I have one tucked on a little sliver of wall in the Library. It's only noticeable from one side of the room but I love the crisp blue and white against the black walls and I have dried palmetto fans in it, which I love. South Carolina gal here.


I recently hung another one on our screened in porch. 


I definitely think it would be fun to do a grouping of several styles together.
 They also make a nice addition to a gallery wall like the one pictured below.


I haven't run across many images with blue and white chinoiserie wall pockets in use but this charming one from @kendallrabuninteriors  is filled with an orchid and I love it!


Do you have any wall pockets?
I have found all of my wall vases in thrift stores over the years. I haven't seen one "in the wild" in ages but if you want to add one or two to your blue and white collection
there are quite a few available on Etsy and Chairish if you are hunting one! Or maybe you can find them in your thrift stores - every area is different when it comes to what you find!


Tuesday, February 16, 2021

How I Made a (faux) Pleated Lamp Shade


It looks like the real deal! Except it is no-sew and easy to create!

I love the new interest in pleated shades. 
I remember going to the cute little cottage in Buckhead that housed Pierre Deux 
when I was in college and looking longingly at the pleated shades
made with Provencal prints. (That dates me for sure!) 
They were pricey. The pleated shades we are seeing again are a bit pricey for me - as they should be because they are made with beautiful fabrics and are quite labor intensive. 


I googled how to make a pleated lamp shade and it was way too "sew-y" for me but if there is a way to pull something off with scissors and a glue gun then I'm in. I saw a couple of how-to's using bias tape to wrap shades. I investigated how to create bias tape from my own fabric (I'm very remedial when it comes to sewing knowledge but it's all out there for the "googling") and then proceeded to adapt the wrapped shade process. 

Here is what I did:

I had a small dingy shade on a brass lamp in the kitchen. 
I had been wanting to cover it for ages and if I messed this up it needed replacing anyway.


I had a scrap of the fabric that I used to cover my chairs. It takes a bit of fabric to create the bias strips and I wasn't sure I had enough. I can't get it anymore so I couldn't start and then run out. Also we use this lamp to light our kitchen table (no overhead light) and the navy background might affect the amount of light coming through the shade.
I really had no idea if this was going to work and I had this Threshold curtain panel that I bought at GW for $1.99 ages ago. Buying curtain panels at thrift stores is a great way to get large pieces of fabric for very little cost. The color and pattern size would work well in my kitchen


I used a metal ruler, a pencil and fabric scissors.
I purchased this very handy set of bias tape makers from Amazon for about $5.00. 
You could cut strips and iron them without this little tool but it would take a long time. You need a lot of strips. This tool paid for itself in time and ease. And I'm pretty sure I'll be making another shade or two - it was that easy. And fun.


It came without instructions. For real. And I'm a novice on this kind of thing. So I googled it. Very simple and you create uniform, creased bias strips every time. 

I decided which size strip I wanted to create and following the google info on how to cut fabrics on the diagonal for bias strips I cut one as a test. I didn't want to cut all of my strips and them be the wrong size. I used about a 48" square of the curtain fabric cut on the diagonal. I used about half so I could have done a pair of these small shades with that one piece of fabric. 


Once I tested my strip making and liked the width I made a couple strips and started gluing using my simple, nothing fancy glue gun. 
I put a thin line of glue at the top edge of my shade and pressed the strip into it. I used a simple clip to hold it in place to cool.


I pulled the strip straight down. The bias strips have a bit of stretch - and forgiveness - which is why they are key to making this project turn out. Because of the stretch I pulled the strip gently before I glued it at the bottom. I didn't want it to be too tight but I didn't want the strip to sag because of the stretch. Using the clip helped with this step.

Then I cut the strip off at the bottom even with the bottom edge of the shade. I decided to use do this instead of wrapping around the shade for a couple of reasons. First, it would block more light to have a double thickness of fabric on the shade. Second, it would take a lot more fabric to make all of those strips and I thought there would be more waste because of how the strips need to be glued down.


Using this method I barely had any wasted fabric.

(Those were the scraps left at the end of the project!)

Also, if you wrap around the shade you have to work around the metal frame wires. 
My method is simpler.


The rest is easy. You just keep gluing strips moving around the shade. 
I overlapped about half the width of my strip. I thought this looked the most like the "real" sewn pleated shades and it was enough of an overlap that you can't see any of the shade peeking through from the side. Pulling the strip slightly like I mentioned above also helps with this.


Just keep making strips and gluing them around the lampshade. 

Once you get all the way around the lampshade you just glue the final strip to overlap the strip where you began.


You can barely see it but you would want this to be at the back of the shade. This is also the point where you will start and stop the top and bottom trim pieces to finish off the shade. 


To finish off the top and the bottom you want to use a long bias strip so that you don't need to piece it. On a larger lampshade you might have to use 2 pieces so those could be sewn together or glued together. You just want to think about where the seam will be.


I glued the strip to the front side first. I used the inside fold line to help me keep it straight. 
At the end I folded the raw edge under and glued it down.


Then I put glue along the edge of the fabric and rolled it over the top edge 
and clipped it down to dry. 
I just did about 2 inches at a time. 


Just smooth it over the wire frame. This isn't hard you just have to do a small section at a time so that you can be sure you don't have any bumps or puckers. The bias strips are very forgiving.


That's it - your cute (faux) pleated lampshade is ready to use!


At night my shade looks a little darker with the light on
 but it looks so charming glowing at the end of the table.


Be sure to share if you make one too!


Monday, February 15, 2021

Painting Checked Floors


 I was mopping the floors the other day (loooonnnngggg overdue, I might add) and realized it had been 8 months since I painted the black and white checked floor in our downstairs Powder Room. They've held up very well so I posted a "reel" on Instagram and there were some questions about how difficult it was to paint.


It is very easy - just a little time consuming because of the drying time in between each step.
It really doesn't take any special skills and once you do a little measuring and figure out a couple of simple things then it's just a matter of following the steps below.


I'm going to explain what I did, how I went about it and what I used. There are a lot of tutorials and paint information available. This isn't the only way, it's just my way of going about this.

This Powder Room refresh was part of a One Room Challenge which is a great motivator for me. We were in the middle of pandemic lockdown, stuck at home and what was available was in short supply. I might have done a few things differently if circumstances had been different but the floors turned out great using what I had on hand and have held up very well!
If you want to see the blog posts documenting the  ORC process you will find them here:

 To begin with I painted the walls, cabinet, everything and left the floors for the very last.
This is the same process I use to get crisp lines on my wall stripes.
I sanded the floors a little to be sure any shiny finish was removed. Then I painted the floors with oil based primer using a small sponge roller. I had small spaces to get into so the small roller worked well. You can see below that it's pretty splotchy.


I did 2 light coats of primer but I have read that 1 is sufficient. This room
 gets a lot of traffic so I wanted it have a tough finish. The
next step was to basecoat the floors with white paint. I had a gallon of Sherwin Williams DTM in gloss white on hand. It is formulated for metal but this was during total lockdown so I went for it. It is very shiny and I like that! I would have normally used SW Exterior or Deck Floor paint in bright white.
 Then I measured and decided the size of squares I wanted to use and that I wanted to place them on the diagonal. Some people call this a "harlequin" floor but harlequin floors actually use a diamond shape not a square.
With my room size I found that I could do a 16" square and have it work out very evenly. I also determined where I wanted a full 16" square to fall (in front of toilet) so I started with a half square on the far wall. I think it works very well to measure your space and then divide by 12, 14. 16 etc to see how the squares work out the best. Or you can simply use a 12" square and go for it. Some people like to plot it out on graph paper. This is a great thing to do if you are having trouble visualizing. I'm more of a "it's only paint - let's go for it" kind of person! This was not my first painted checked floor so I could visualize what I wanted.

I let the 2 coats of white floor paint dry 24 hours- just to be sure - before I started taping.
 You will need a LOT of blue painters tape!


I taped my long diagonal lines first. I used a metal ruler to measure my spacing, made light pencil marls and then taped just to the outside of the mark. I used a 4' level to double check that my tape lines were not wavy. Then I  measured and taped off the squares. You are taping just outside the mark because these will be the squares you paint black. I put a dot of blue tape in each square that I am NOT painting to be a visual reminder. Anything to help from becoming confused. You can do every other row. 

Here is the BIG tip!! This is the key to crisp, straight edges...
If you look closely at the blue tape above you can see that I have painted along the edge with the white base color. I use a 1/2 inch or less brush and just lightly paint along the inside edge of my squares - the ones that will be black. This paint will seal the edge of the tape and you won't have black seeping under the tape. It requires one more step and drying time but you won't have to try and touch up afterwards!! So worth it. I never ever skip this step!!
 

Then I used a 4" foam roller that I had on hand to fill in the black squares. I used Sherwin Williams ProMar 100 Exterior Paint in Tricorn Black to paint my squares. This is my go-to glossy black paint so I had it on hand but this is what I would have used even if I hadn't been in lockdown.

This picture is the answer to the question, "Why does Cooper always have paint on him??"
#neverfarfrommyside 


Let the final coat of black paint dry completely and then the fun part - pulling the tape and revealing the crisp painted squares. Mollie was going to help but Cooper beat her to it!!


It really is easy and a great way to get a beautiful floor for very low cost too!!
Just measure twice, double check that you've taped off correctly before you paint and then don't skip the step where you paint along the tape edges.
 If you do that you will have a beautiful floor. 
I can't wait to see your painted floors!


Friday, February 5, 2021

Forcing Spring

We are closing in on a year of being confined to our homes. 

I am anxiously waiting on Spring. I know I'm not alone in this and I'm always anxious for Spring to arrive any year!  I'm just extra excited this year!

I have always loved having forced bulbs in my house during the Winter months. Honestly, I never care if my paperwhites or amaryllis are potted up late and bloom in January instead of during the holidays. 

And I always buy hyacinths in the quaint little glass bulb jars when I find them in the stores. 

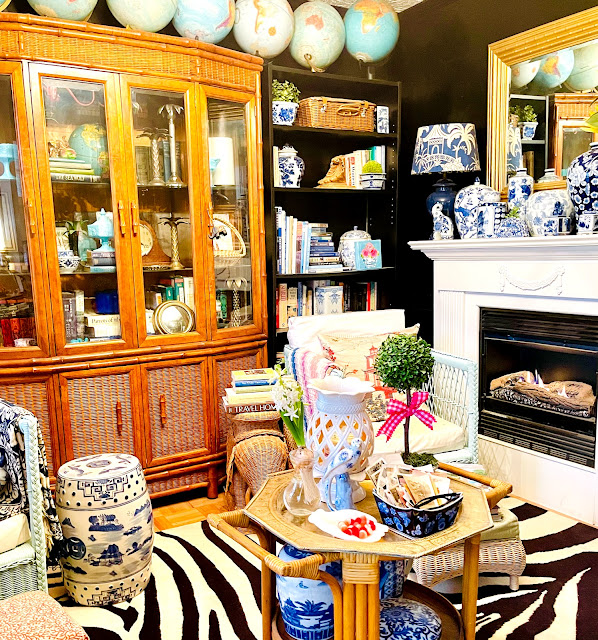
They are my favorite!    This one bloom is making the whole Library smell fabulous.


I love to put them around the house on tables near where we sit to relax, read or watch TV. 
They scent the entire room!


After the bulb blooms inside I plant it in my front yard 
(never in the back yard because bulbs are poisonous to dogs and Cooper would definitely dig them up!)

I ran to Wal Mart today for a few non-plant related necessities and treated myself to a spin through the garden center... and they were rolling out the forced Spring bulbs. Many are a $1 each. I grabbed a few to update my head or bust planters (I never know what to call them but I love them!) from their Christmas look below.


I love that Wal Mart has these forced bulbs each year because we don't always have the best luck with bulbs in the South. Using these inside and out in February also helps me be patient about planting a little longer!


I can't wait to get these potted up. I'll be sure to share on my Instagram account!


Wednesday, February 3, 2021

Faded Beauties...


Every January my local Publix grocery store has about a week and a half 
when the store is filled with 
"Buy One, Get One Free" bouquets of roses. 
Two dozen roses for a little over $10.00!!
I've written about this before.


I posted pictures of the fresh, beautiful roses on my Instagram account.
They had every color of rose imaginable.
I put them everywhere.


Eventually they begin to fade. 
I keep them for as long as I possibly can. 
I refresh the water and trim the stems to prolong the beauty.
 Roses are worth it. 


And then the roses begin to dry and the petals become papery. 
I leave them in the vase on the counter until there isn't any moisture left in the bloom. 
There are a lot of different ways to dry roses but this works for me. 
Not every bloom dries perfectly but I usually have over half of them dry beautifully.


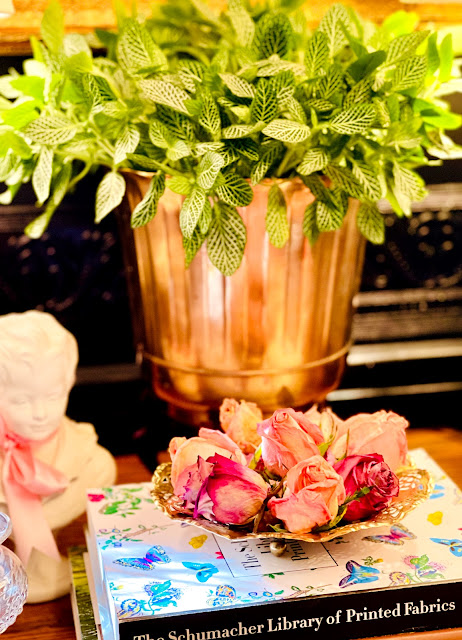
I snip them from the stem and arrange them in a bowl 
or on a little blue and white chinoiserie plate. 
They don't have much scent but you can take a cotton ball and put a few drops of essential oil on a cotton ball and tuck it under the blooms.


They don't last forever - when they get too fragile or the color fades you can just toss them 
and treat yourself to another bouquet of roses and dry those!